
Conversion projects help authors turn existing exam, question, and booklet files into reusable digital content. This module explains how to create a conversion project, add source files, choose whether to create questions or a full test, add metadata, review completed results, and send validated outputs back into the library workflow.
1. Create a conversion project
-
Open the dashboard.
-
Select the From exam files card or Create questions and tests > From exam files in the left sidebar.
-
Click Start Conversion in the top-left corner to create a project. You can also view recent conversion projects from this view.
2. Name and tag the project
-
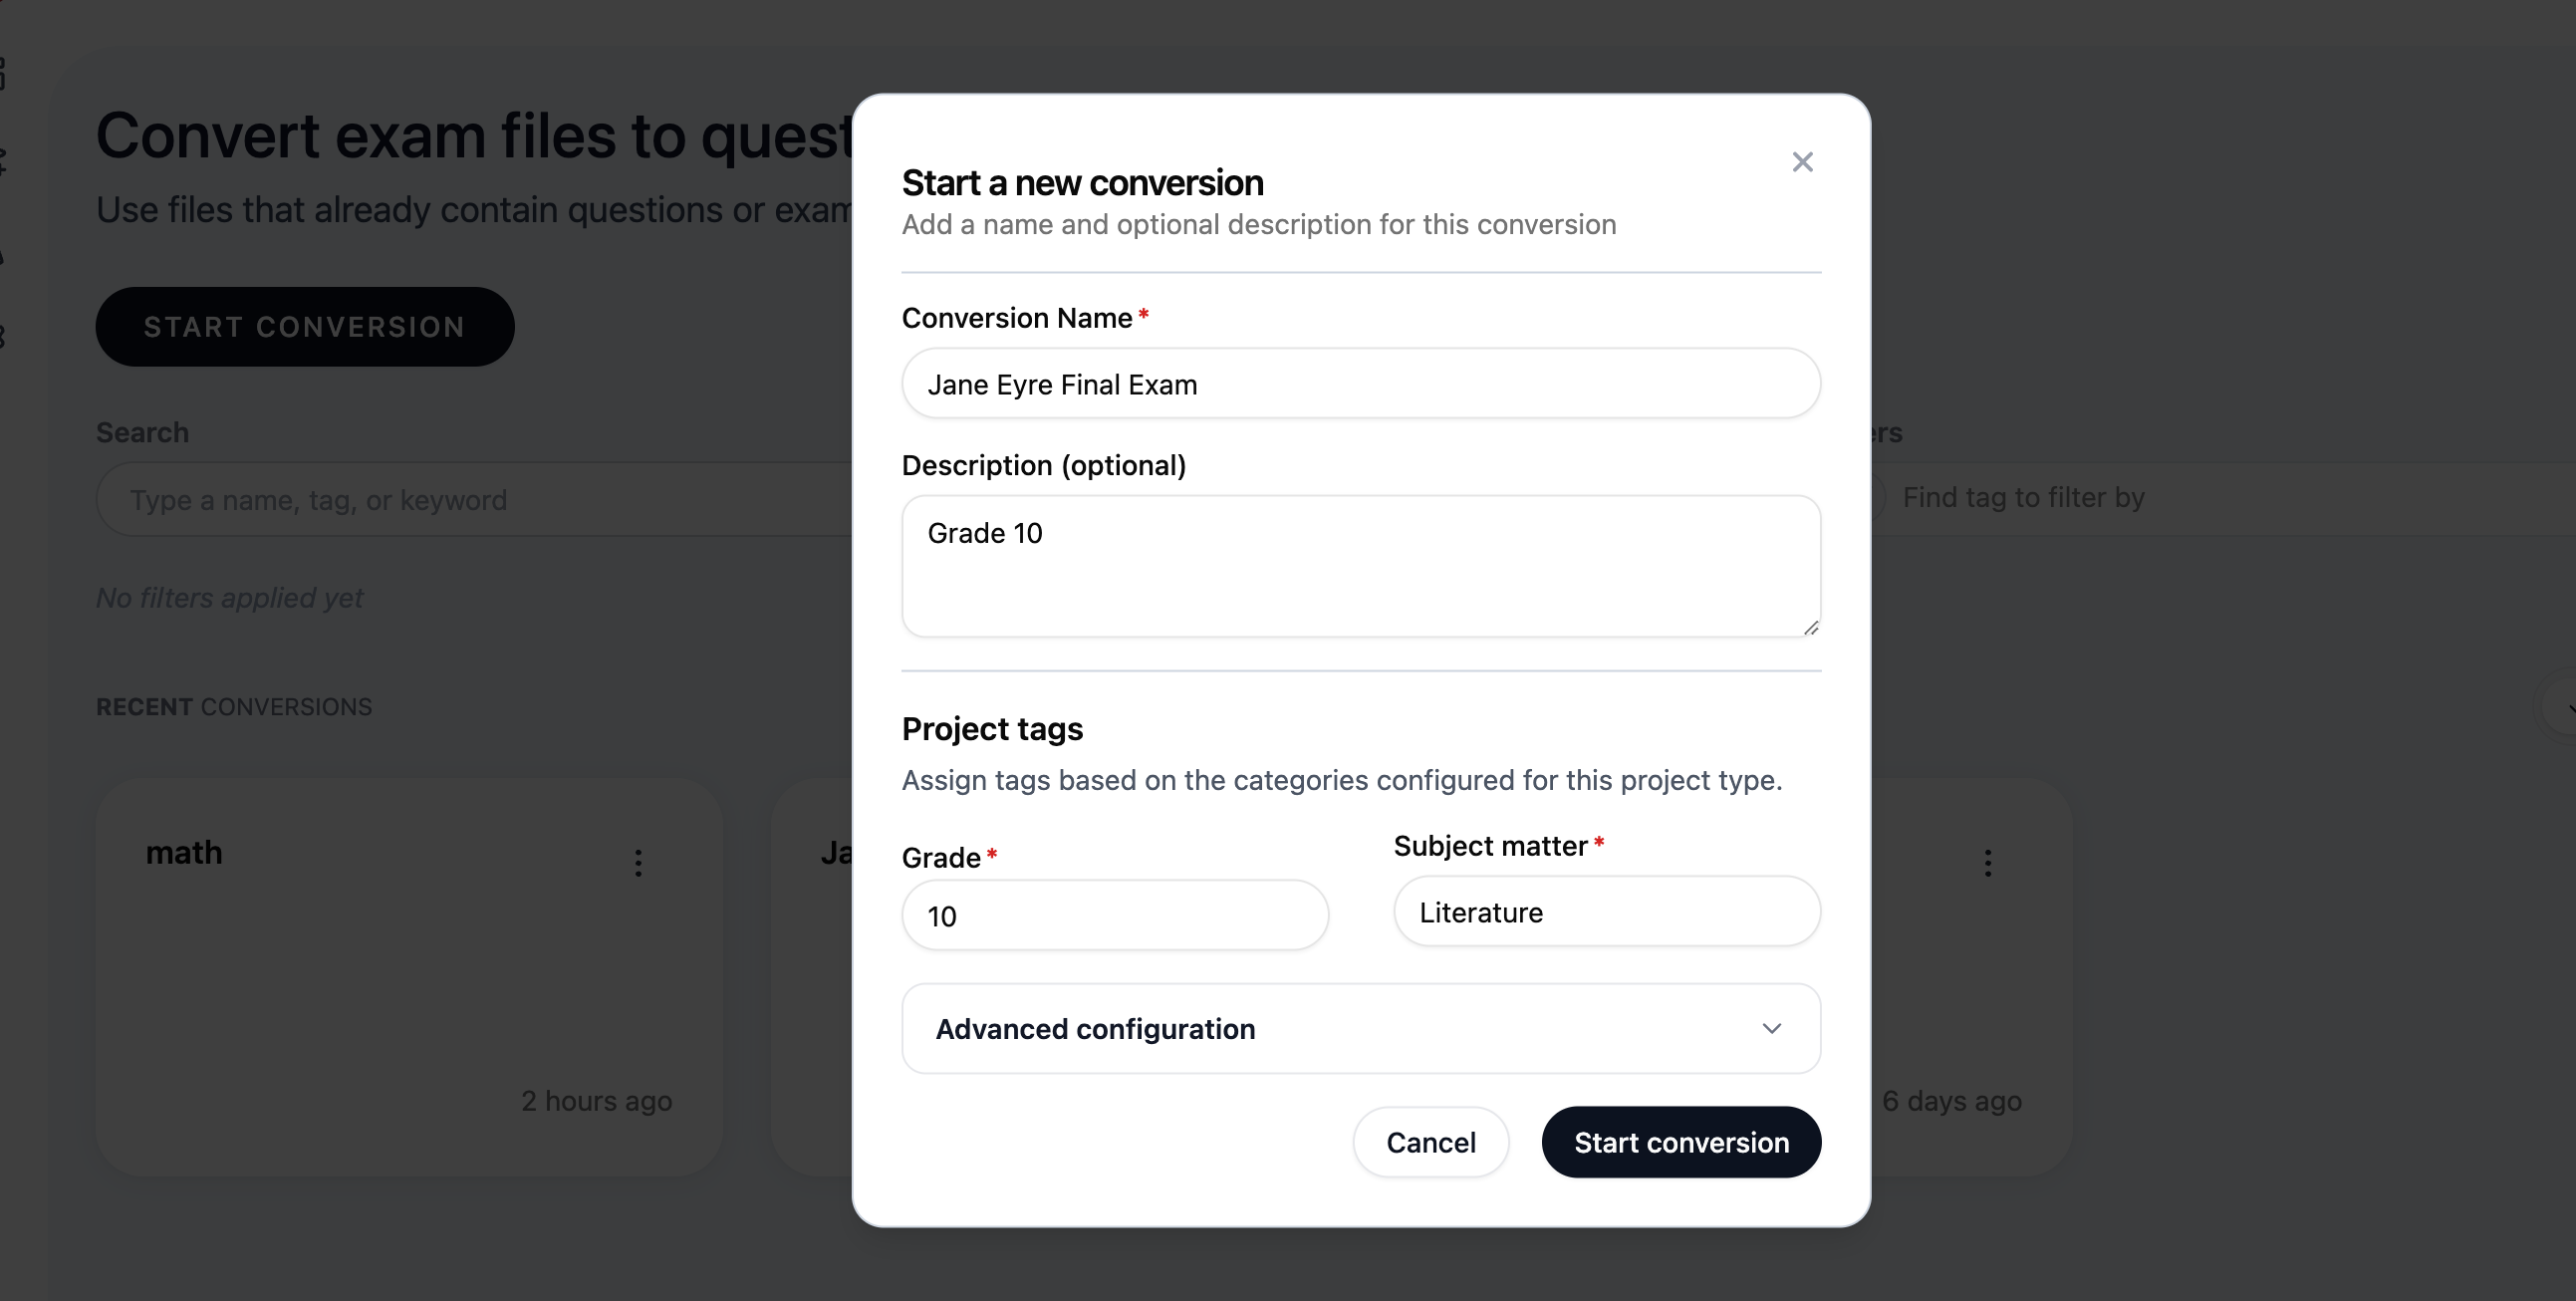
Add a name for the project (such as Biology Final Exam 2024) and optionally a description.
Tip: Use names that include the subject, exam type, and year. Clear project names make repeated conversions and results easier to find.
-
For users or organizations that have set up categories as a way of tagging documents and output files, enter the correct values for each mandatory category (at minimum).
-
Optional: Under the Advanced configuration dropdown, set which metadata categories apply to the project’s output files:
-
Select Manage Categories for either Test or Question, or both (depending on the desired output of the project).
-
The list displays which Categories are already assigned to that output type. Select a category to make it mandatory.
-
Click Delete to remove the category from the list (does not delete the category from the system).
-
Add an existing category from Studio Settings, or create a new category (this will be added to the list in Studio Settings and will be available for other projects).
-
The system will default to using whichever categories are assigned by Studio Settings. Click Reset to return to the defaults.
-
Click Apply.
-
-
Click Start Conversion at the bottom of the dialog. You will be redirected to the project setup page.
3. Conversion setup
Steps in the setup process are designated by light blue boxes.
-
In Step 1, click Upload files to add source files material. You will need to enter mandatory category values for the source file(s), or allow AI to fill in the values.
These source files should contain questions, not an overview of the course or subject matter. Typical source files include:
-
PDF/DOCX tests or compilation of exam questions
-
QTI item packages
More than one source file may be used for a project.
-
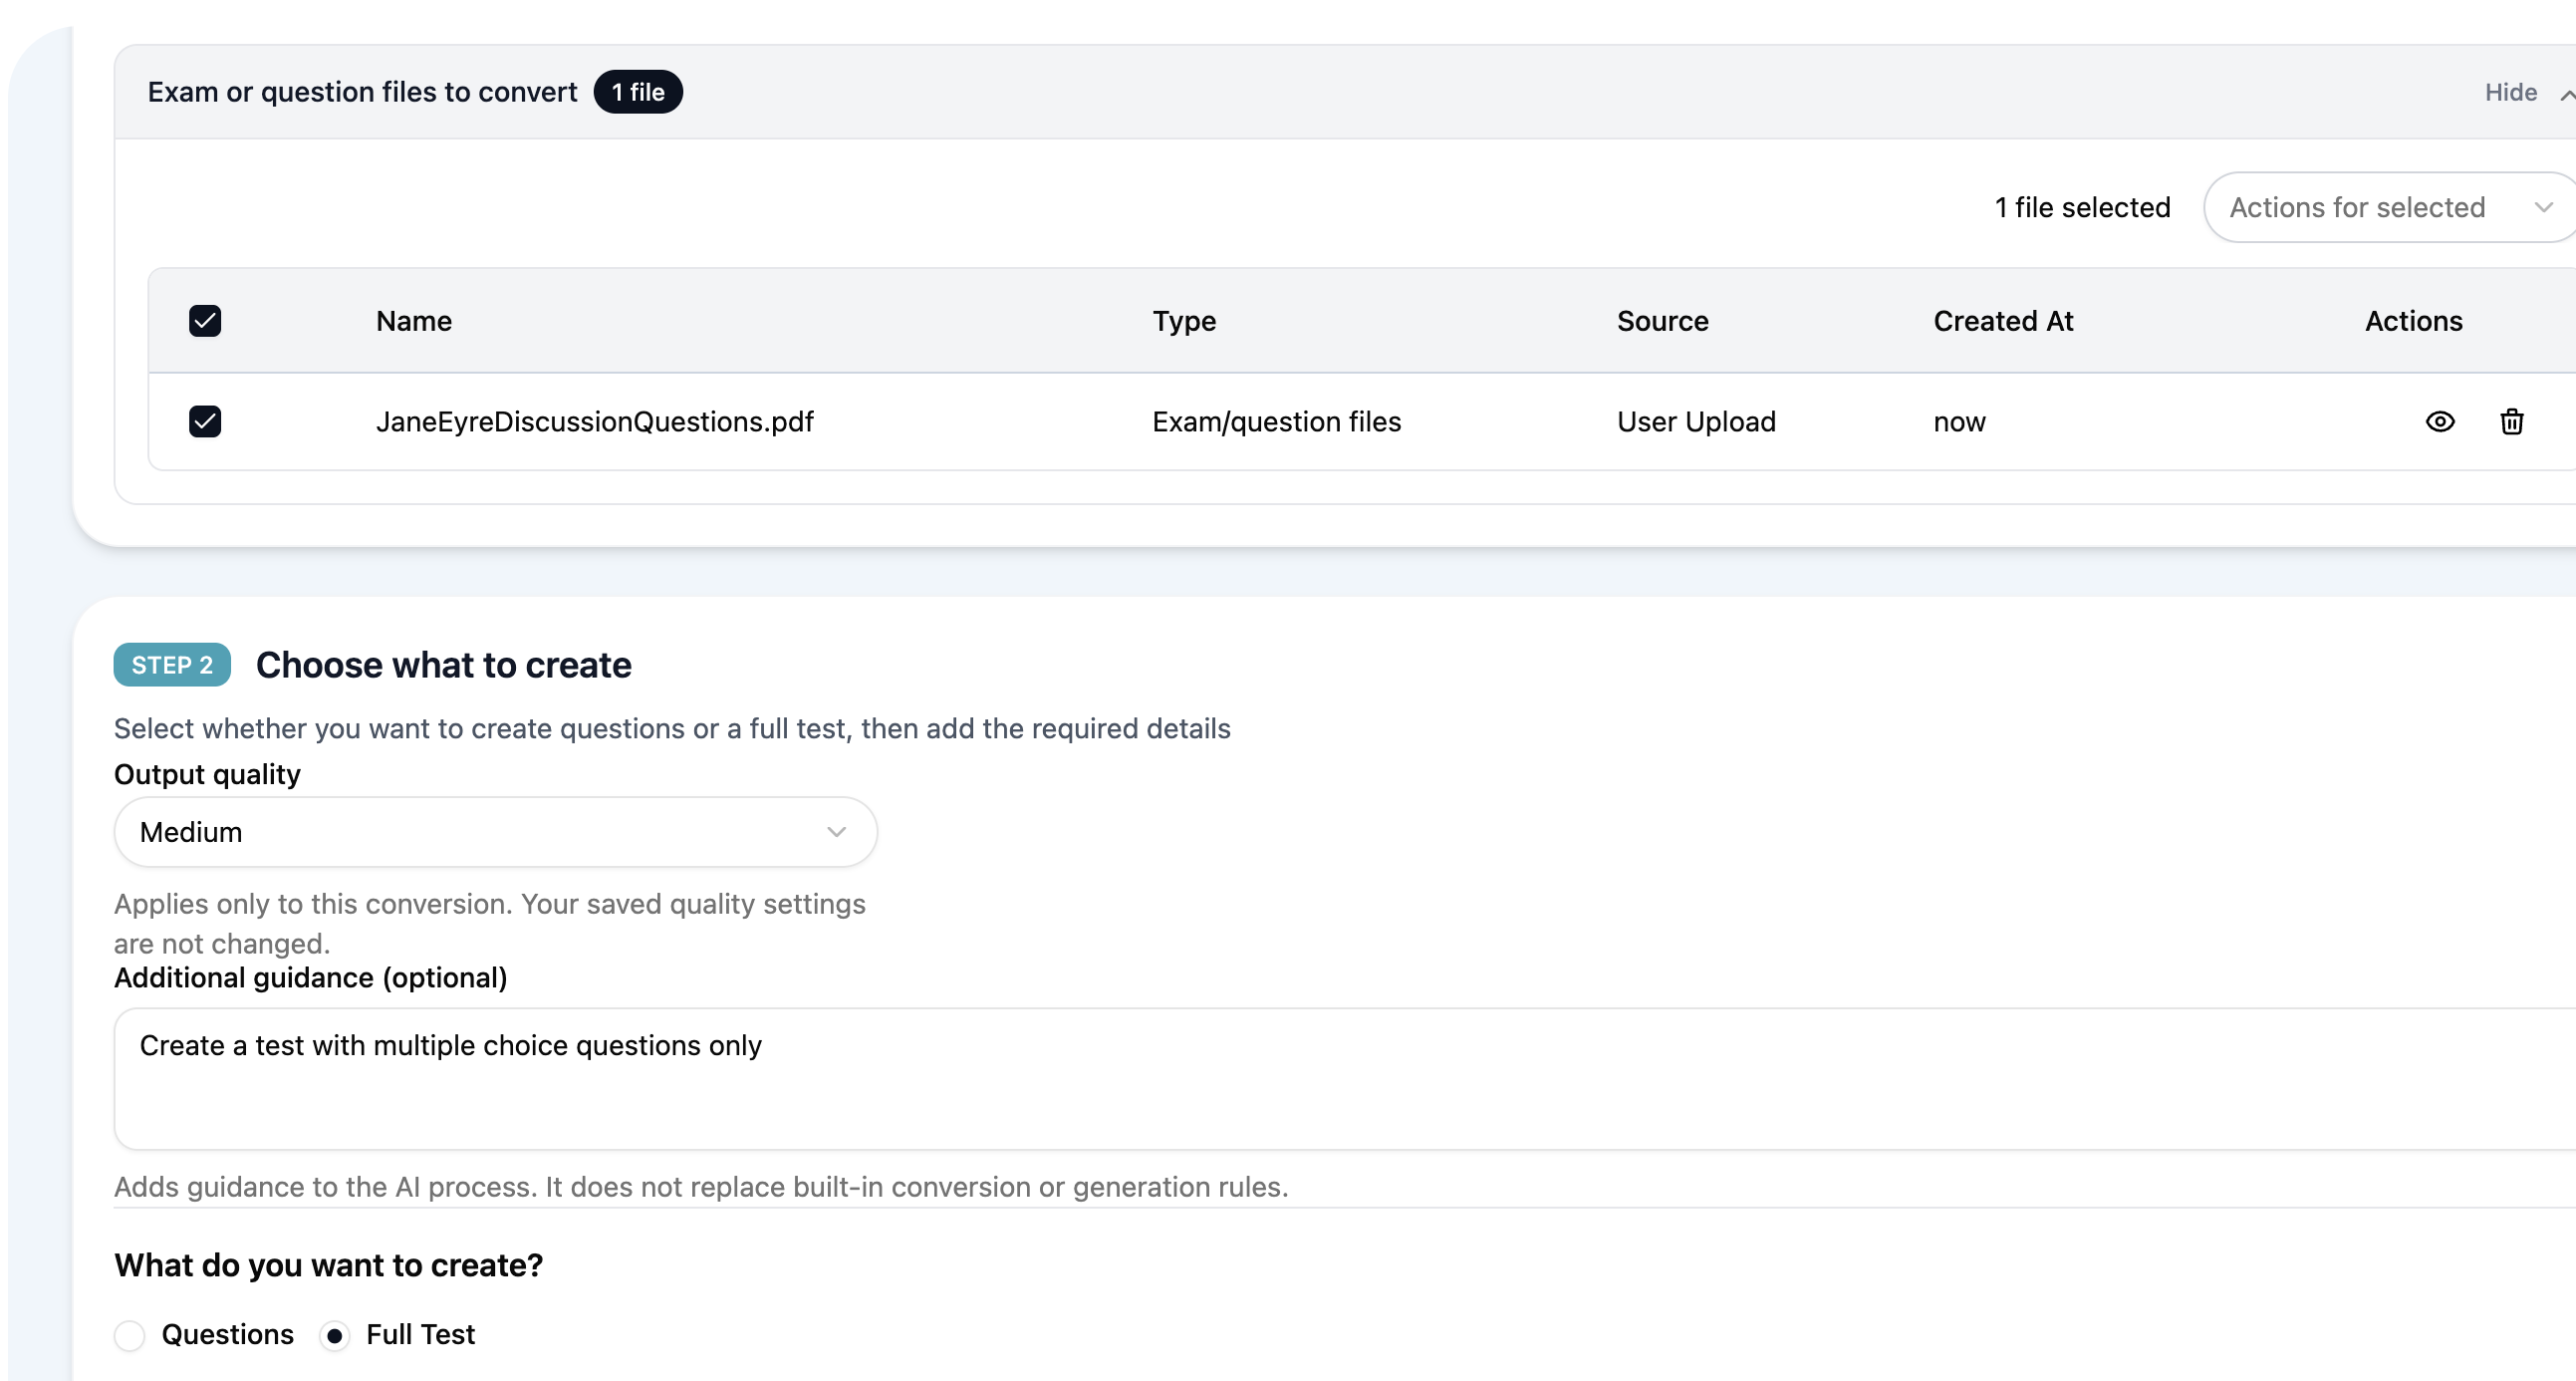
Once the source file(s) are uploaded, ensure the documents you wish to use are selected them from the files list. Then, proceed to Step 2.
4. Choose what to create
-
Select the quality of the output, if it differs from the default setting. The change applies only to this conversion.
-
Optional: Add any notes on what to create, such as question types. The text adds guidance; it does not replace the built-in conversion rules.
-
Select whether you want to create questions (items) or a full test:
-
Questions: create separate reusable question items.
-
Full Test: create one assembled test output when the source should remain a cohesive assessment.
-
-
Add required metadata in Add details. Metadata comes from the taxonomy configured for the output document type (either in Studio Settings, or from the Advanced configuration in project setup), so the fields can change depending on whether you create questions or a test.
Use AI-assisted tagging only when you want TAO Studio to suggest metadata during processing. Review those tags later before relying on them for library filtering.
-
Click Convert.
5. Viewing conversion results
You can view your progress by clicking the bell icon in the top-right corner.
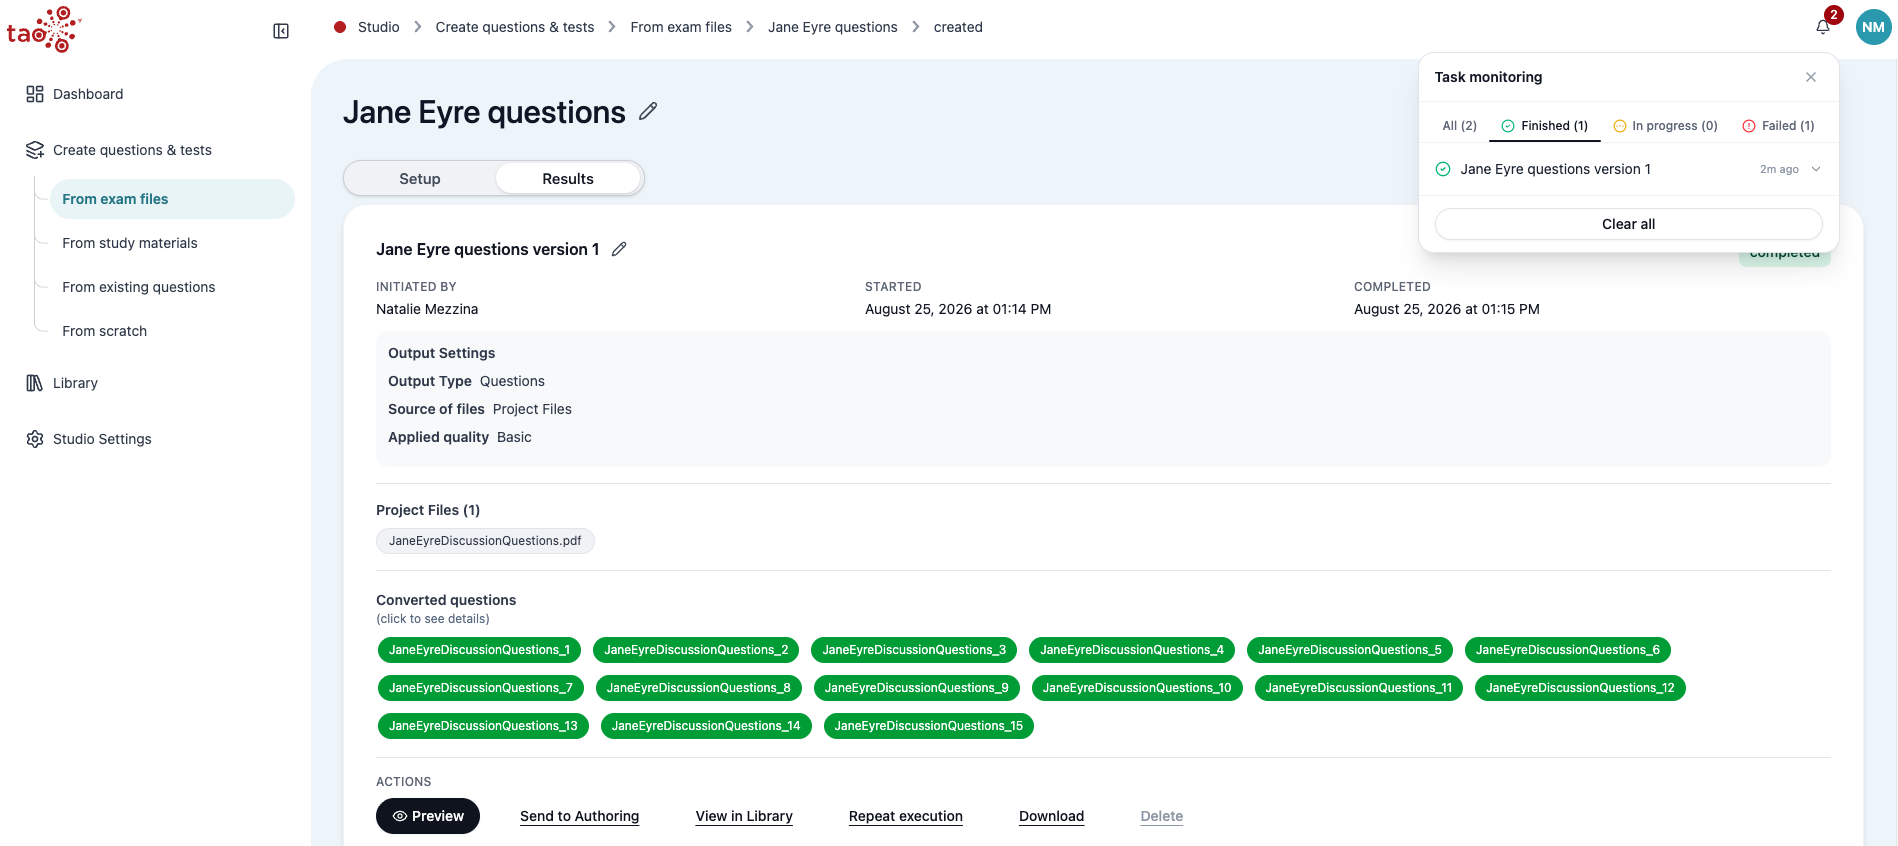
Once the conversion is complete, you will be redirected to the Results tab. The conversion results will display as one or more color coded tiles under Converted questions/test.
Content that has passed the TAO Studio validation will be colored green. Yellow designates that the content may be usable but does not completely meet the standards.
Failed conversions are typically a result of source files that could not sufficiently be reproduced into items or a test (for example, an overview of a course).
Result actions
Under the conversion results, you will see a menu of the available actions:
-
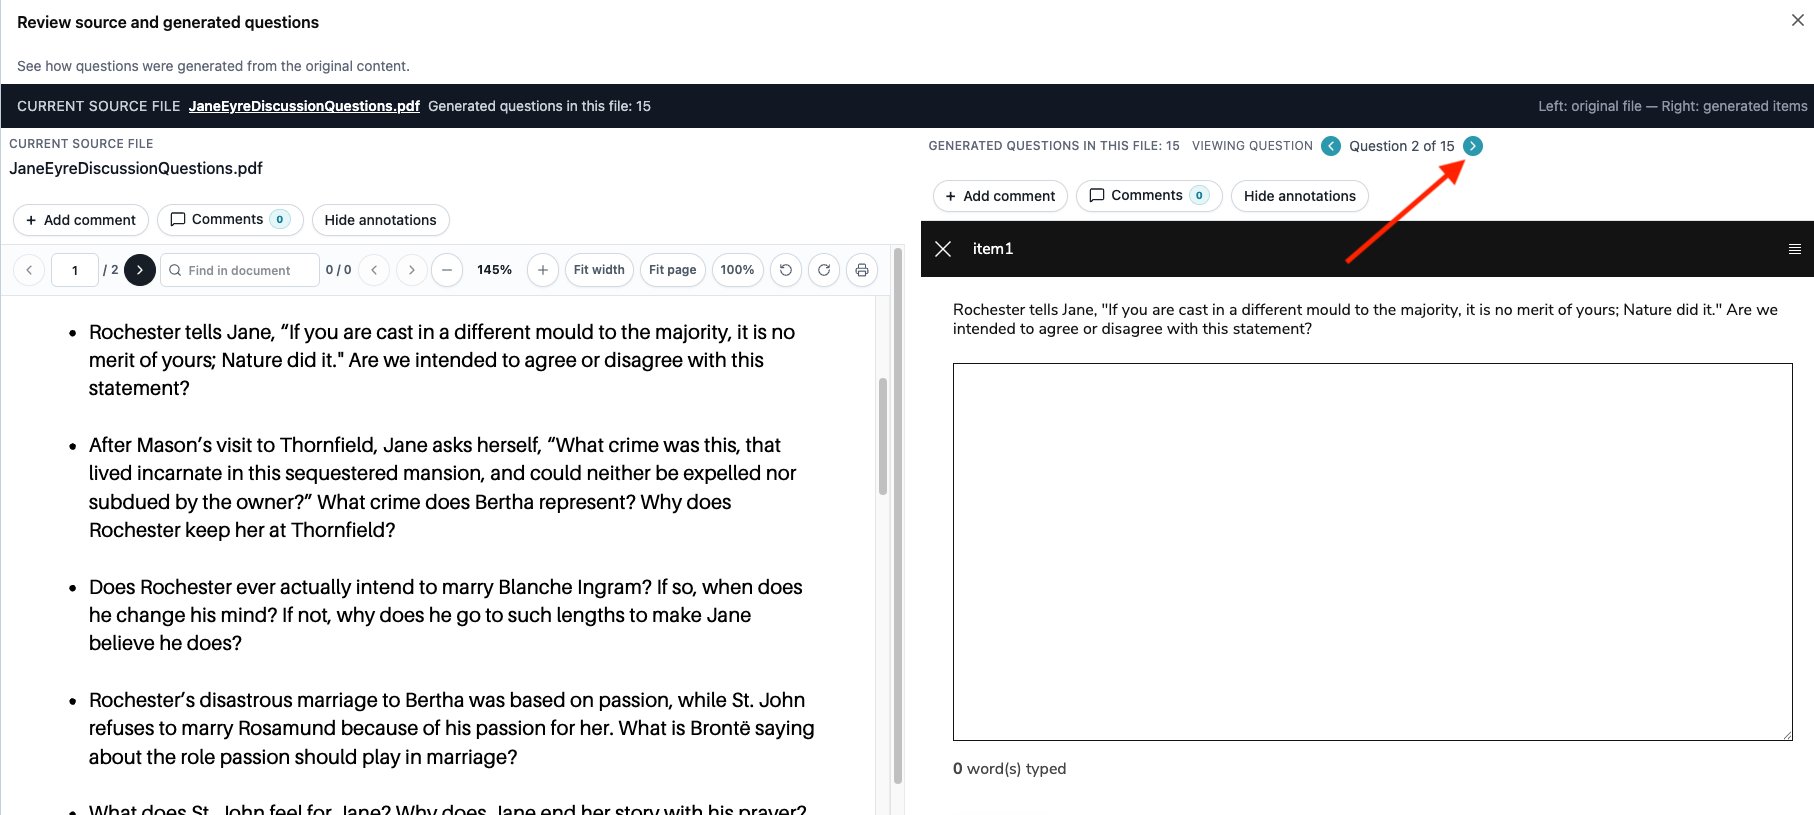
Select Preview to review generated content. This will open a split view dialog, with the source material on the left and generated questions or test on the left. Use the blue arrows to navigate through questions.
-
View in library: If you select this option, the library filter will be automatically set to the current project. Open an output file and check Relationships > Origin Document to confirm it still points at the conversion source.
If you select View in library, the filter is for the specific execution of the project. If you repeat execution, it will generate different questions/tests. If you view a separate execution in the library, you will only see that execution’s results.
-
Repeat execution: run conversion again with the same setup. When the output name matches, TAO Studio updates the existing library file (a new revision on the same item) instead of creating a duplicate row. Outputs with the same display name from a different source stay separate.
-
Download the questions or tests to your computer
-
Delete removes all results