
Related articles
Best practices for organizing the Content Bank (authoring)
Applies to
Roles
-
Content developers
-
Administrators
Purpose
Creating a high-quality assessment involves more than simply authoring items. A typical workflow includes organizing content, developing and reviewing items, assembling tests, previewing the assessment, and validating the final learner experience before delivery.
This playbook provides an overview of the complete authoring workflow and highlights the key decisions and activities that occur at each stage.
Recommended workflow
The typical authoring workflow follows these phases:
-
Organize the content library.
-
Author assessment items.
-
Collaborate and review content.
-
Preview completed items.
-
Organize completed content.
-
Assemble the test.
-
Preview the complete test.
-
Validate the learner experience.
Typical test creation and validation workflow
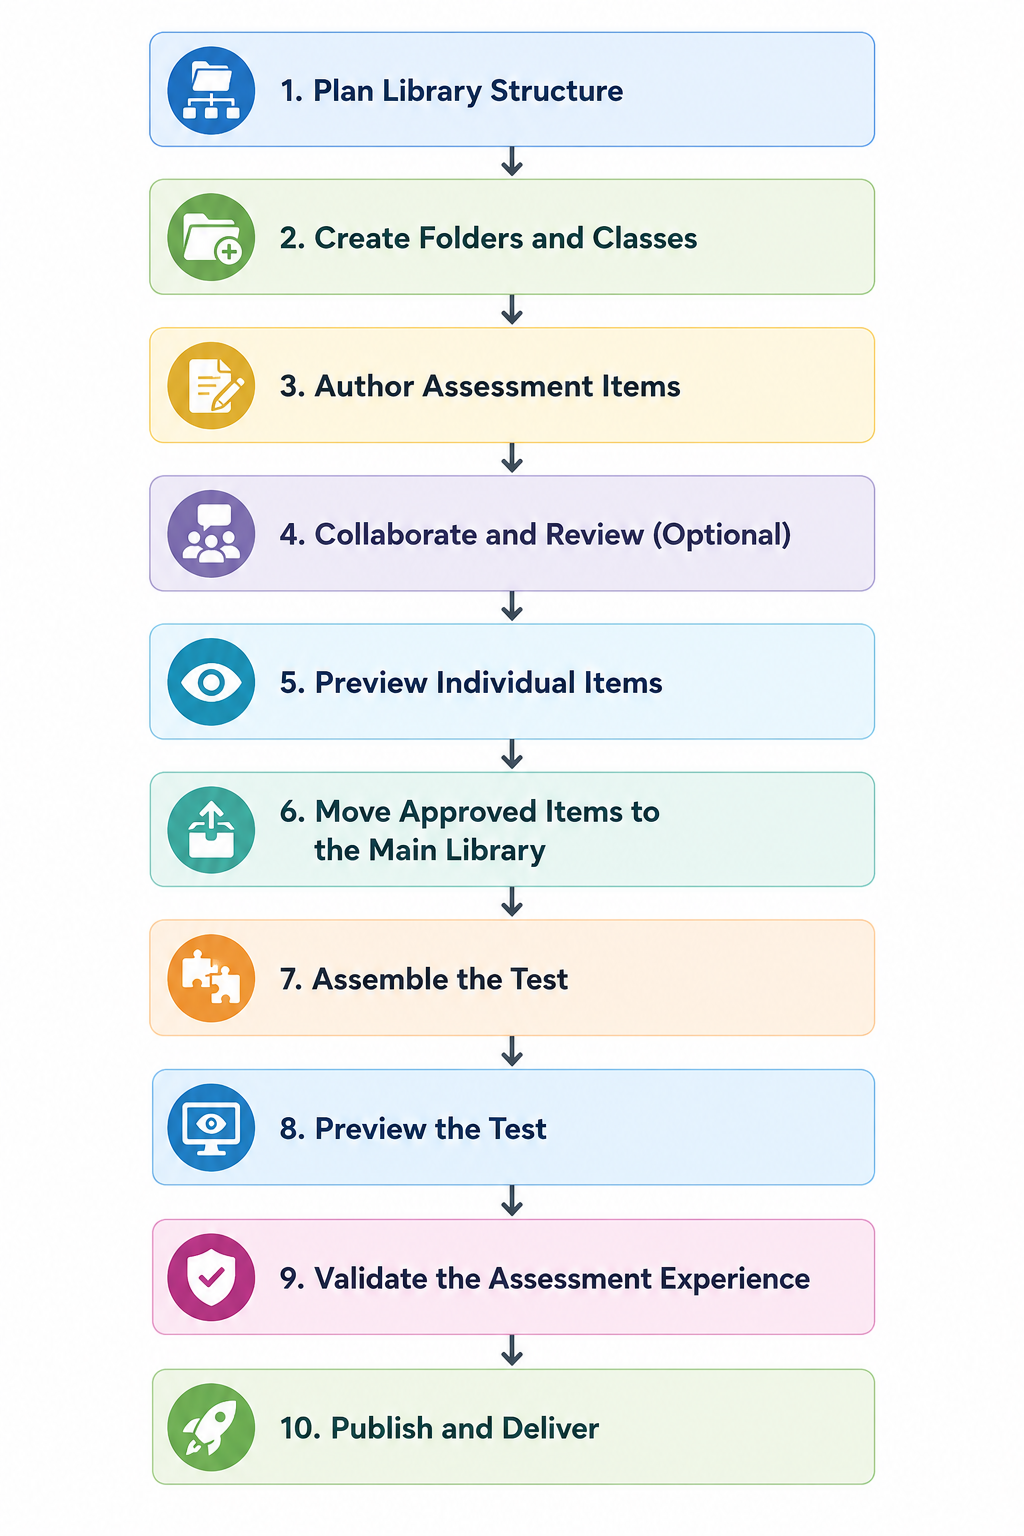
Workflow
1. Organize the content library
A well-organized content library makes authoring, searching, and test assembly much easier. Planning this structure early helps reduce duplication and simplifies collaboration as the item bank grows.
1a. Plan structure
Before creating items, establish a folder structure that reflects how your organization manages assessment content.
Common approaches include organizing content by:
-
Subject
-
Grade level
-
Project
-
Language
-
Individual author workspaces
Many organizations also provide authors with personal "scratch" folders where items can be developed before they are ready for wider use.
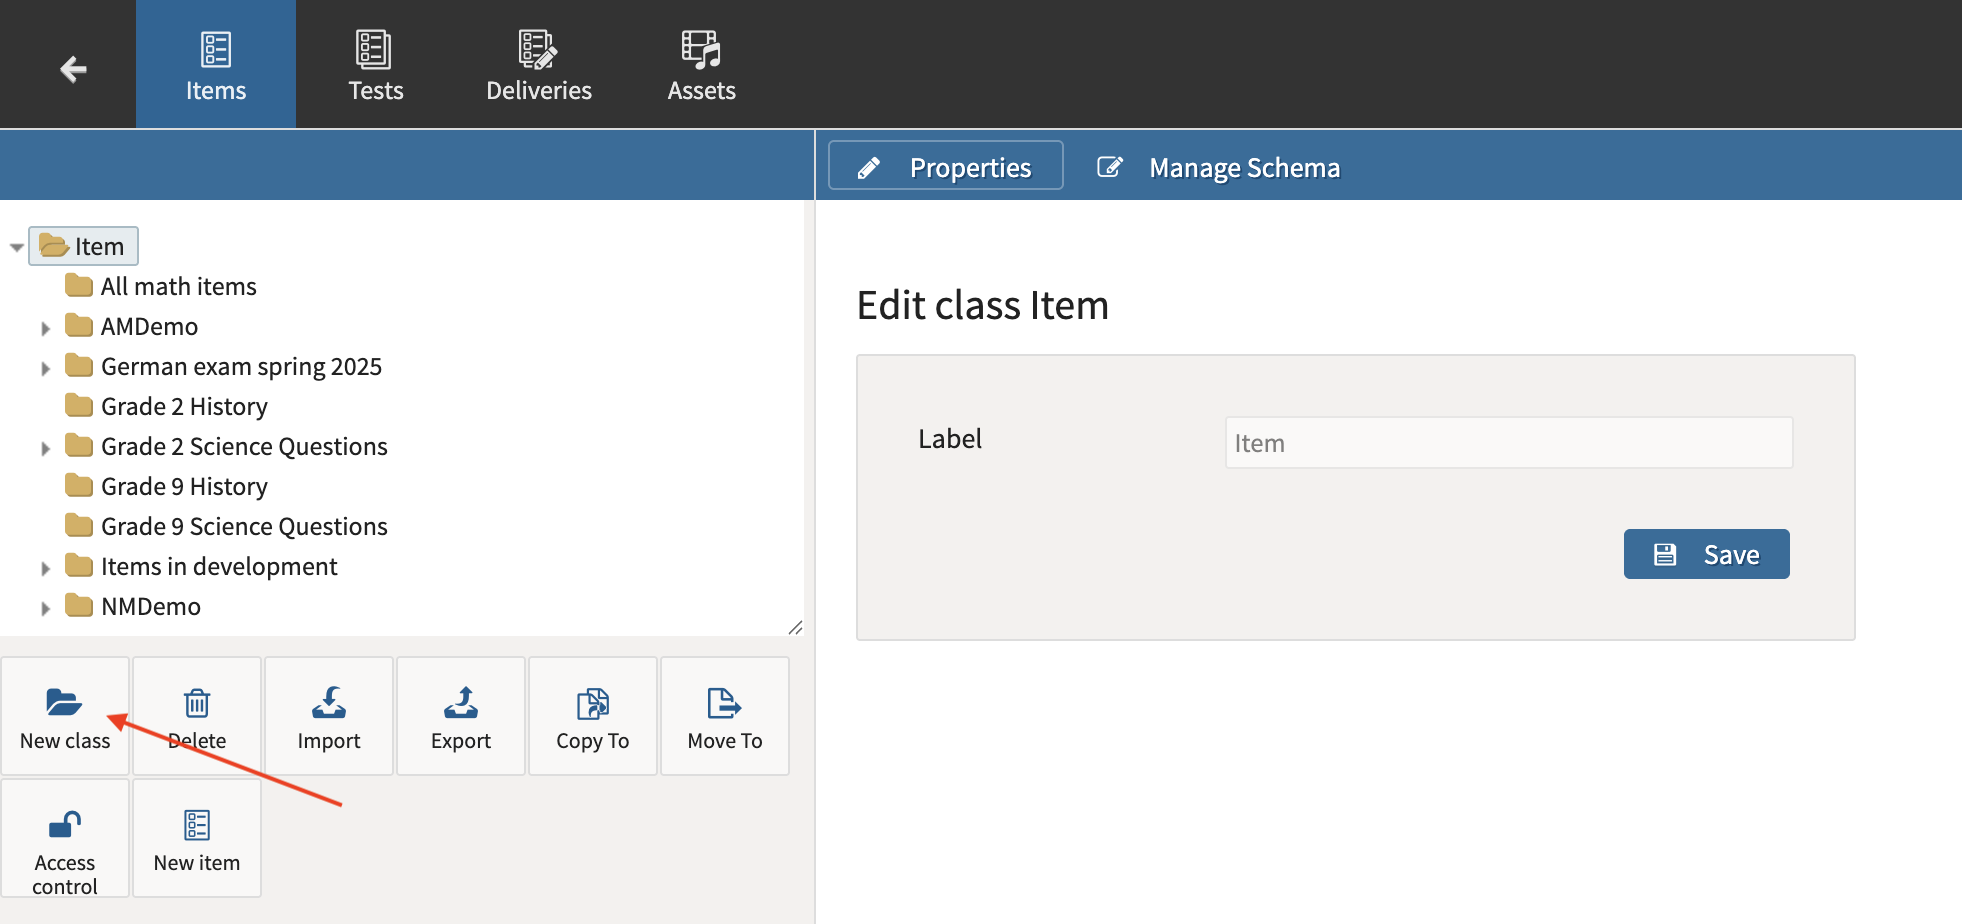
1b. Create classes (folders)
Organizational folders are called Classes in TAO Authoring.
-
Select a parent folder (such as Item in the Items library).
-
Select New class.
-
Add a label that is meaningful to what the class represents.
2. Create assessment items
Item development forms the foundation of every assessment.
Authors typically create items within their own workspace before those items become part of the shared content library.
-
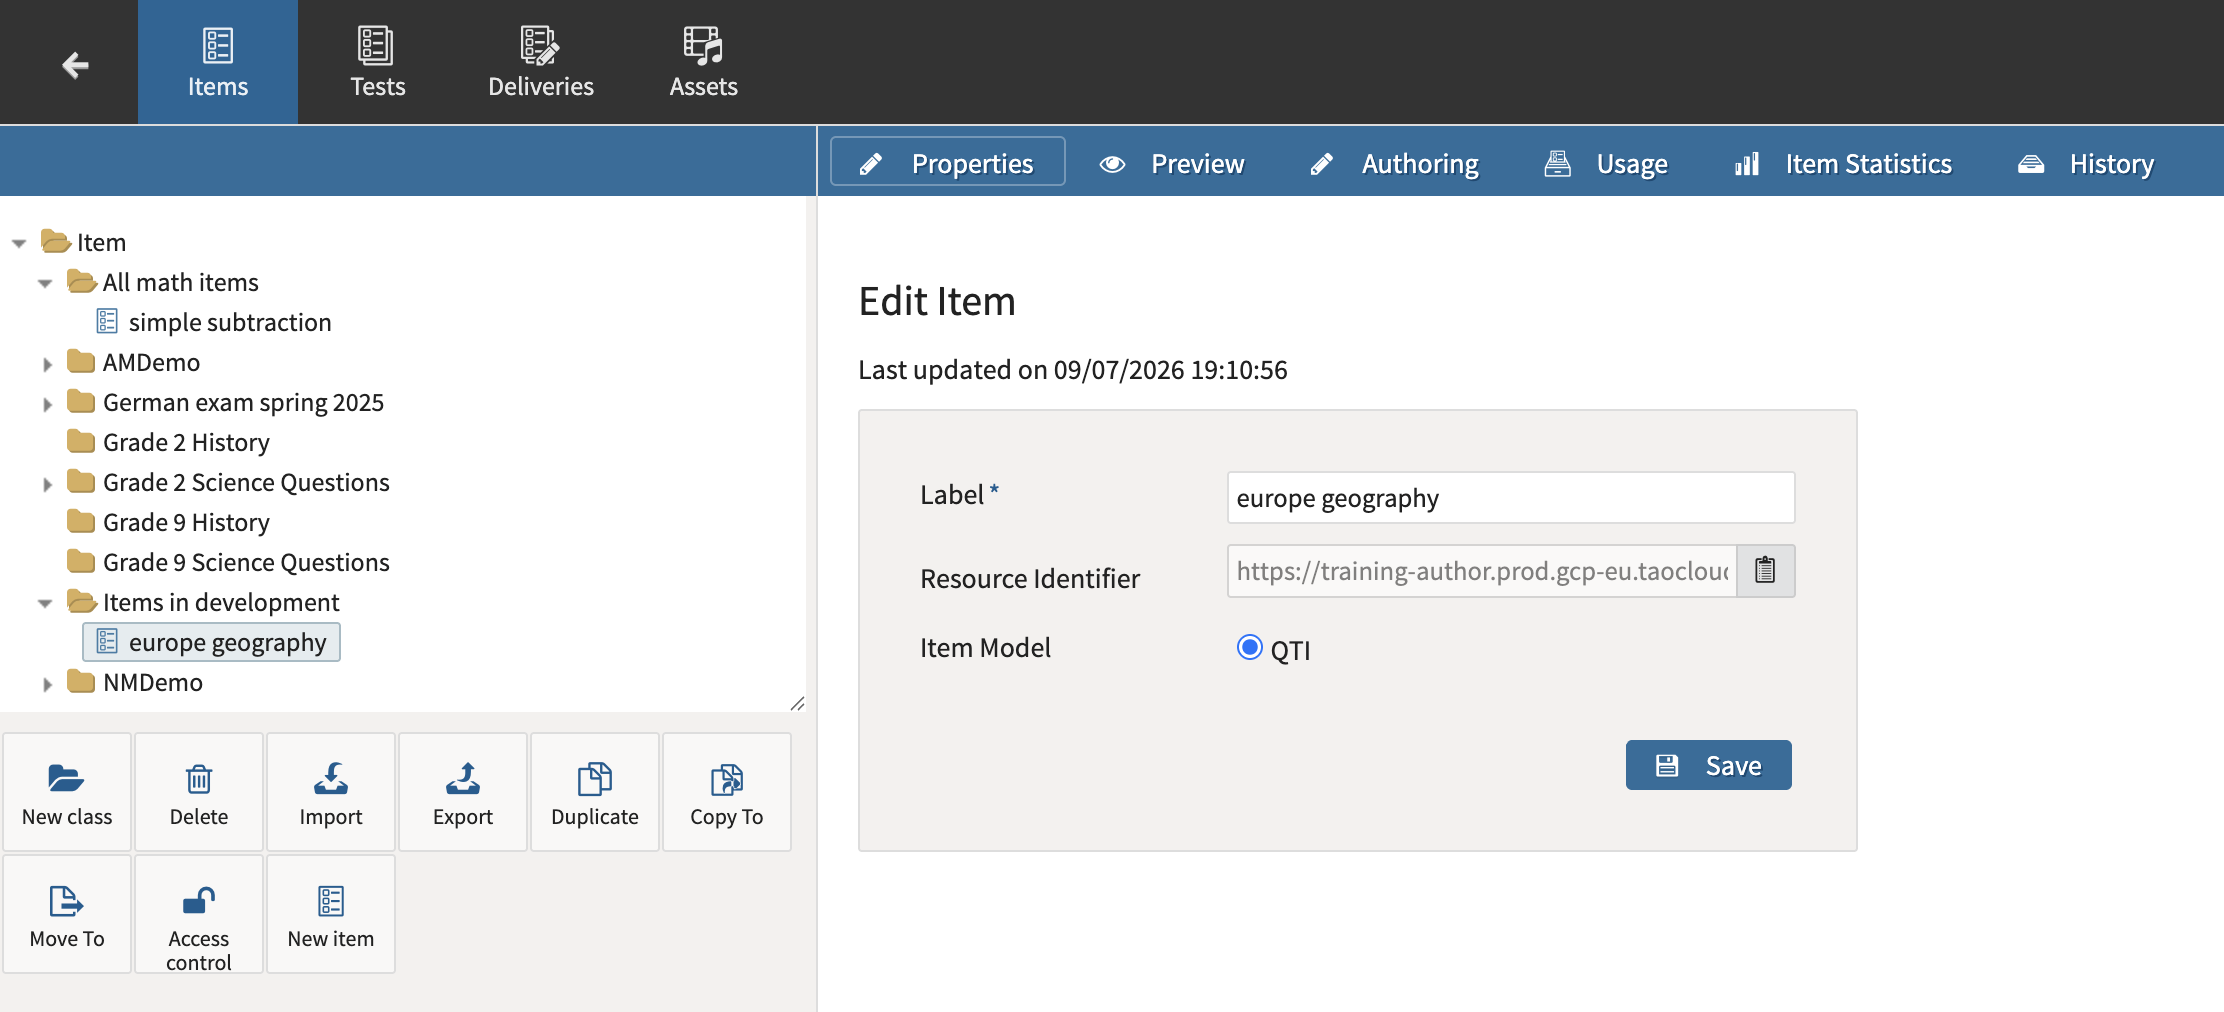
Select a class folder.
-
Select New item.
-
Select Authoring.
During authoring, creators may:
-
Add interactions.
-
Configure scoring.
-
Add passages or supporting materials.
-
Configure accessibility or response settings.
-
Apply metadata.
-
Preview individual interactions as they are developed.
Each item should be developed until it is complete and ready for review before it is considered for inclusion in a test.
2a. (optional) Collaborate on item development
Some items require contributions from multiple authors.
For example:
-
One author writes the question.
-
Another creates graphics.
-
A subject matter expert reviews the content.
-
An editor revises the wording.
Where collaborative authoring is required, Item History can be used to maintain multiple versions of the same item.
Each saved version records:
-
The author
-
The date and time
-
A commit message describing the changes
This allows contributors to work sequentially while maintaining a complete revision history and, if necessary, reverting to an earlier version.
4. Preview individual items
Once an item is complete, preview it from the authoring interface.
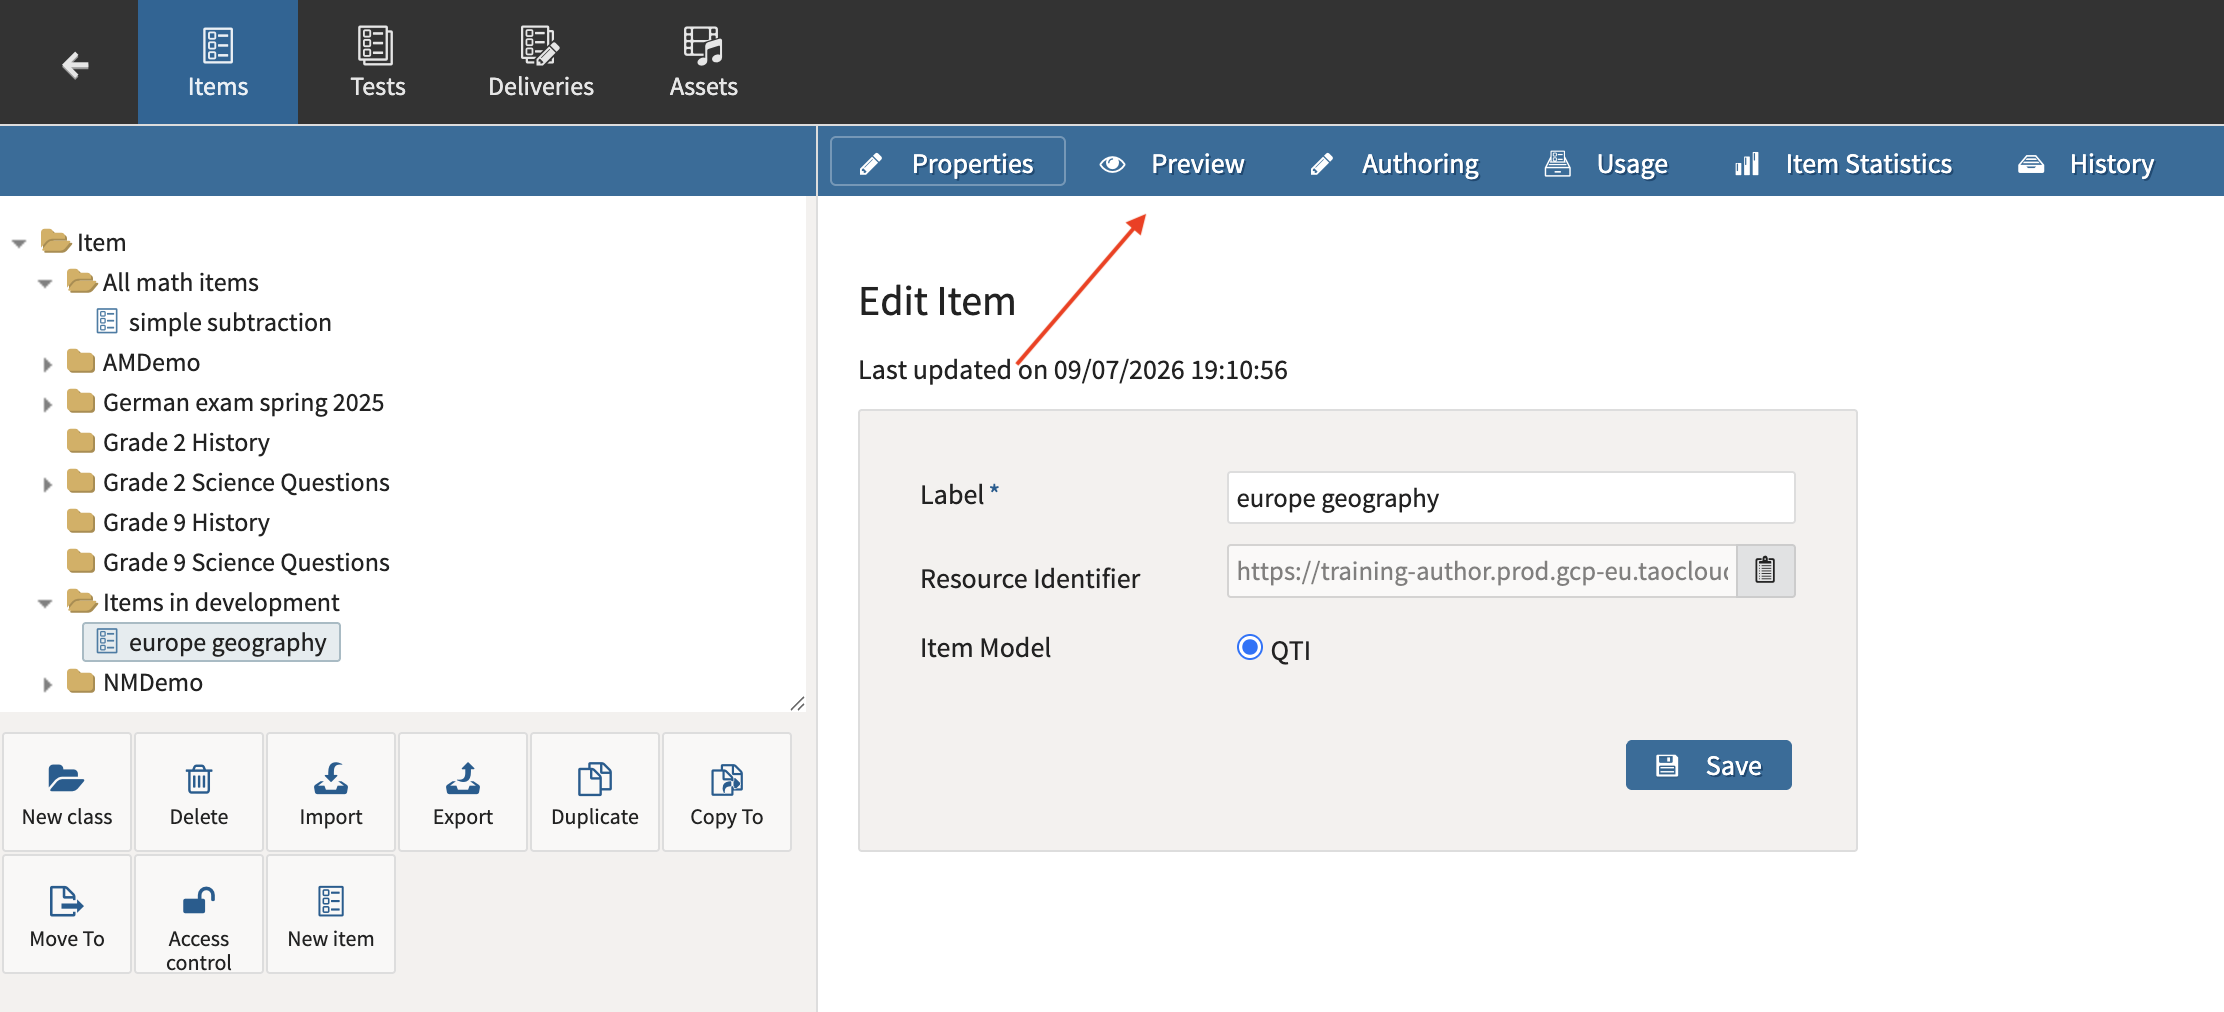
Item Preview allows authors to experience the item as a test-taker would, helping verify that:
-
The layout appears correctly.
-
Interactions behave as expected.
-
Instructions are clear.
-
Supporting materials display properly.
-
The overall learner experience matches expectations.
Previewing individual items before assembling a test helps identify issues early in the authoring process.
Items can also be previewed from test assembly.
5. Organize approved items
After items have been reviewed and finalized, move them from author workspaces into the shared content library.
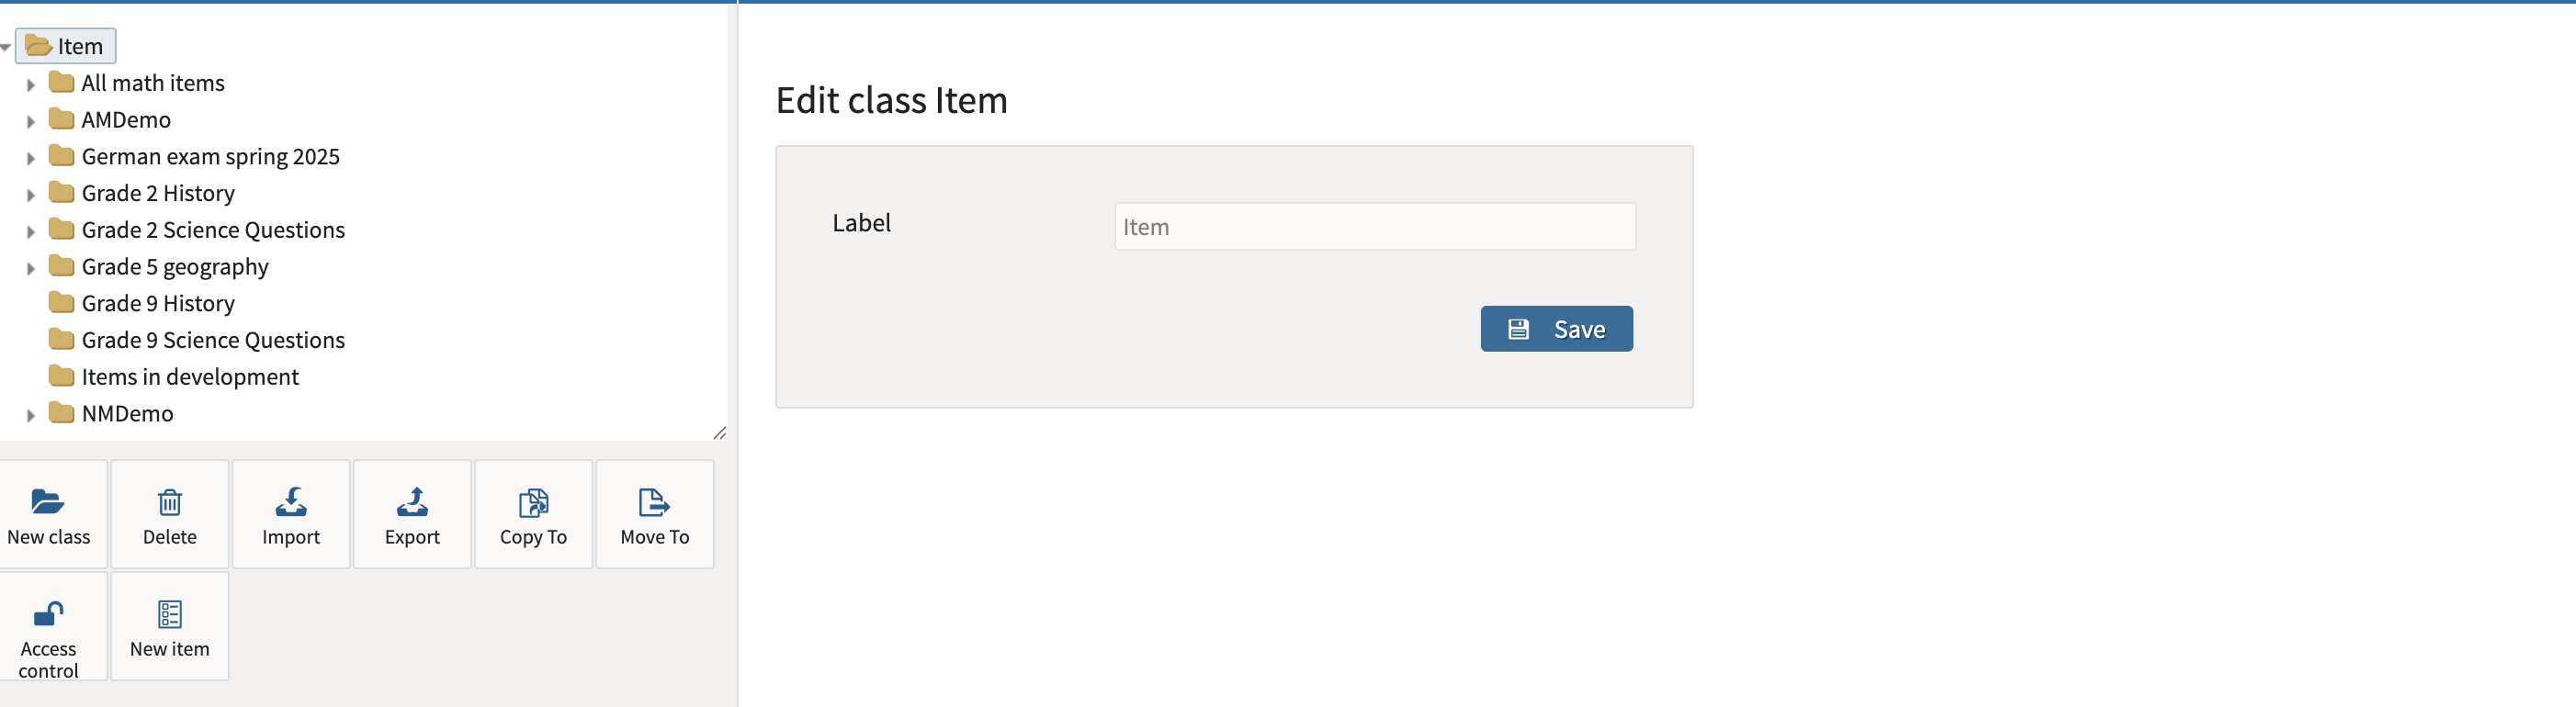
Organize approved items according to your library structure so they can be easily located during test assembly.
For example, items may be stored by:
-
Subject
-
Grade
-
Unit
-
Topic
-
Assessment program
6. Assemble the test
Once sufficient items have been created, they can be assembled into a test.
Depending on the size of the assessment, a test may simply contain a list of items or may be divided into:
-
Test Parts
-
Sections
These divisions are optional but can help organize larger assessments into logical groups.
During test assembly, authors typically:
-
Add items to the test.
-
Organize items into sections or test parts.
-
Configure navigation and test behavior.
-
Review the assessment structure.
Cog wheel icons represent the Properties of the test, part, section, or individual item. You can also view or edit an item directly from test assembly.
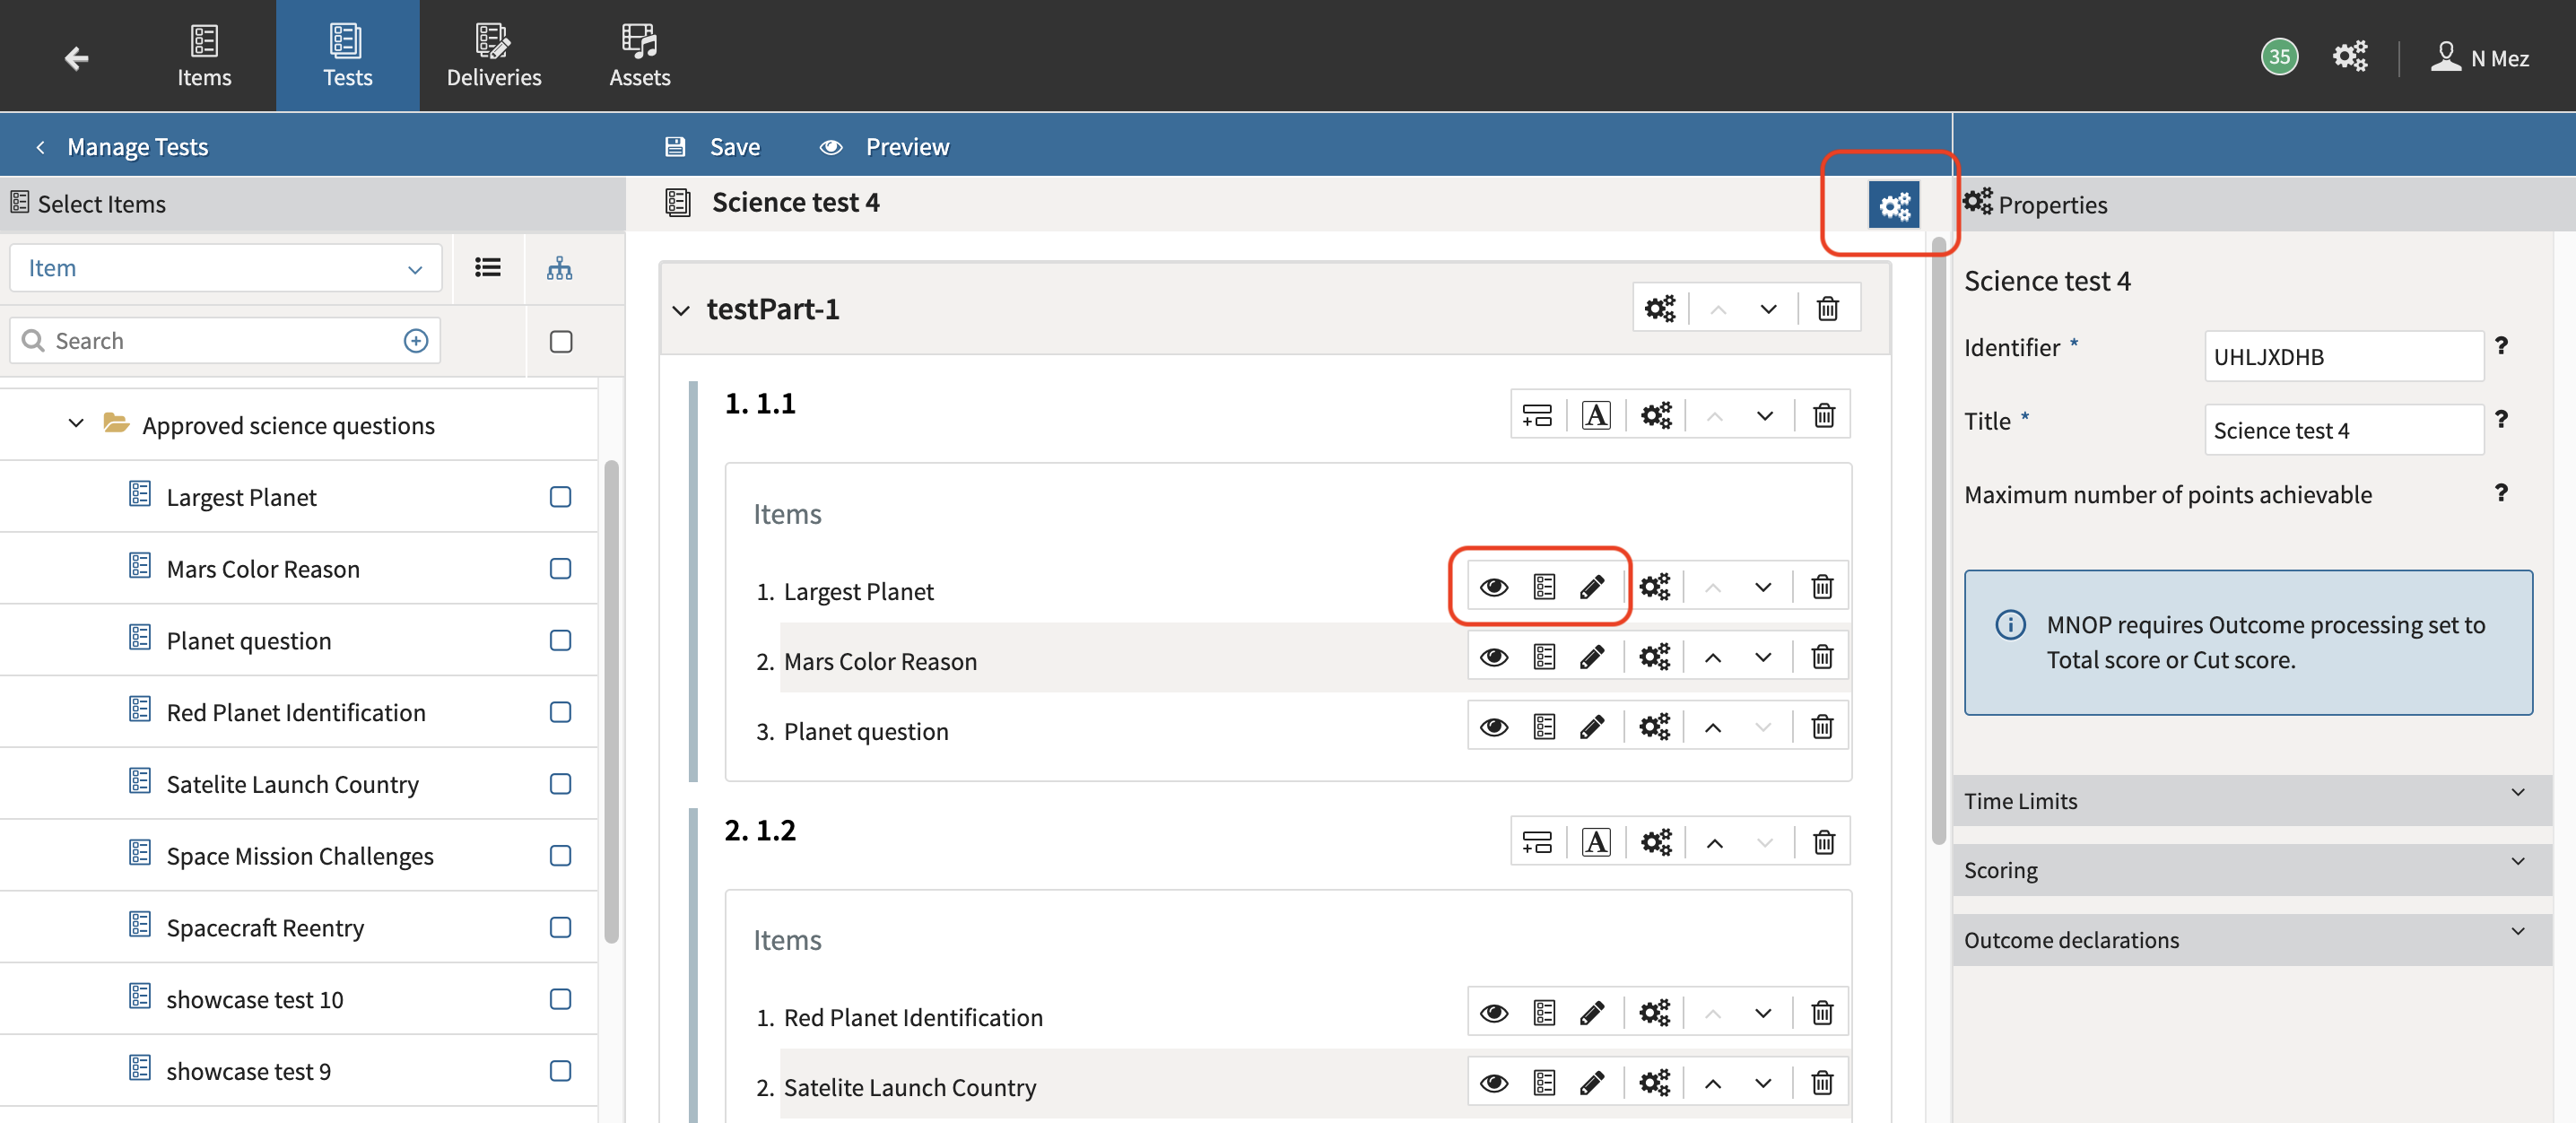
Because tests often represent significant authoring effort, regular backups are recommended throughout development.
7. Preview the complete test
After assembling the assessment, preview the entire test.
Unlike Item Preview, Test Preview allows authors to navigate through the assessment as a whole and verify that:
-
Items appear in the correct order.
-
Navigation behaves as expected.
-
Test parts and sections are organized correctly.
-
Instructions and transitions are appropriate.
-
The overall assessment flow makes sense.
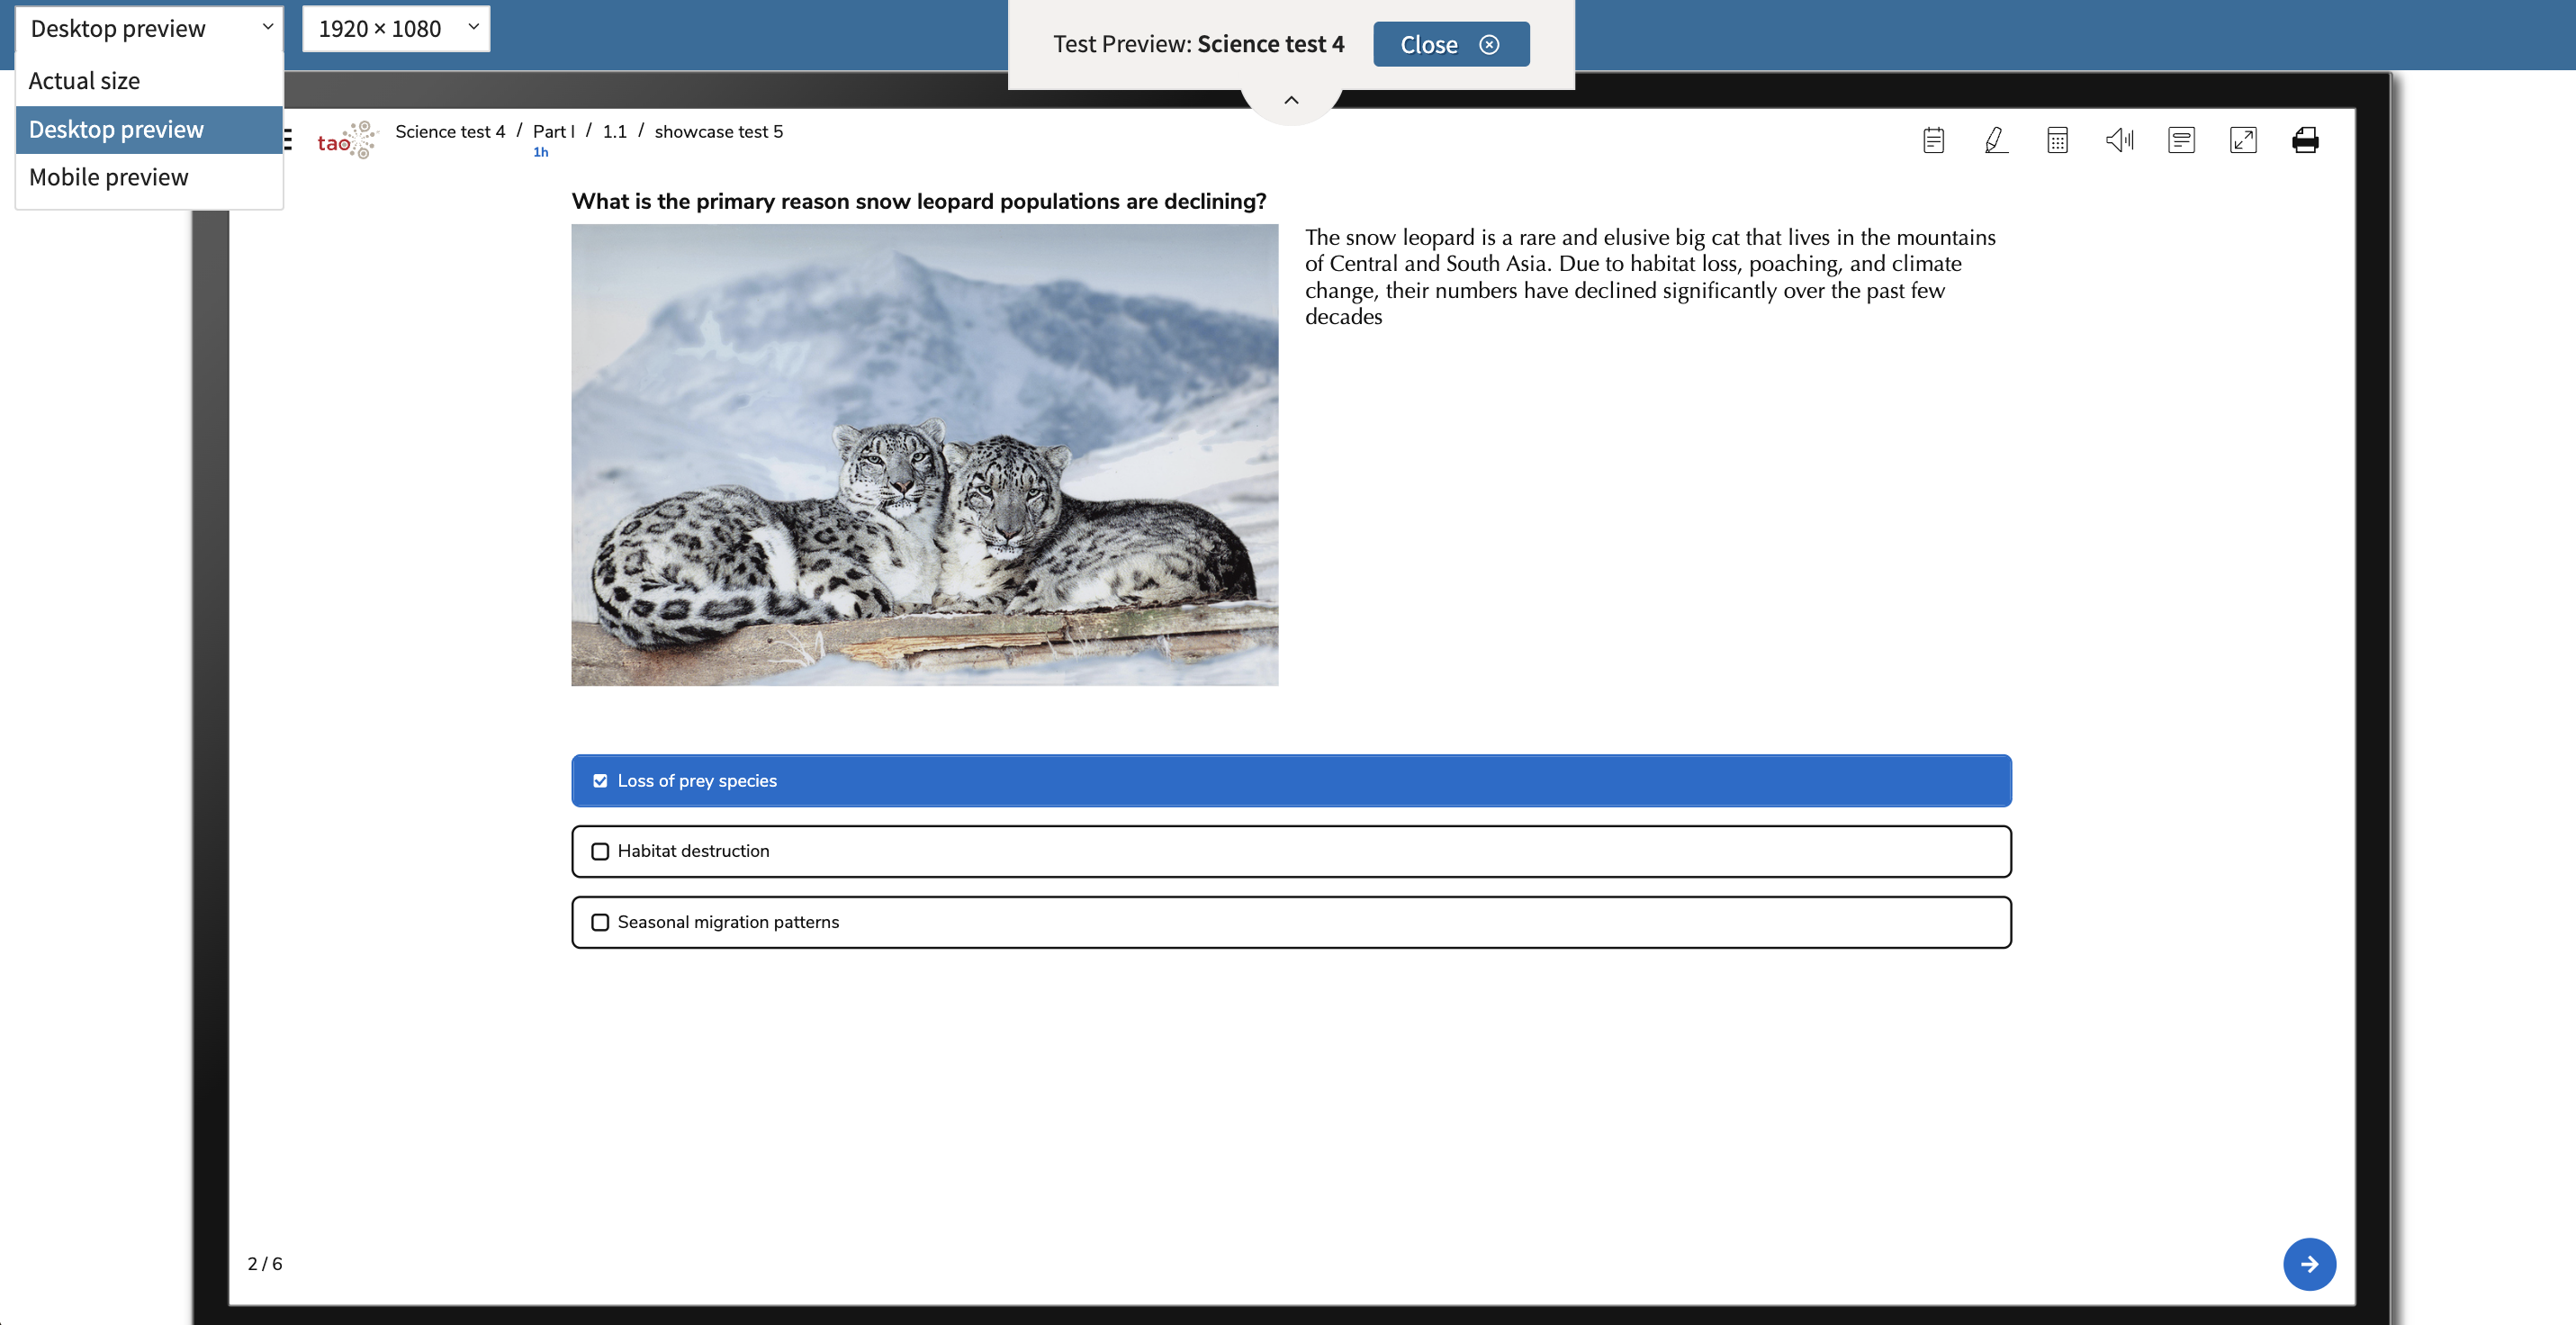
Test Preview is intended to validate the structure of the assessment rather than generate scores (this must be done through item preview).
You can view the test in different formats according to how test takers will access it (mobile, desktop, etc).
8. Validate the learner experience
Before publishing an assessment, experience it from the perspective of a test-taker.
There are several ways to validate the assessment:
|
Test Preview |
Use Test Preview to review the assembled assessment and verify its overall flow. |
|
Create a session and deliver the test to a demo test taker |
Publish the test by creating a delivery, assign it to a session, and complete the assessment using a demo test-taker account. This provides the most complete validation of the learner experience because it reproduces the same workflow that real test-takers will follow. |
|
Create a public session and take the test as an anonymous user |
Create a public session to make the assessment available for broader testing without creating individual test-taker accounts. Important: If the test is published as a public session, it will be available to anyone who views Public sessions from the TAO login page. |