
Related articles
Applies to
Personas
-
Content Developers
-
Administrators
Prerequisites
Before organizing your Content Bank, ensure that:
-
You have permission to create folders and item classes.
-
You have planned how content should be organized across your organization.
-
User roles and permissions have been identified.
-
A metadata strategy has been established (recommended).
Purpose
A well-organized Content Bank makes it easier for authors to collaborate, locate content, assemble tests, and manage large item libraries over time. By establishing a consistent folder structure, controlling permissions, and following a clear content lifecycle, organizations can reduce duplication and improve the efficiency of assessment development.
This playbook outlines recommended practices for organizing and maintaining the Content Bank.
Recommended approach
When organizing your Content Bank, focus on these areas:
-
Plan your folder structure.
-
Separate author workspaces from shared content.
-
Manage permissions carefully.
-
Move approved content into shared libraries.
-
Reuse content responsibly.
Best practices
1. Plan your folder structure
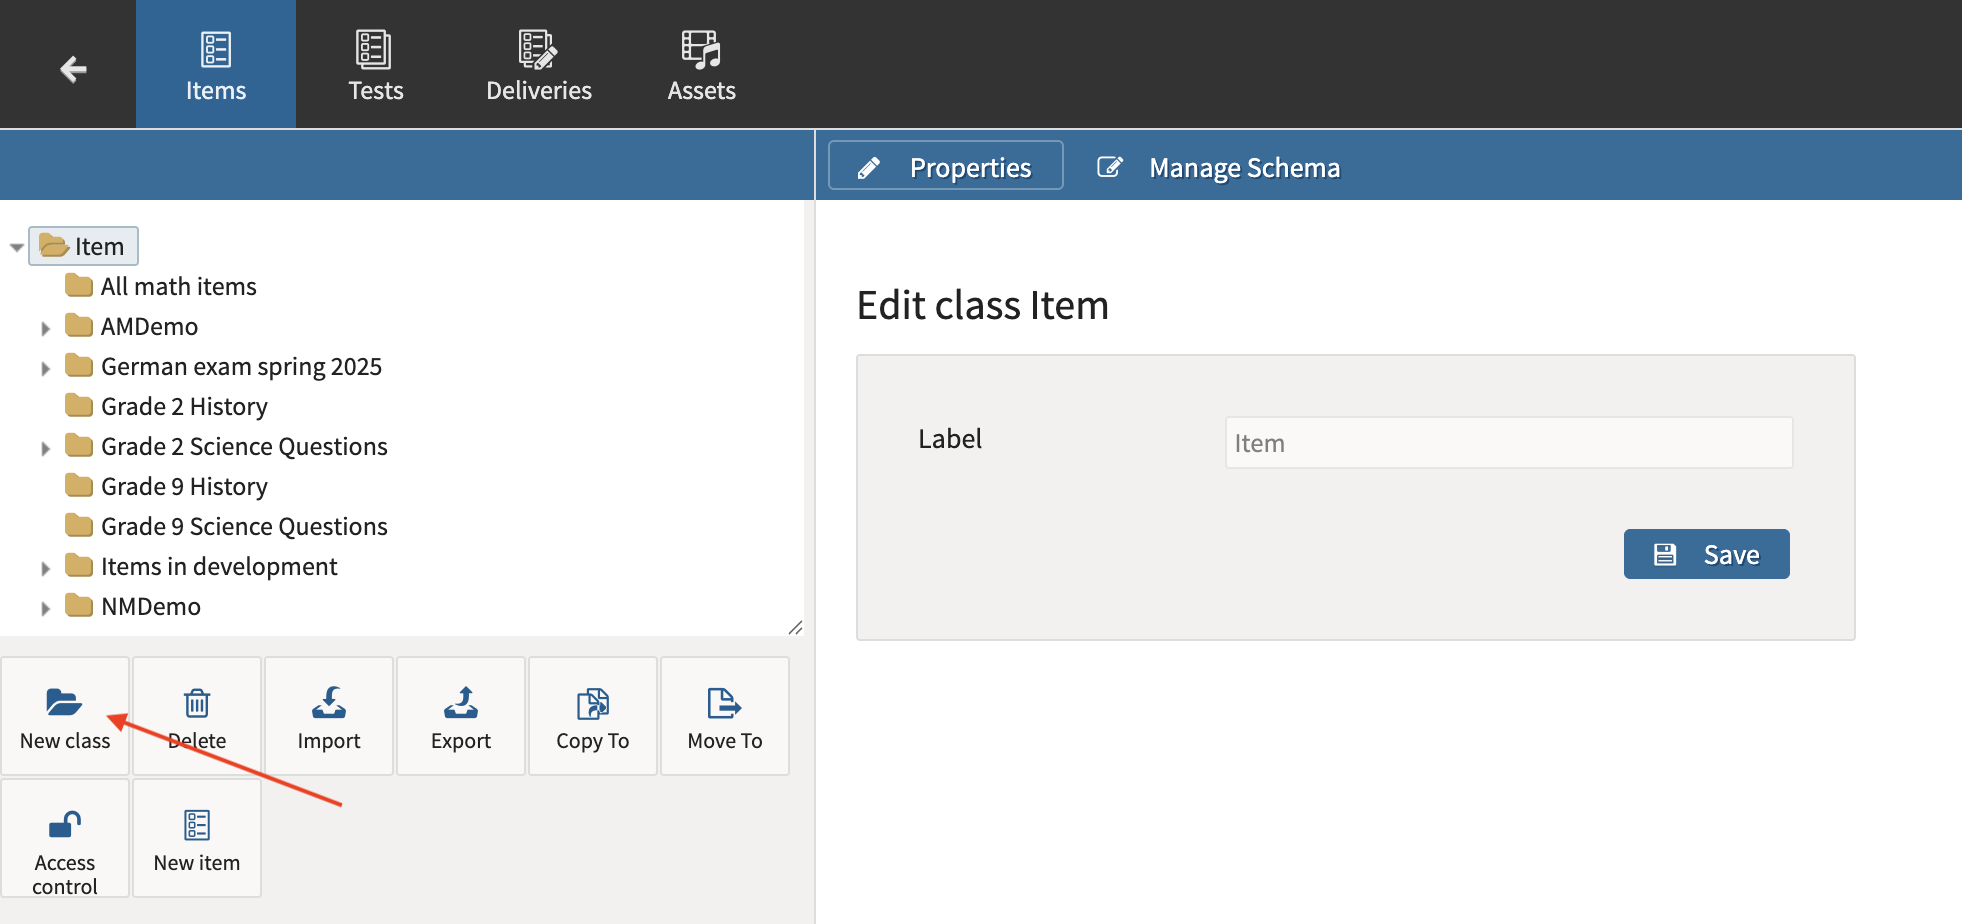
The Content Bank should reflect how your organization creates and manages assessment content.
For most K–12 organizations, it is helpful to organize folders by:
-
Subject
-
Grade level
-
Course
-
Assessment program
Within these folders, create item classes that represent the different content areas or collections of items.
2. Separate authoring workspaces from approved content
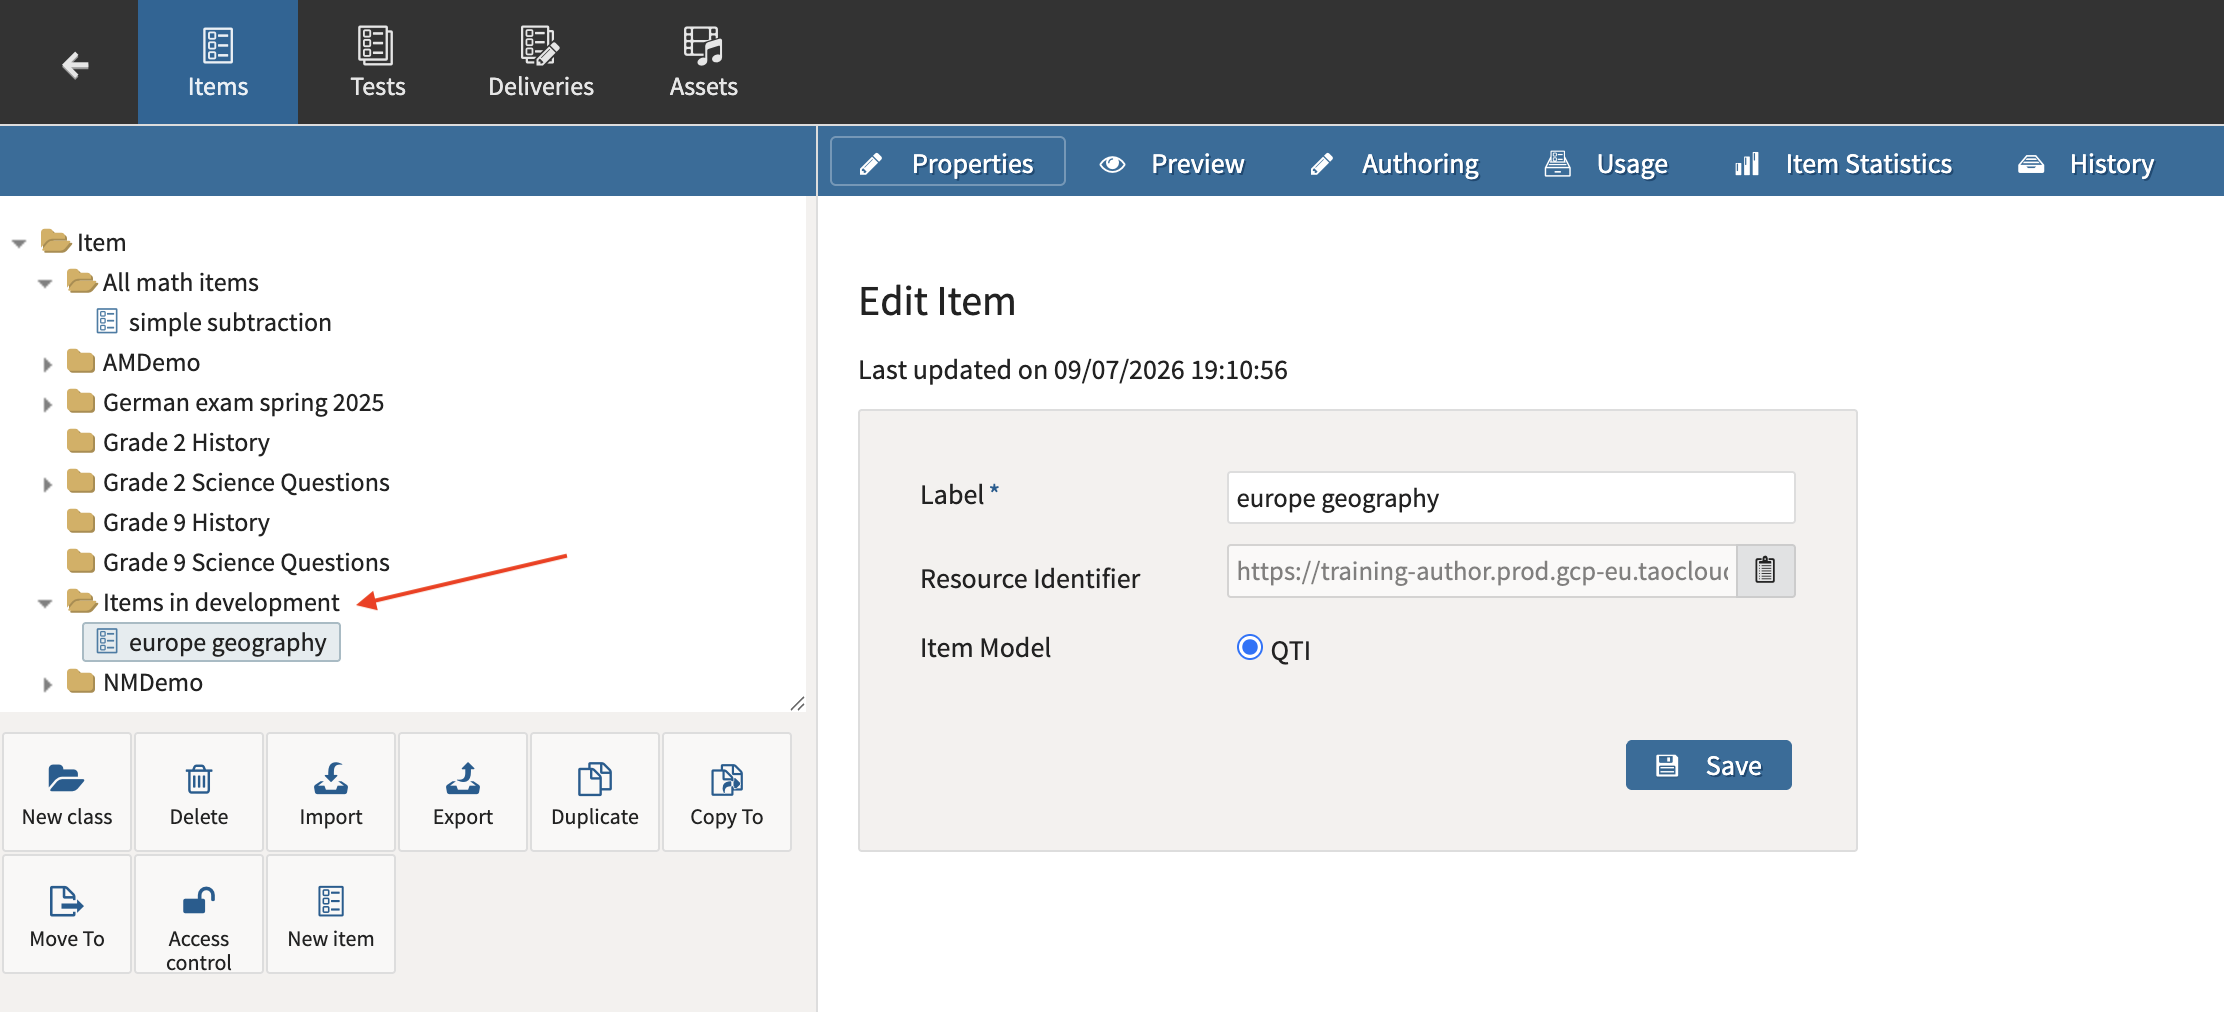
Provide authors with dedicated workspaces where they can develop items before they are shared with the rest of the organization.
A typical workflow is:
-
Authors create and edit items in their personal workspace.
-
Items are reviewed and finalized.
-
Approved items are moved into the shared subject or class folder.
Separating draft content from production content helps prevent incomplete items from being used during test assembly.
3. Control access & permissions
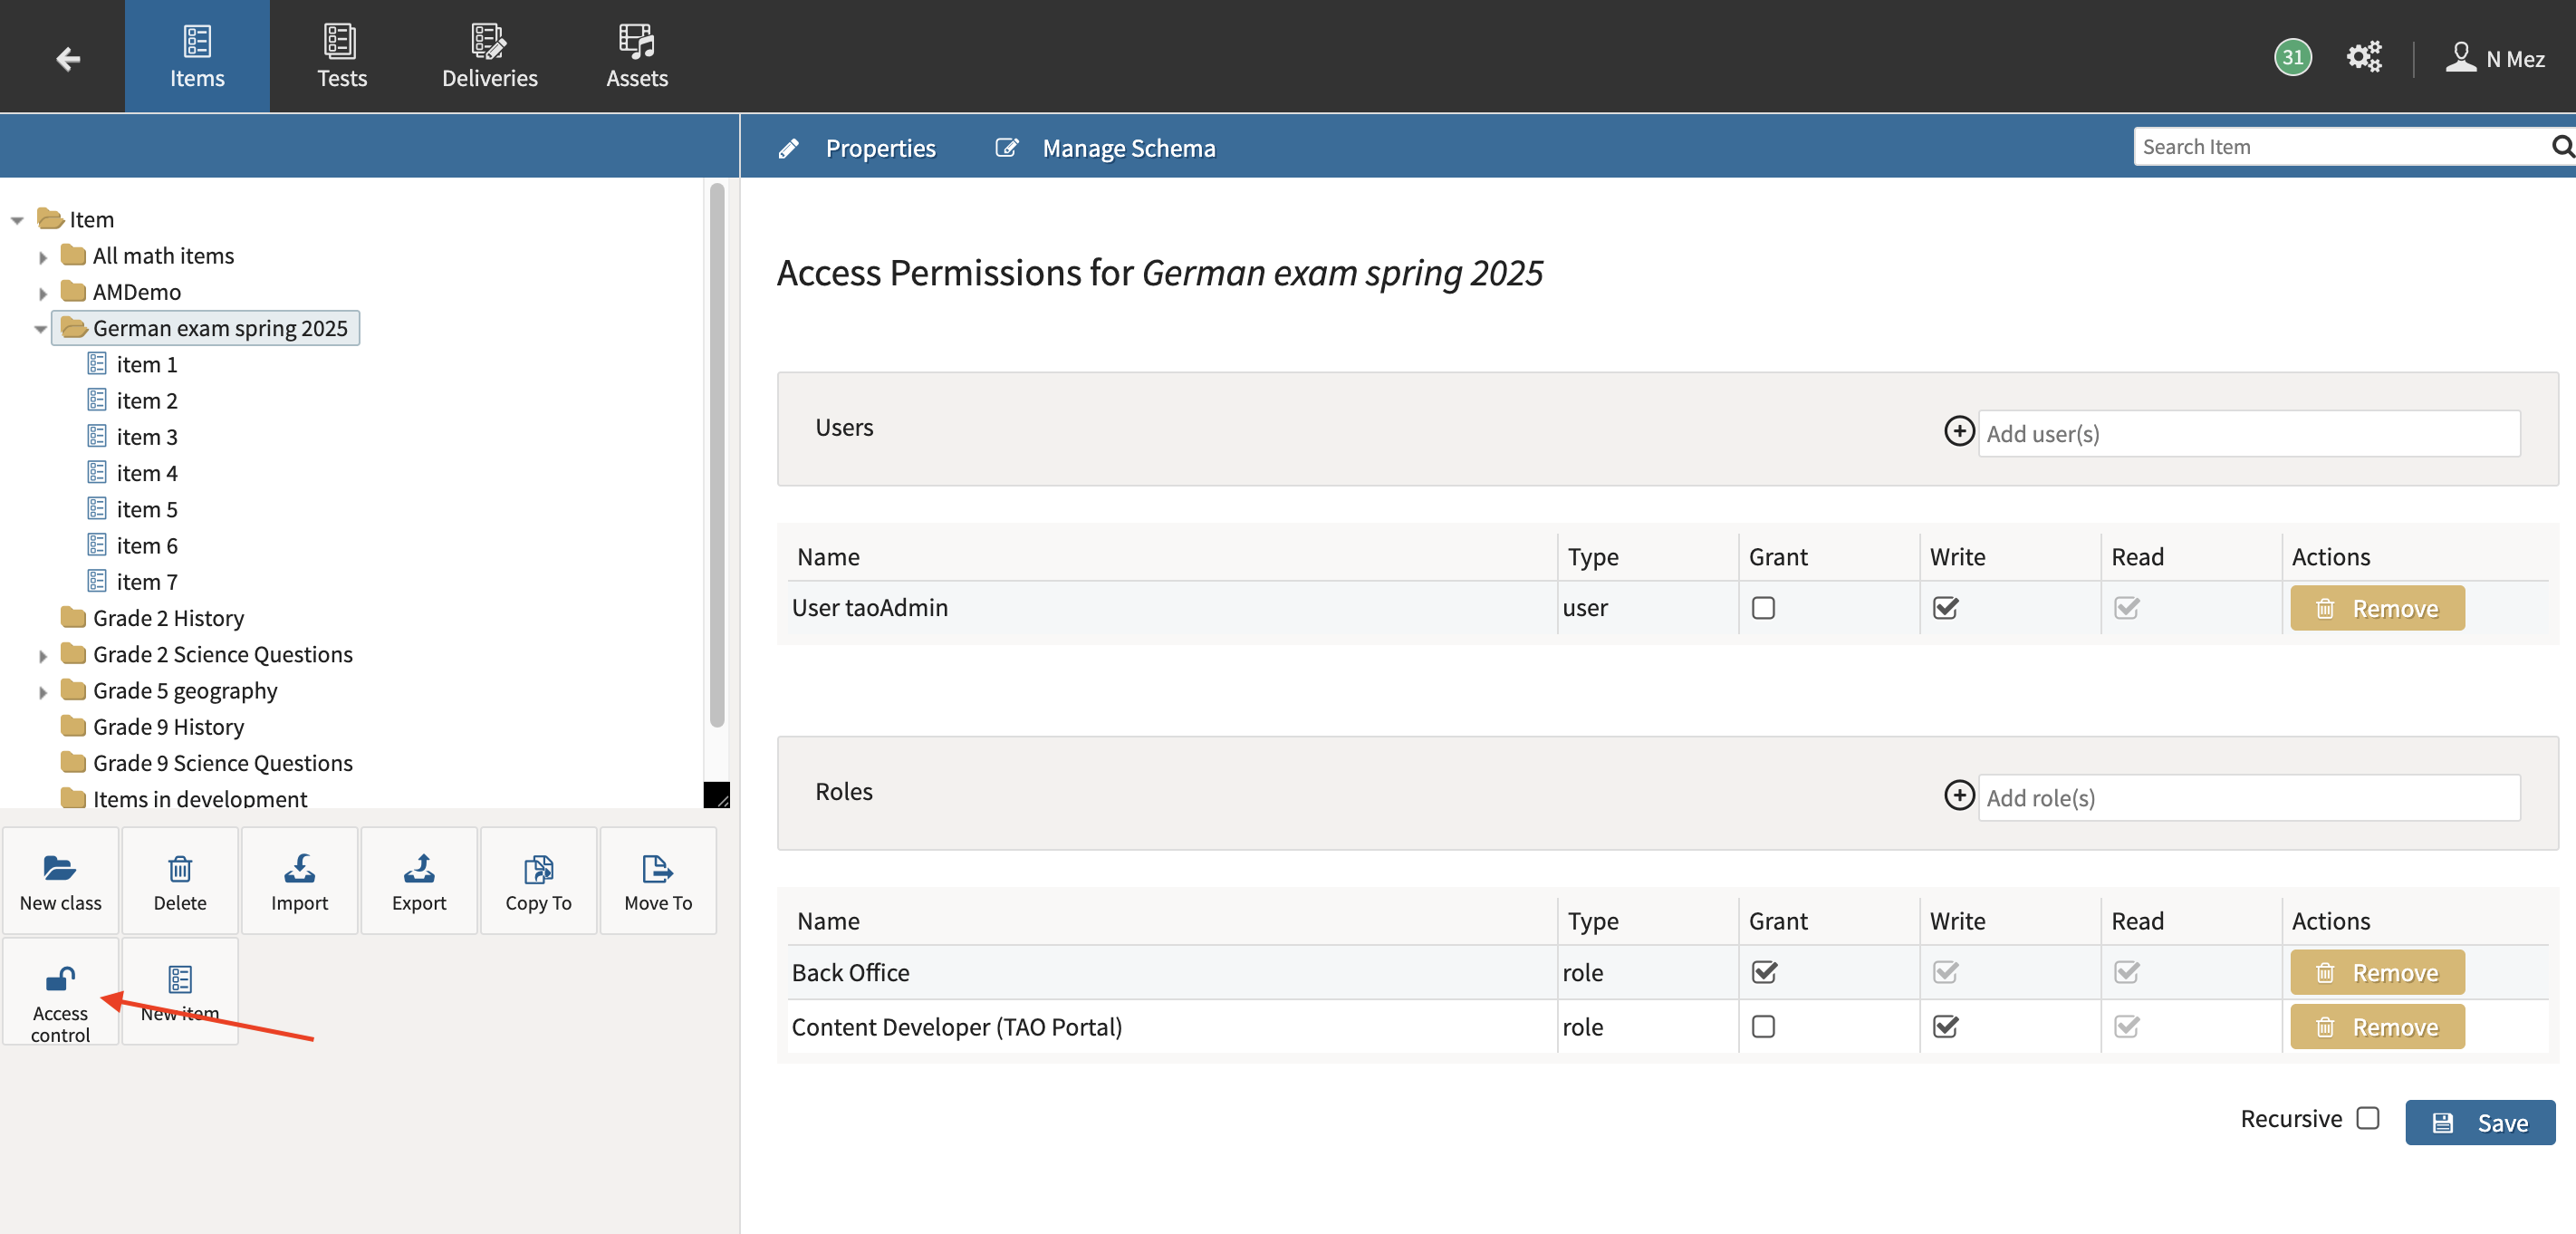
Use Access Control to ensure users only have access to the content they need. For more information, see Access Control and Permissions.
Permissions can be configured for individual folders or item classes.
When planning permissions:
-
Give authors edit access to their own workspaces.
-
Limit editing rights in shared libraries.
-
Restrict administrative functions to designated content managers.
Managing permissions at the folder level helps protect approved content while still supporting collaboration.
In the Users section, you can grant specific individuals permission to the selected folder or item.
In the Roles section, you can define which Portal roles have access.
4. Move content thoughtfully
As content progresses through the authoring process, move it into its permanent location within the Content Bank.
Resources can be moved by:
-
Dragging and dropping them within the library.
-
Using the Move To command.
Before moving content, review how the destination folder is configured.
Metadata and permissions may change depending on the destination, so it is important to understand how inherited properties will be applied.
4a. Understand metadata and permission inheritance
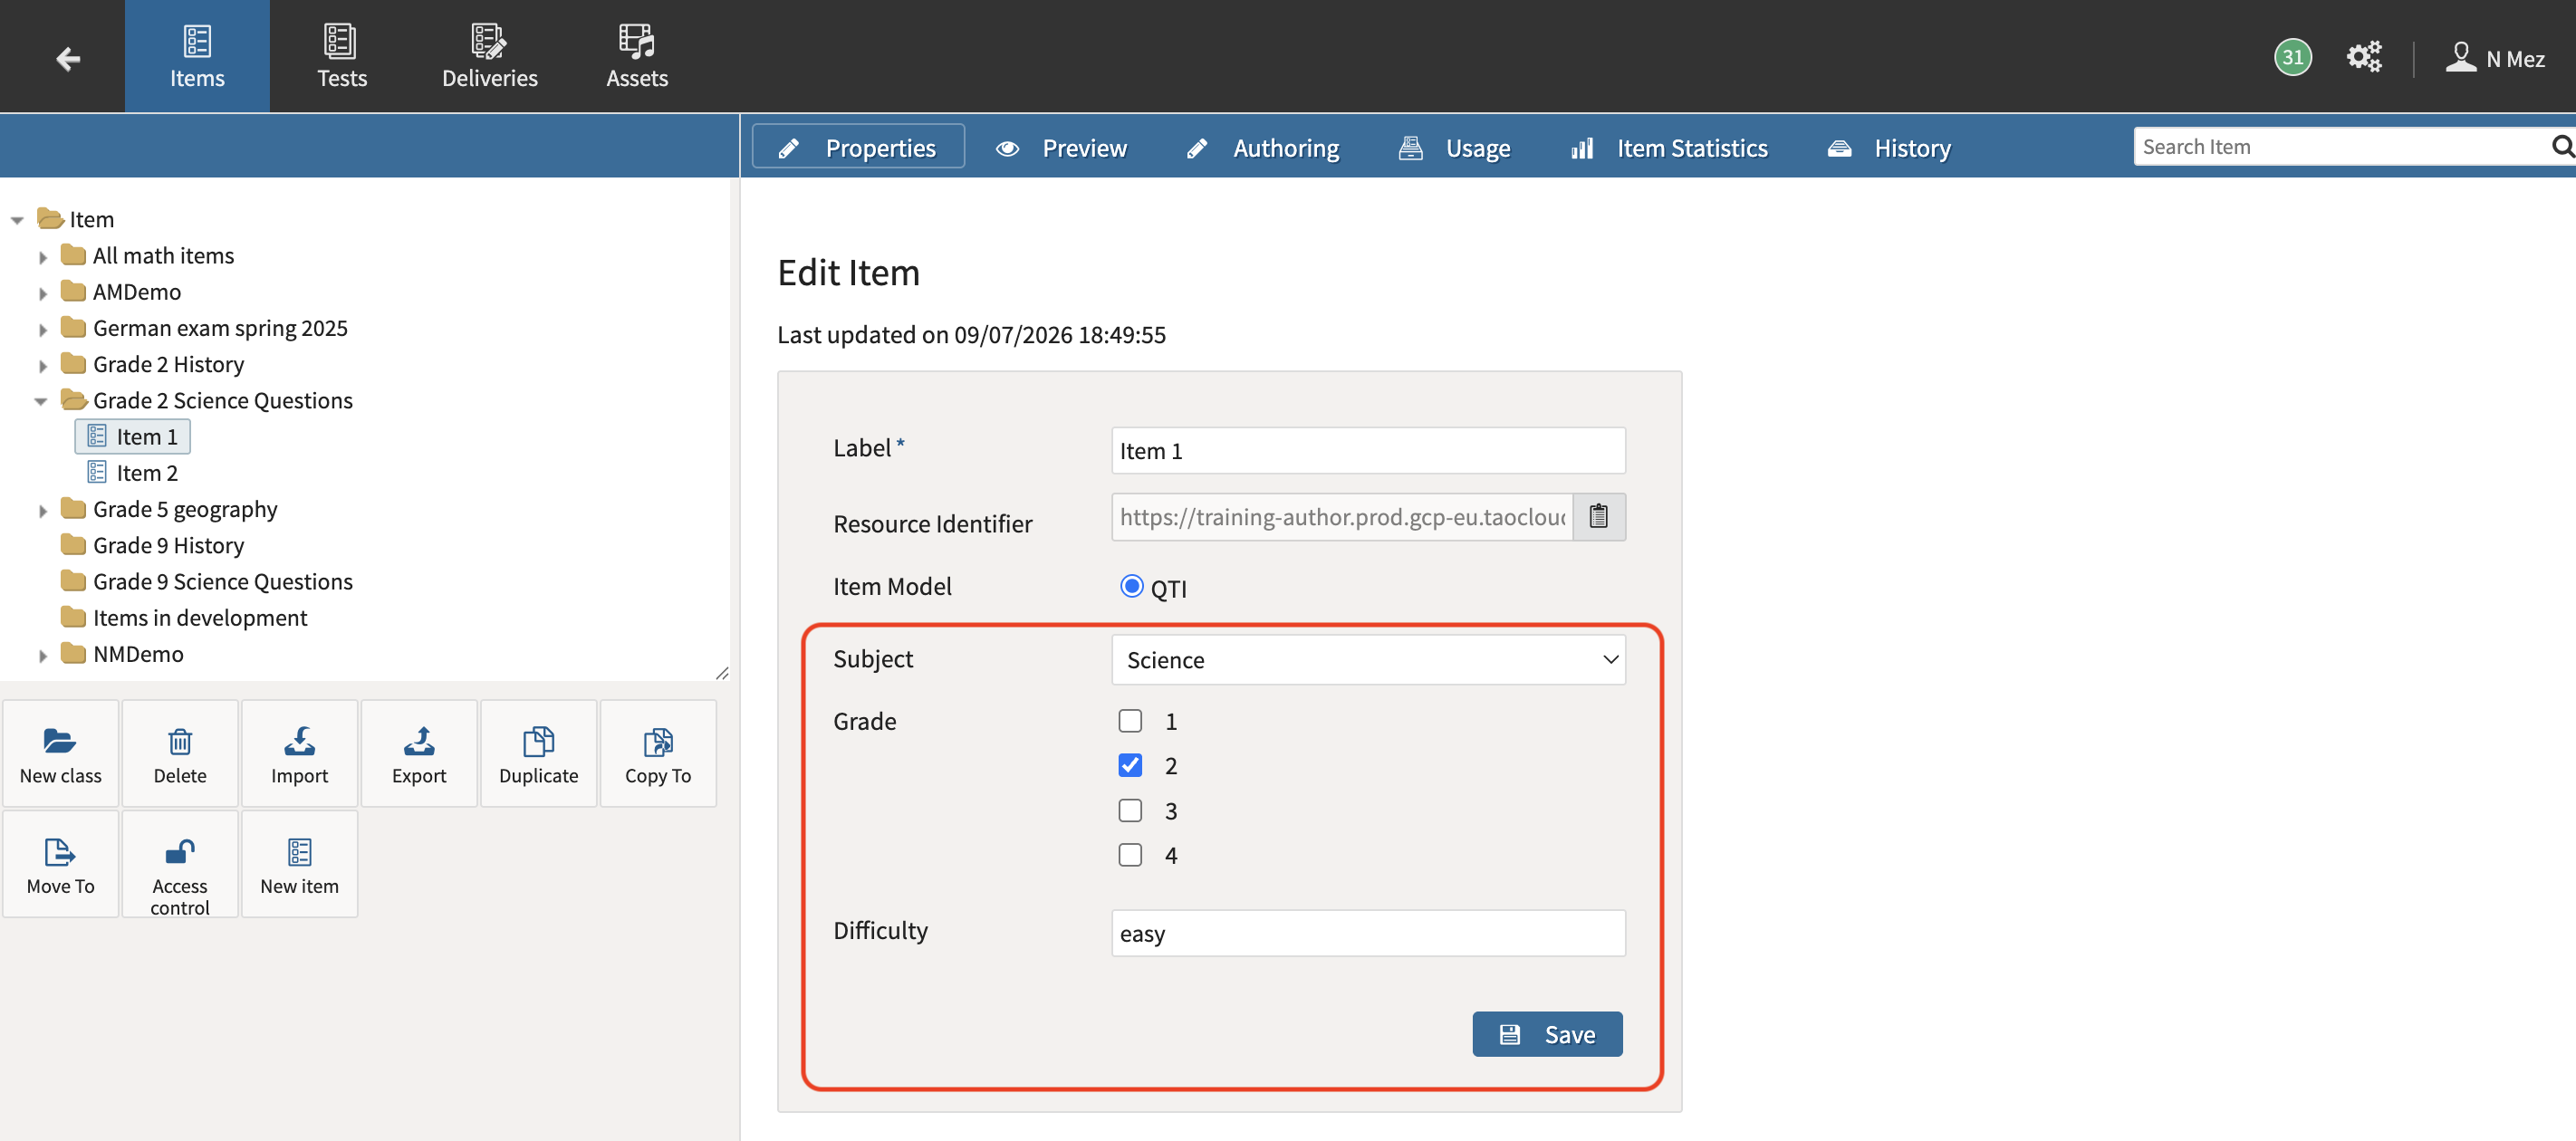
When items or folders are moved between item classes, they may inherit the metadata schema and permissions of their new location. For more information on how metadata works, see Metadata: Full workflow from configuring to search.
Before completing a move, consider:
-
Will important metadata be replaced?
-
Should the existing permissions be preserved?
-
Should the destination permissions be inherited?
6. Reuse content
If similar content already exists, consider reusing it instead of authoring a new item from scratch.
TAO supports several approaches:
-
Duplicate an item to create a new version for modification.
-
Copy To another folder when the same item is needed in multiple locations.
-
Move To when content has reached its permanent location.
Choosing the appropriate option helps reduce duplicated work while maintaining a well-organized library.
7. Use Item History for author collaboration
When multiple authors contribute to the same item, use Item History rather than creating multiple copies of the item.
Item History allows authors to:
-
Save intermediate versions.
-
Record changes with descriptive commit messages.
-
Review previous versions.
-
Restore earlier versions if necessary.
This approach keeps collaboration centralized while preserving the complete history of the item.
For example, one author might create the question text while another later adds graphics or revises the wording. Each contribution is saved as a new version without overwriting previous work.
8. Establish a content lifecycle
Define a consistent process for moving content from creation to publication.
A simple lifecycle might include: Author Workspace > Review > Approved Content (class folders) > Test Assembly