Related articles
Applies to
Personas
-
Content Developers
Prerequisites
Before working with images in TAO, ensure that:
-
Images have been prepared for digital delivery.
-
You understand the intended display size of the image within the item.
-
You have access to image editing or compression software if optimization is required.
Purpose
Images play an important role in many assessment items, but poorly prepared images can increase page loading times, reduce image quality, and negatively affect the test-taking experience.
This playbook outlines best practices for selecting, preparing, optimizing, and managing images so they display clearly while keeping assessments responsive and efficient.
Recommended approach
When working with images, consider the following:
-
Choose the appropriate image format.
-
Size images correctly before uploading.
-
Optimize images for web delivery.
-
Configure image properties appropriately.
-
Test images within the completed item.
Best practices
1. Choose the right image format
Selecting the correct image format is one of the simplest ways to improve both image quality and performance.
As a general guideline:
|
Format |
Best used for |
|---|---|
|
JPEG (.jpg, .jpeg) |
Photographs and images containing many colors. JPEG images generally provide the smallest file size for photographs. |
|
PNG |
Logos, screenshots, diagrams, and images containing text or large areas of solid color. PNG images preserve sharp edges and text better than JPEG, making them ideal for instructional graphics or screenshots. |
|
SVG |
Vector graphics, icons, and simple illustrations. SVG images scale without losing quality, although they cannot be used as background images for Graphic Interactions. |
2. Prepare images at their intended size
One of the most common performance issues is uploading images that are much larger than they can be displayed.
Before uploading an image:
-
Determine its largest expected display size.
-
Resize the image in an image editor.
-
Upload the appropriately sized version.
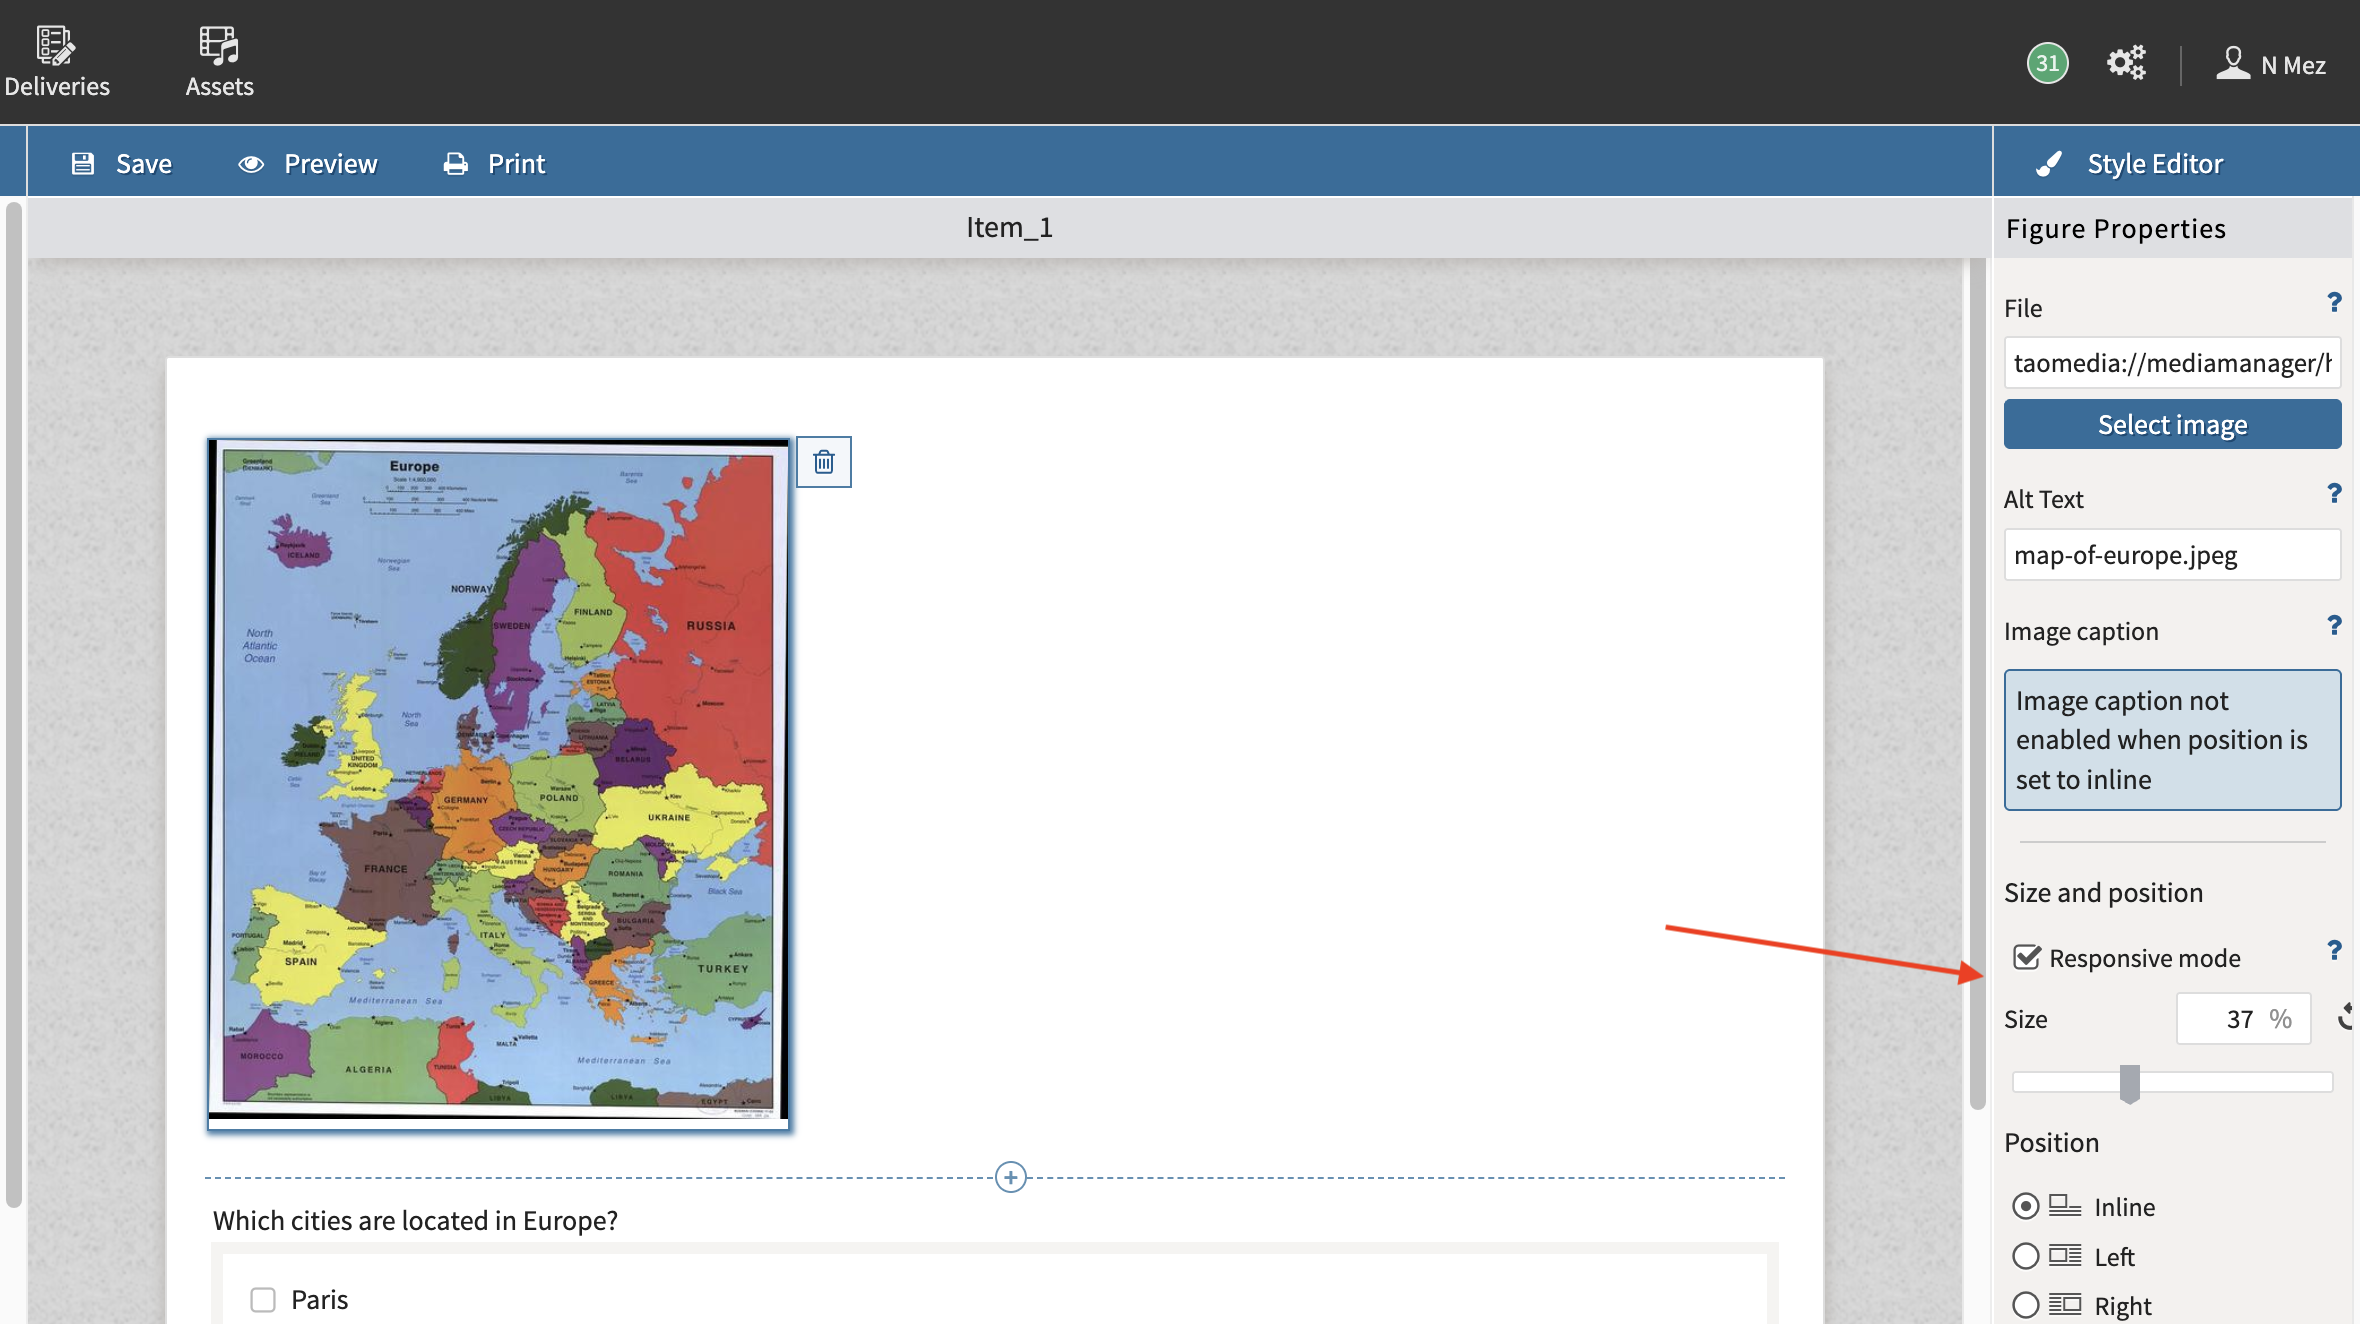
The sizing tool changes only how the image is displayed - it does not reduce the file size.
3. Design for responsive content
TAO items are responsive and automatically adjust to different screen sizes.
Because of this:
-
Images should be sized for the largest expected display width.
-
Responsive image sizing should be used whenever appropriate.
For standard content:
-
A full-width text block displays images at approximately 964 px wide.
-
A full-width Graphic Interaction background displays at approximately 946 px wide.
If images occupy fewer columns in the item layout, reduce the image dimensions accordingly before uploading.
4. Optimize images before uploading
As a general guideline:
-
Logos larger than approximately 20 KB should be reviewed.
-
Photographs larger than approximately 100 KB should be reviewed.
Image compression tools can significantly reduce file size while maintaining visual quality.
5. Avoid unnecessary transparency
PNG images that contain transparency often require larger file sizes.
If an image will always appear on a white background, consider removing transparency and saving the image with a white background instead.
6. Use image properties effectively
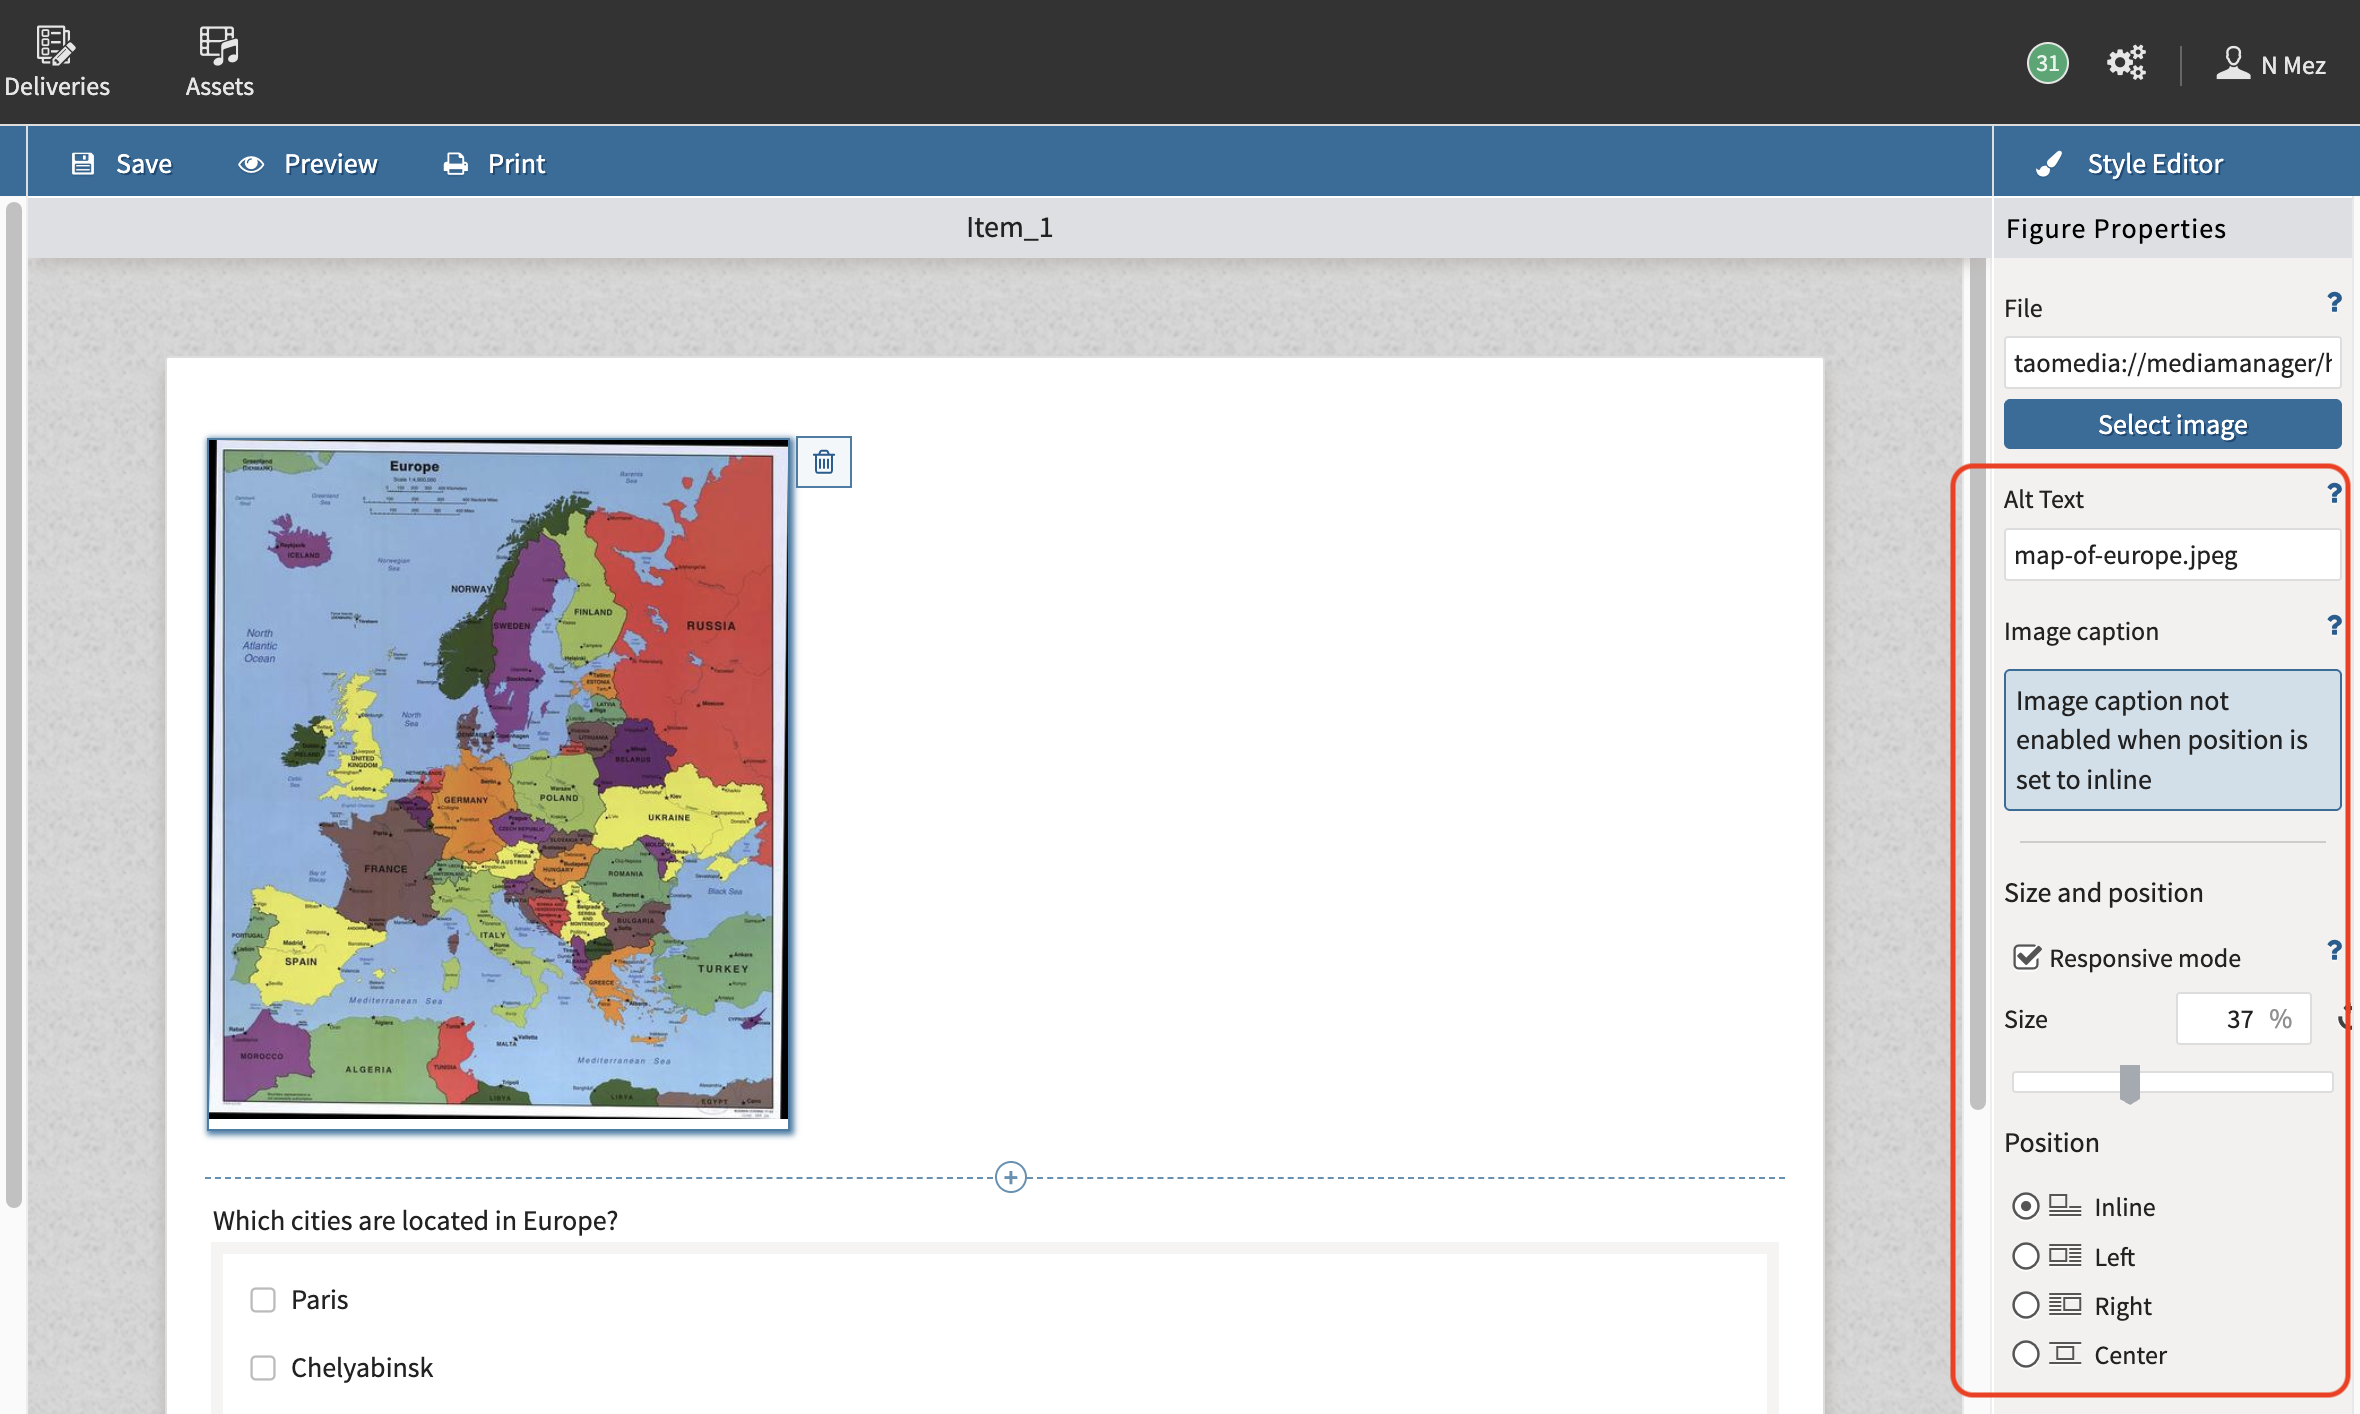
After inserting an image, select it within the interaction and review its settings in the Figure Properties panel.
|
Alt text |
Provide meaningful alternative text that describes the image for users who rely on assistive technologies. Alt text should communicate the purpose of the image rather than simply naming the file. |
|
Responsive mode |
Enable Responsive Mode whenever appropriate. Responsive Mode allows the image to resize automatically based on the available screen space rather than using fixed dimensions. This helps ensure a consistent experience across different devices and screen sizes. |
|
Alignment |
Choose an alignment that supports readability. Available options include:
Consider how surrounding text will wrap around the image when selecting an alignment. |
7. Pay attention to text placement
If adding text immediately after an image, insert a line break before typing longer paragraphs.
This prevents wrapped text from appearing awkwardly beside the image and improves readability.
8. Test images within the item
After authoring is complete, preview the item and review every image.