
This article describes how Scan Uploaders scan collected response sheets and upload them into TAO.
Response sheets are scanned then uploaded into TAO. They then become part of the test taker’s response set; if the test contains items that were not paper-based, all responses are included in the same set, allowing scorers to score as usual.
1. Access paper-based sessions
-
Log into TAO Portal
-
Navigate to Paper Sessions
The Scan Uploader’s view contains two tabs:
-
All paper sessions: View all paper sessions for groups where you are enrolled as the Scan Uploader.
When uploading a PDF, the upload report displays an error for any pages that matches responses in session where the current user is not enrolled as a Scan Uploader. No scan is attempt will apply to those responses.
-
Response uploads: Upload responses and view upload history
2. View session details and monitor progress
Click Enter session to view a session’s details.
From this view you can:
-
Compare expected vs uploaded pages per test-taker
-
View which test takers have finished or need scoring
The Scan Uploader’s session overview includes a Review test button for each candidate.
3. Scan and upload response sheets
Important: Before uploading, ensure your scanned PDFs meet these requirements:
-
QR codes must remain visible and undamaged
-
Scan at sufficient quality to reliably capture QR codes and responses
-
Scan pages straight (not tilted) to improve readability
-
The scan window is active
-
Scan each response sheet and save it as a PDF. PDF files can include:
-
Multiple test-takers' response sheets
-
Response sheets from multiple sessions
-
Pages in any order
-
-
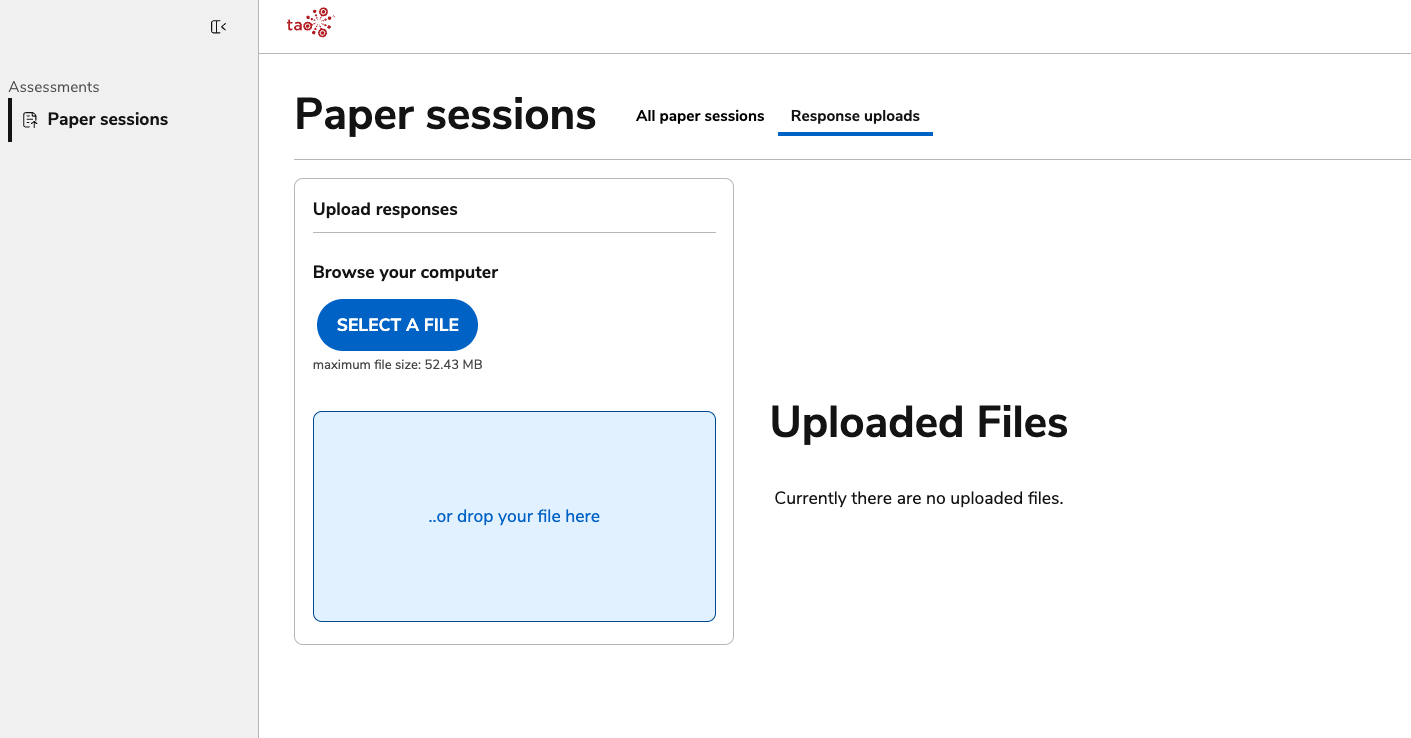
Go to the Response uploads tab.
-
Click Select a file or drag and drop your PDF(s) into the drop zone (max size: 52.43 MB).
There is no limit on the number of upload attempts or files.
How TAO processes scans
-
TAO reads QR codes per response sheet page
-
Matches pages to:
-
Test-taker
-
Session
-
Item
-
-
Attaches the test taker’s response to the QR code
4. Review and verify upload progress
Processing may take seconds to minutes depending on volume. Once the scans are uploaded, you can select the button on the right side of each listed scan to view each response separately.
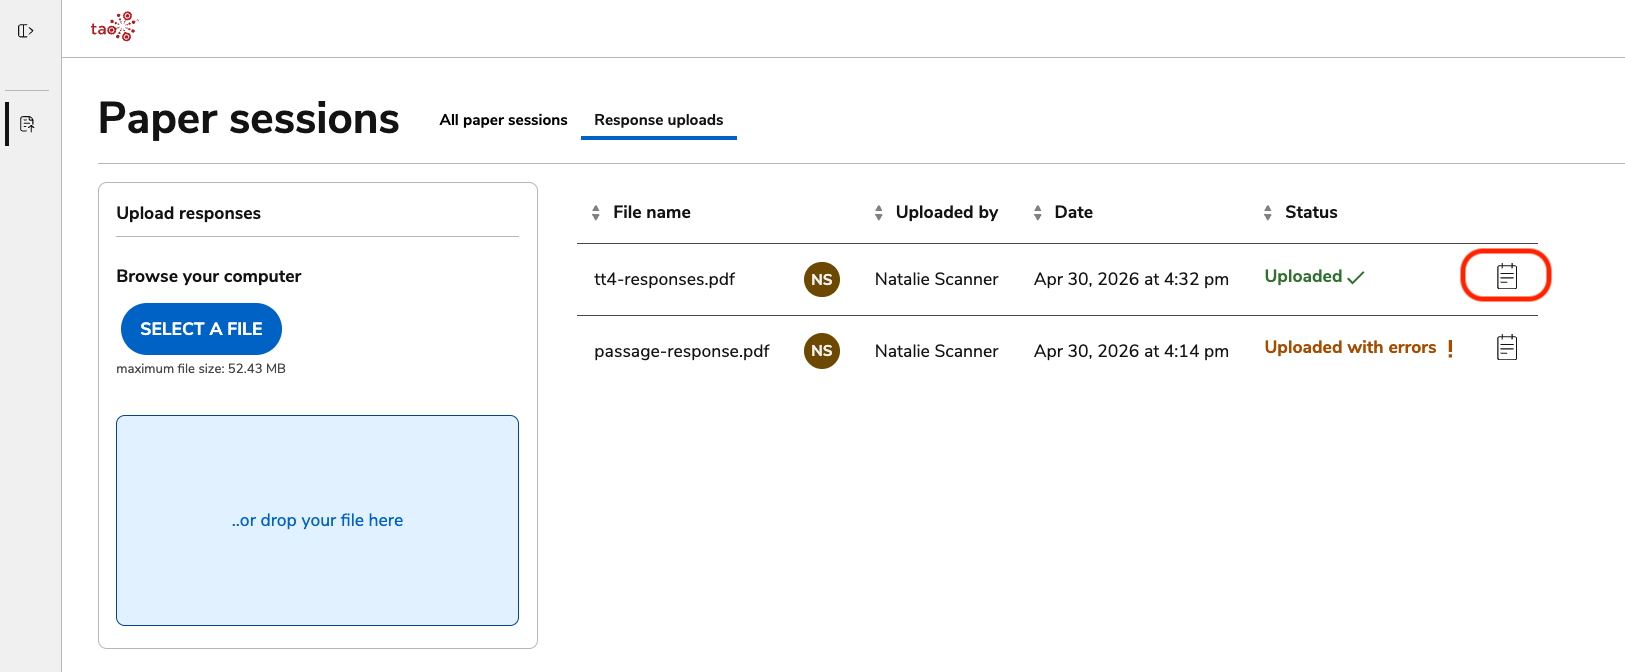
Track uploaded vs expected pages: The Response upload status column in the session list (or session overview) will show the status of each response sheet (Uploaded with a green checkmark = successfully processed).
Once the status for each test taker’s response is Uploaded, check for:
-
Successfully matched pages
-
Unmatched pages (QR issues)
Handling QR issues
If QR codes fail, choose one of the following workarounds and re-upload files as needed (no limits):
-
Physical fix Replace QR code and re-scan
-
Print the original QR code again from the booklet PDF
-
Cut and paste it over the damaged QR code area on the paper
-
Re-scan and re-upload
-
-
Digital fix: Edit PDF to restore QR code
-
Use an image/PDF editing tool
-
Replace the damaged QR code region with a clean digital version of the original QR code
-
Upload the corrected PDF
-