
Related articles
Best practices for working with images in item authoring
Applies to
-
Content developers
Prerequisites
-
Have the media file available on your computer, or know where it is stored in the Asset Manager.
Purpose
This guide explains how to add media assets such as images, audio files, videos, and passages to a test item in TAO. Existing Assets can be selected from the Asset Manager; new Assets can be uploaded directly to the Asset Manager and used while authoring an item.
Steps
1. Open the item for editing
-
Create a new item or open an existing item in the Authoring Tool.
-
Drag a Text Block (A) from the Inline Interactions panel onto the item canvas.
You can also add an image to any text block within an existing interaction. Note that added an asset may change the format of the interaction.
-
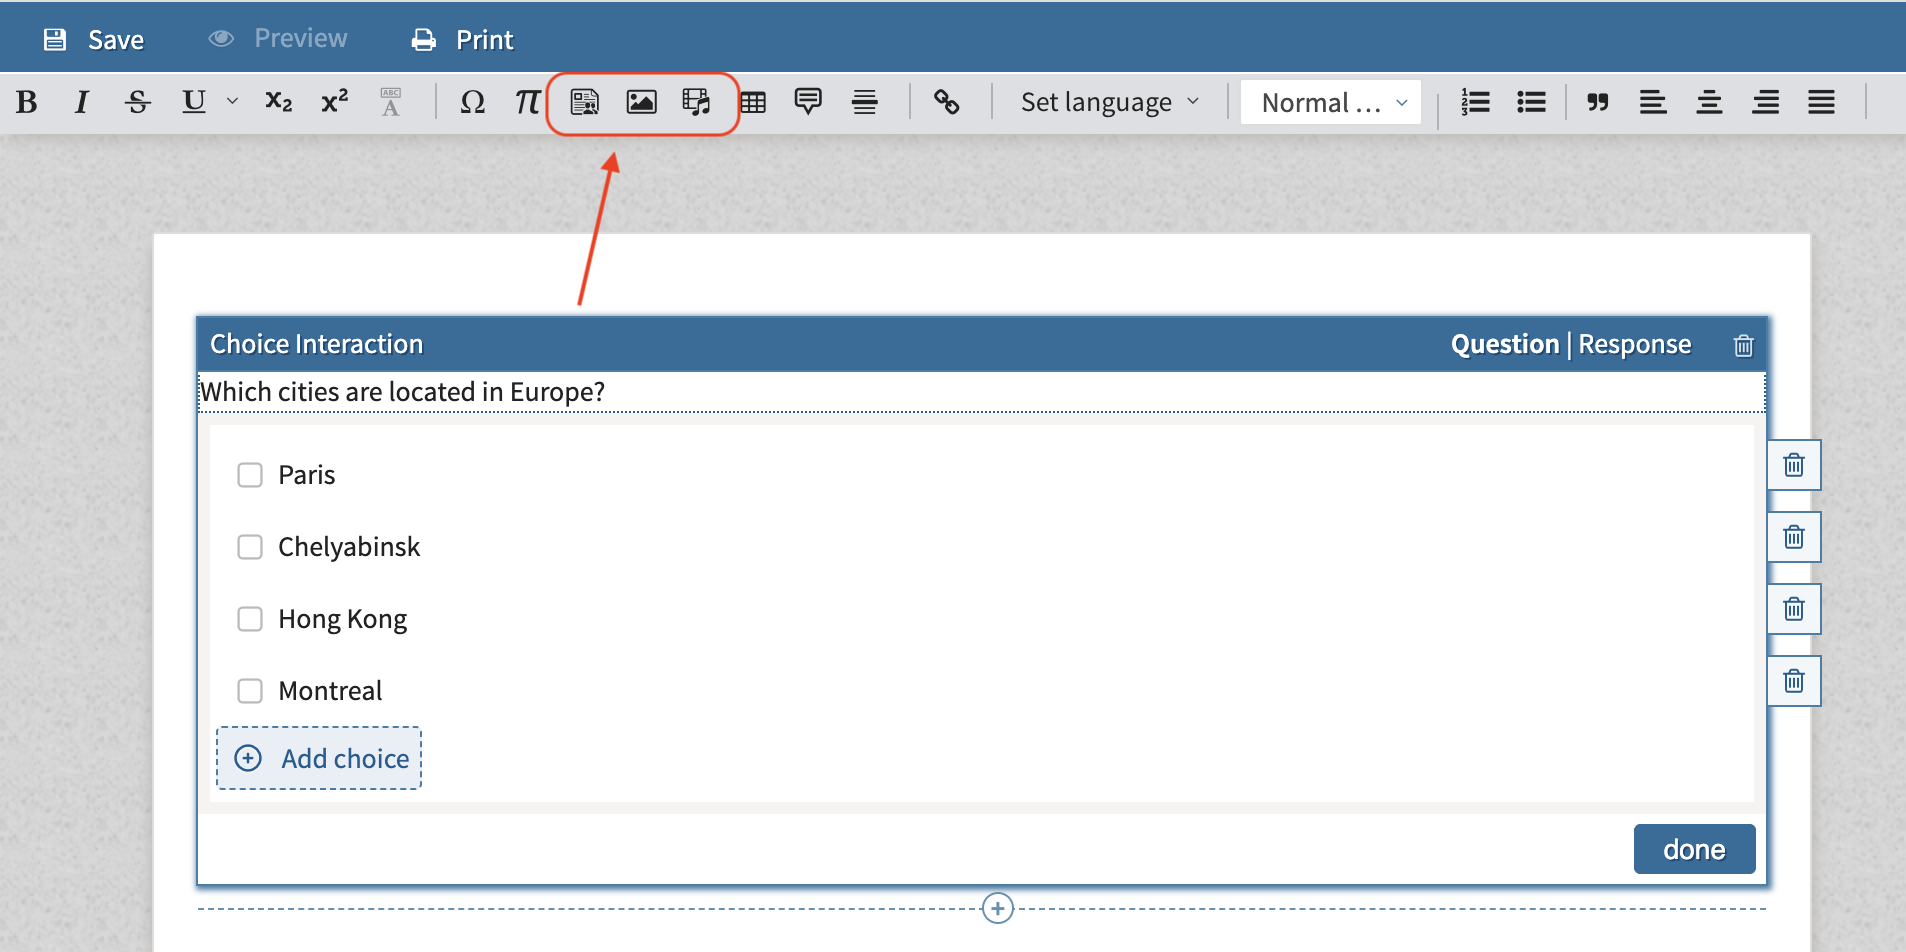
Locate the editing toolbar displayed above the text block.
2. Select the asset type
-
Click the appropriate toolbar icon:
-
Image icon for images
-
Media icon for audio or video files
-
Shared File icon for passages (also known as shared stimuli)
-
-
The Asset Manager opens and displays available resources.
3. Add an existing asset from the Asset Manager
-
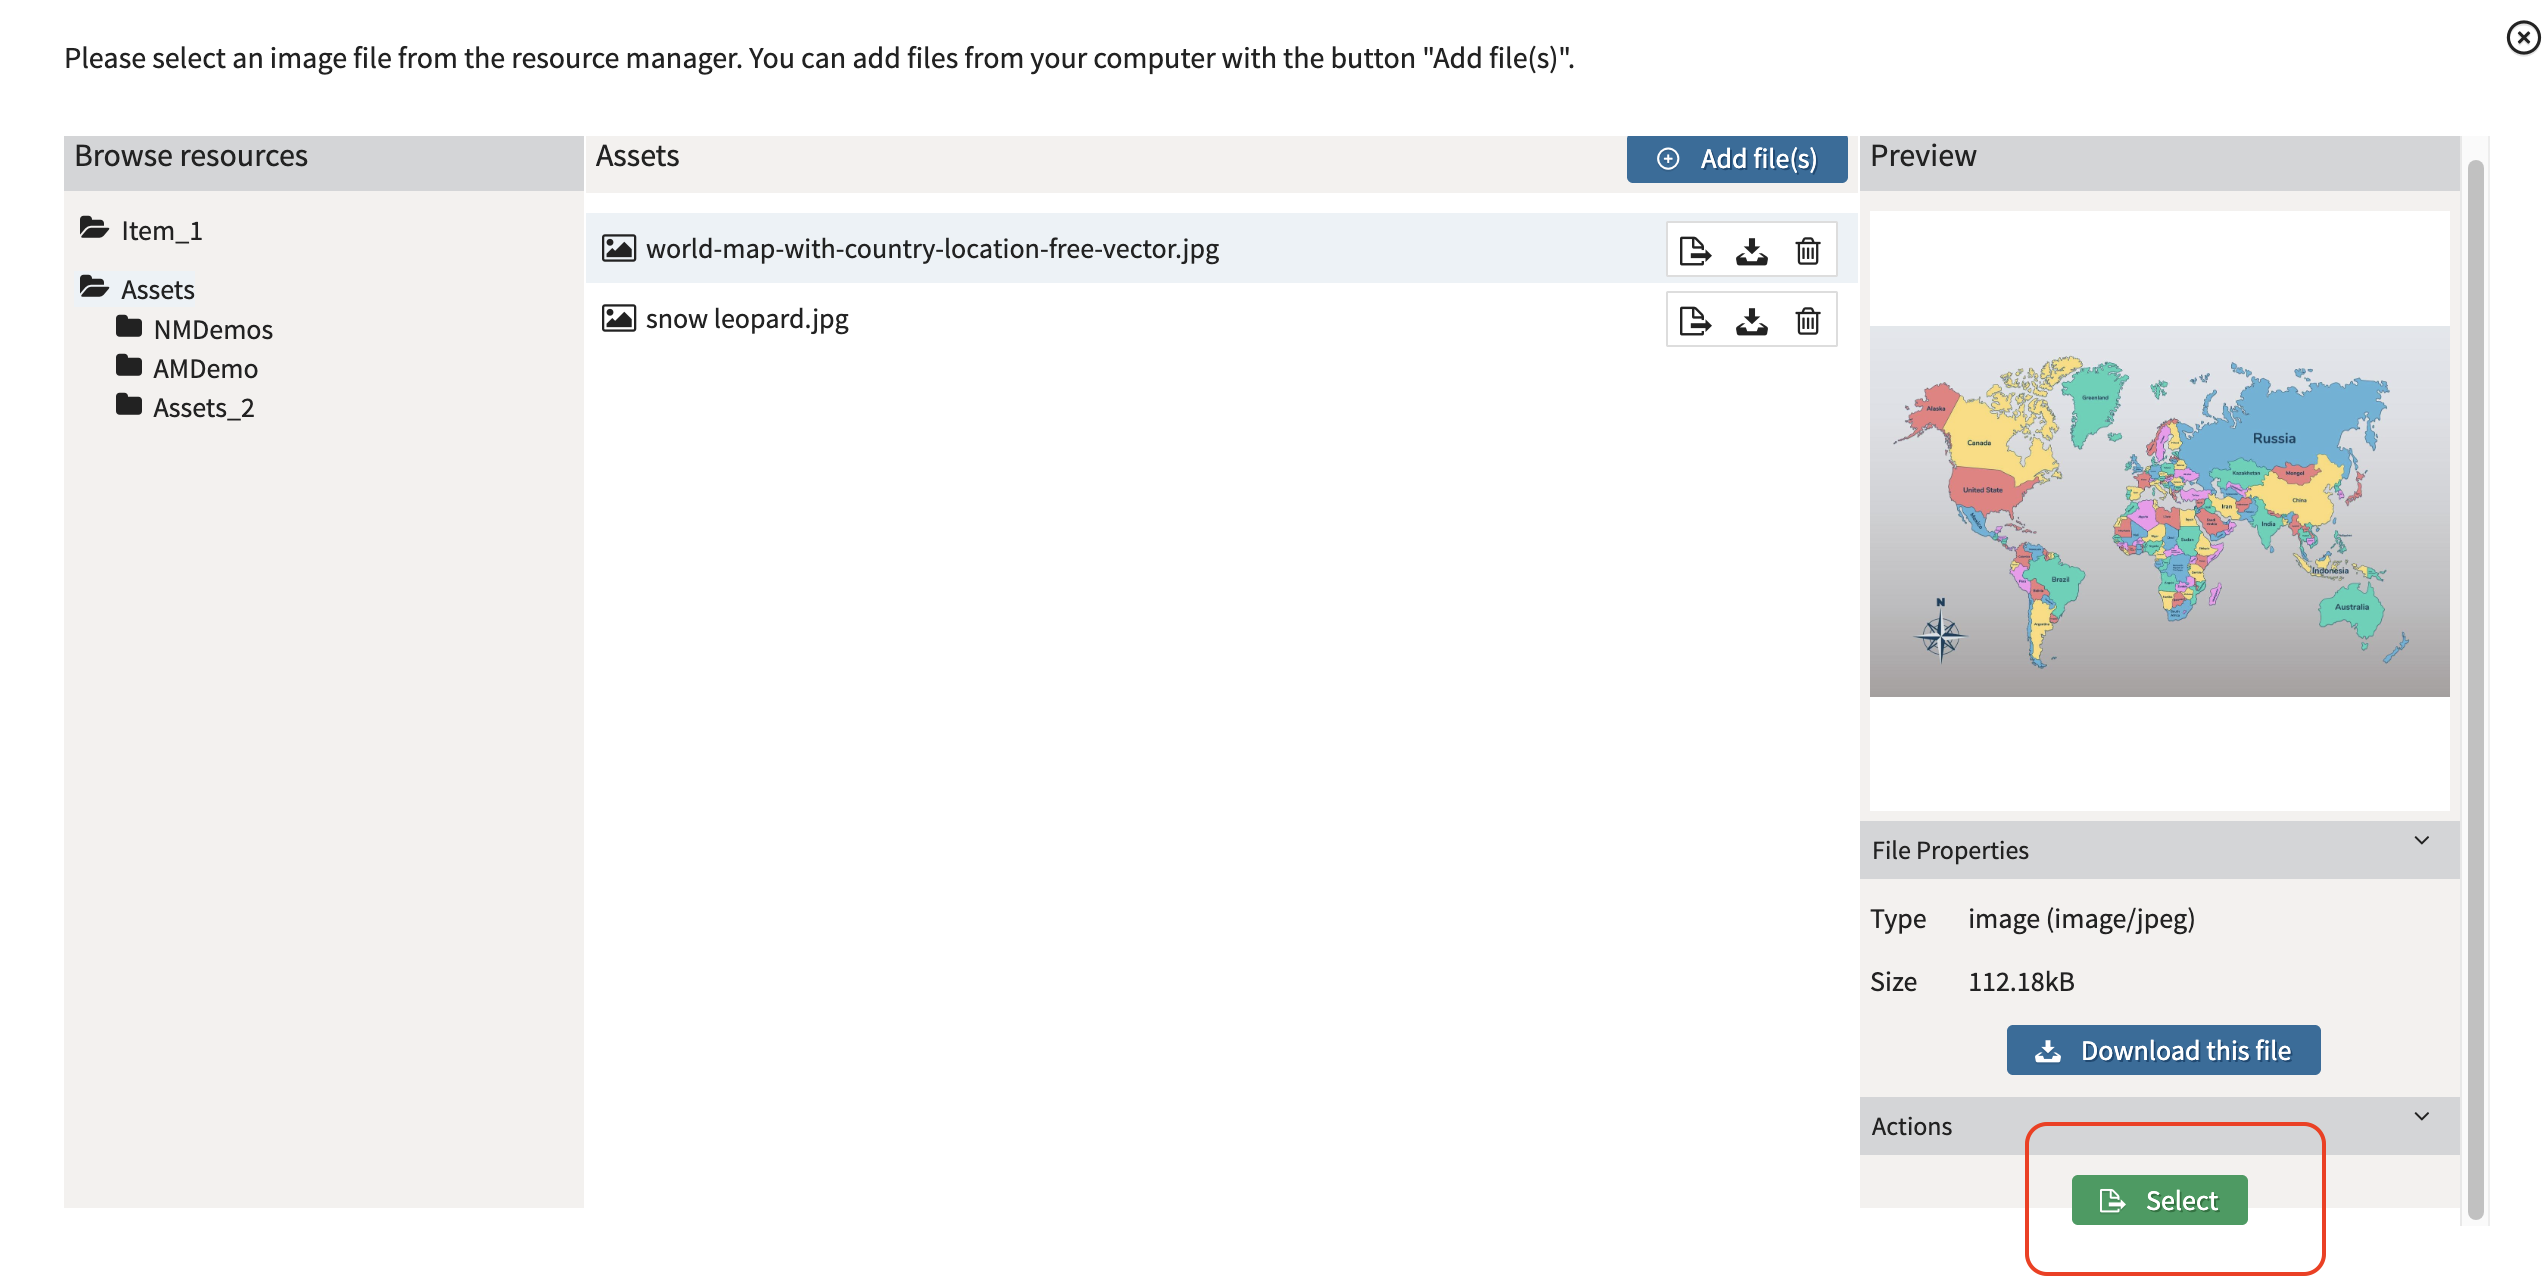
Browse the Asset Manager folders and select the folder containing the asset.
-
Use the preview panel to confirm you have selected the correct file.
-
Click Select to insert the asset into the item.
4. Upload a new asset while authoring
-
Click an asset toolbar icon (see above) to open the Asset Manager.
-
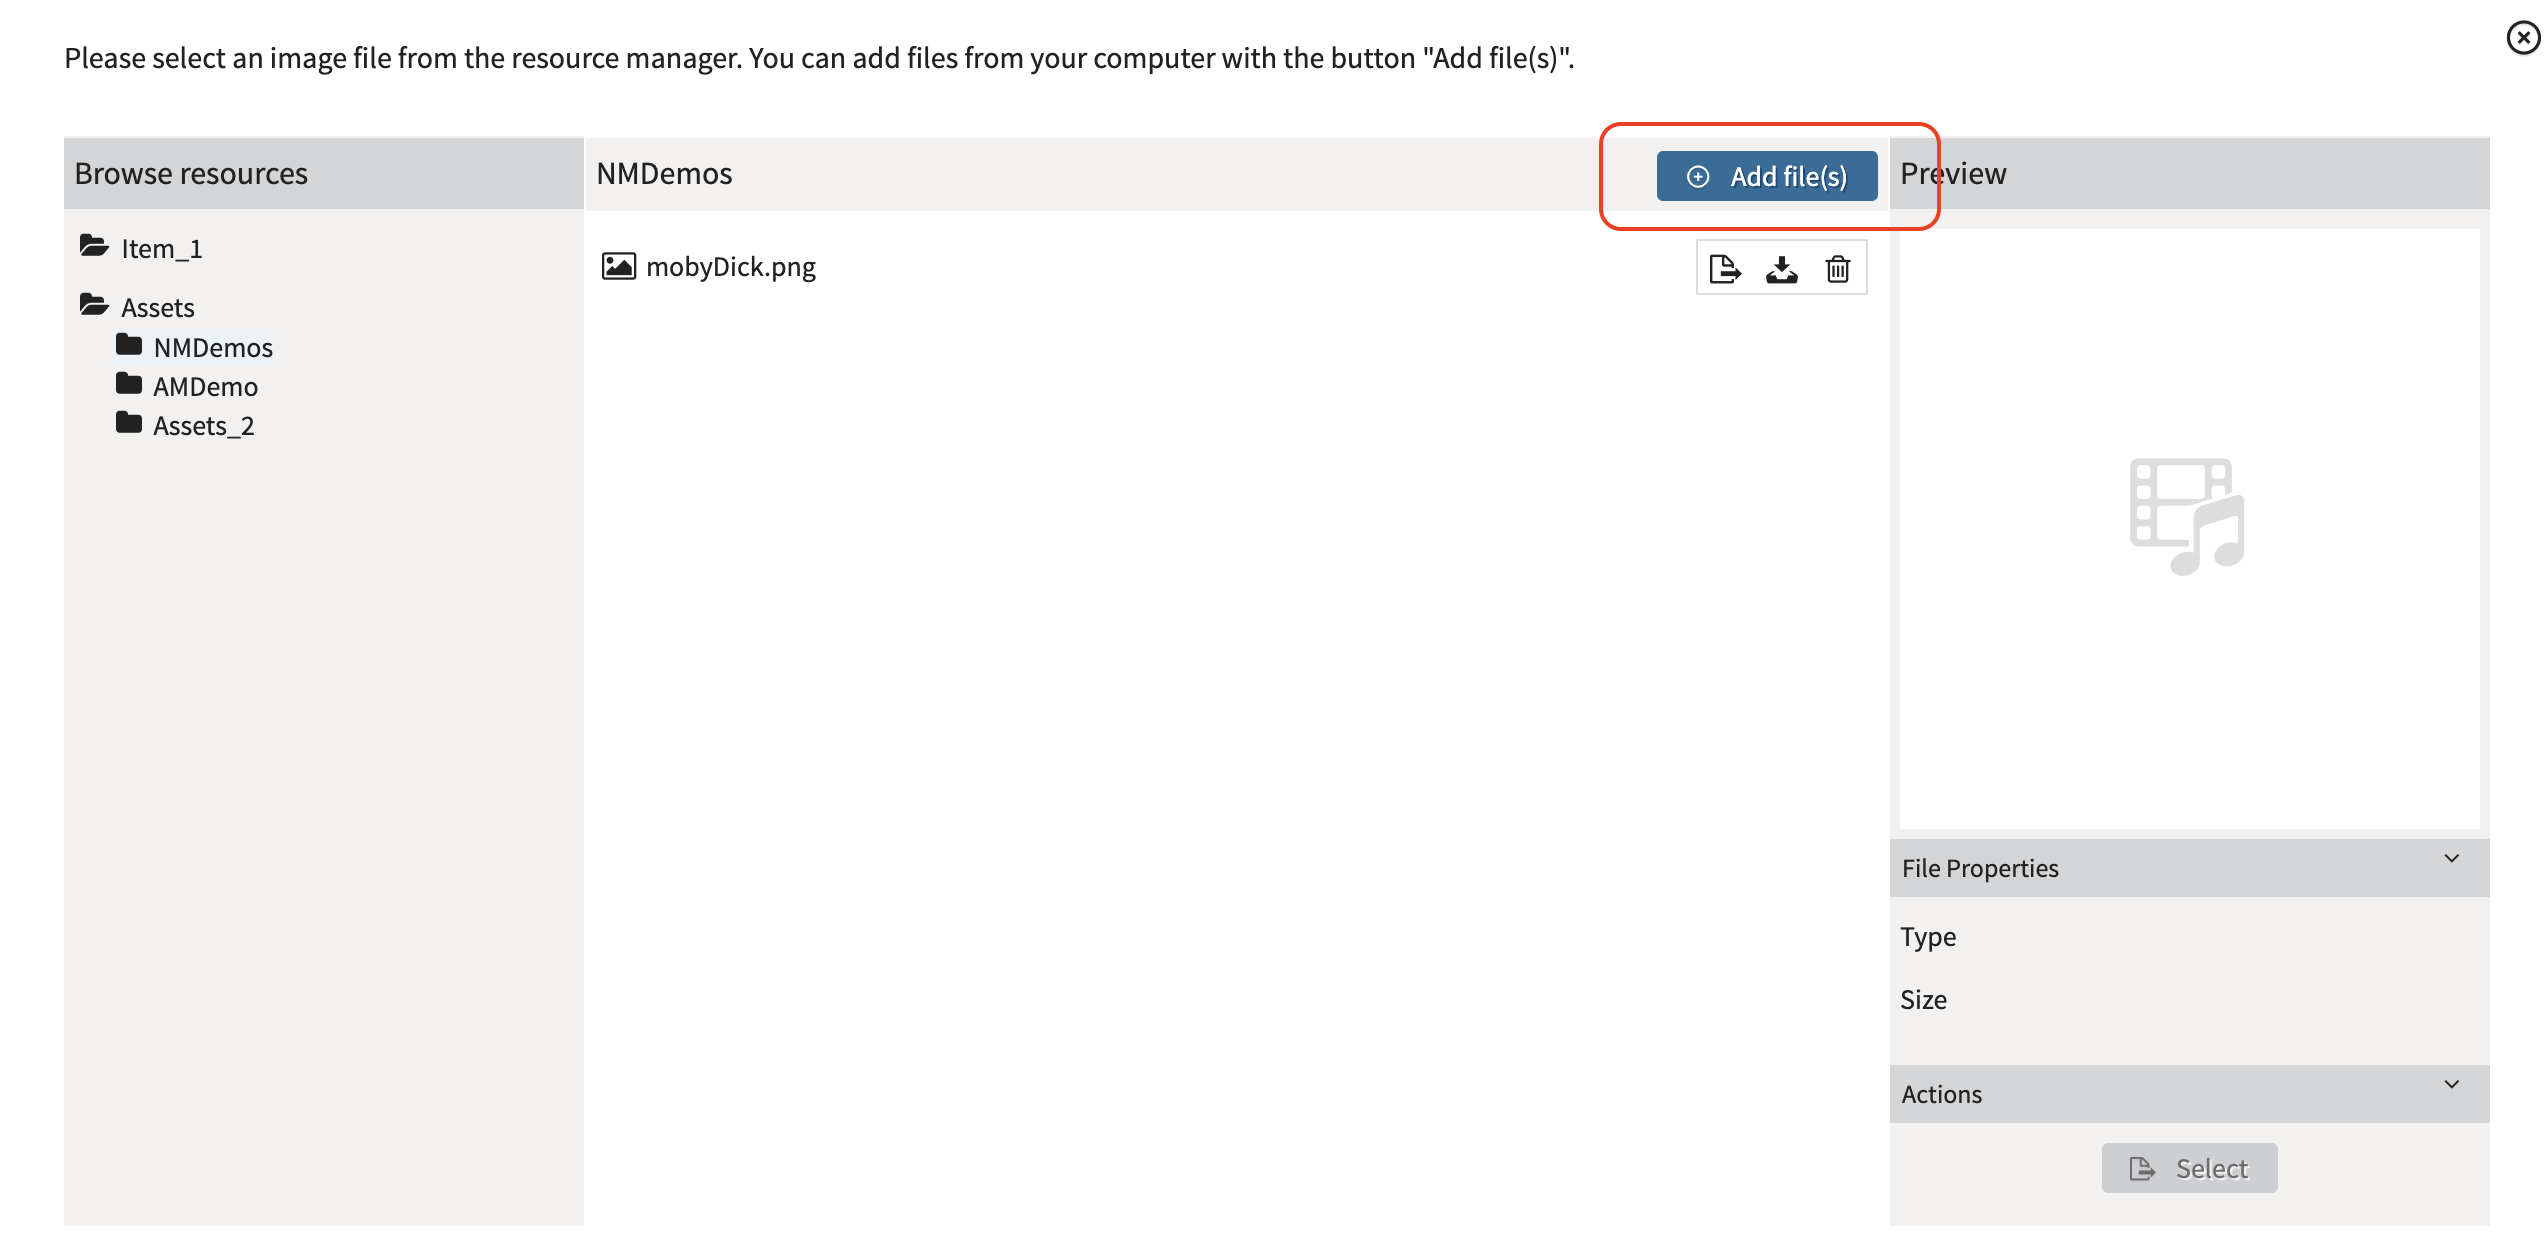
Choose a folder in the Asset Manager where the file will be stored.
-
Select Add file(s).
-
Click Browse and locate the file on your computer.
-
Select Upload.
-
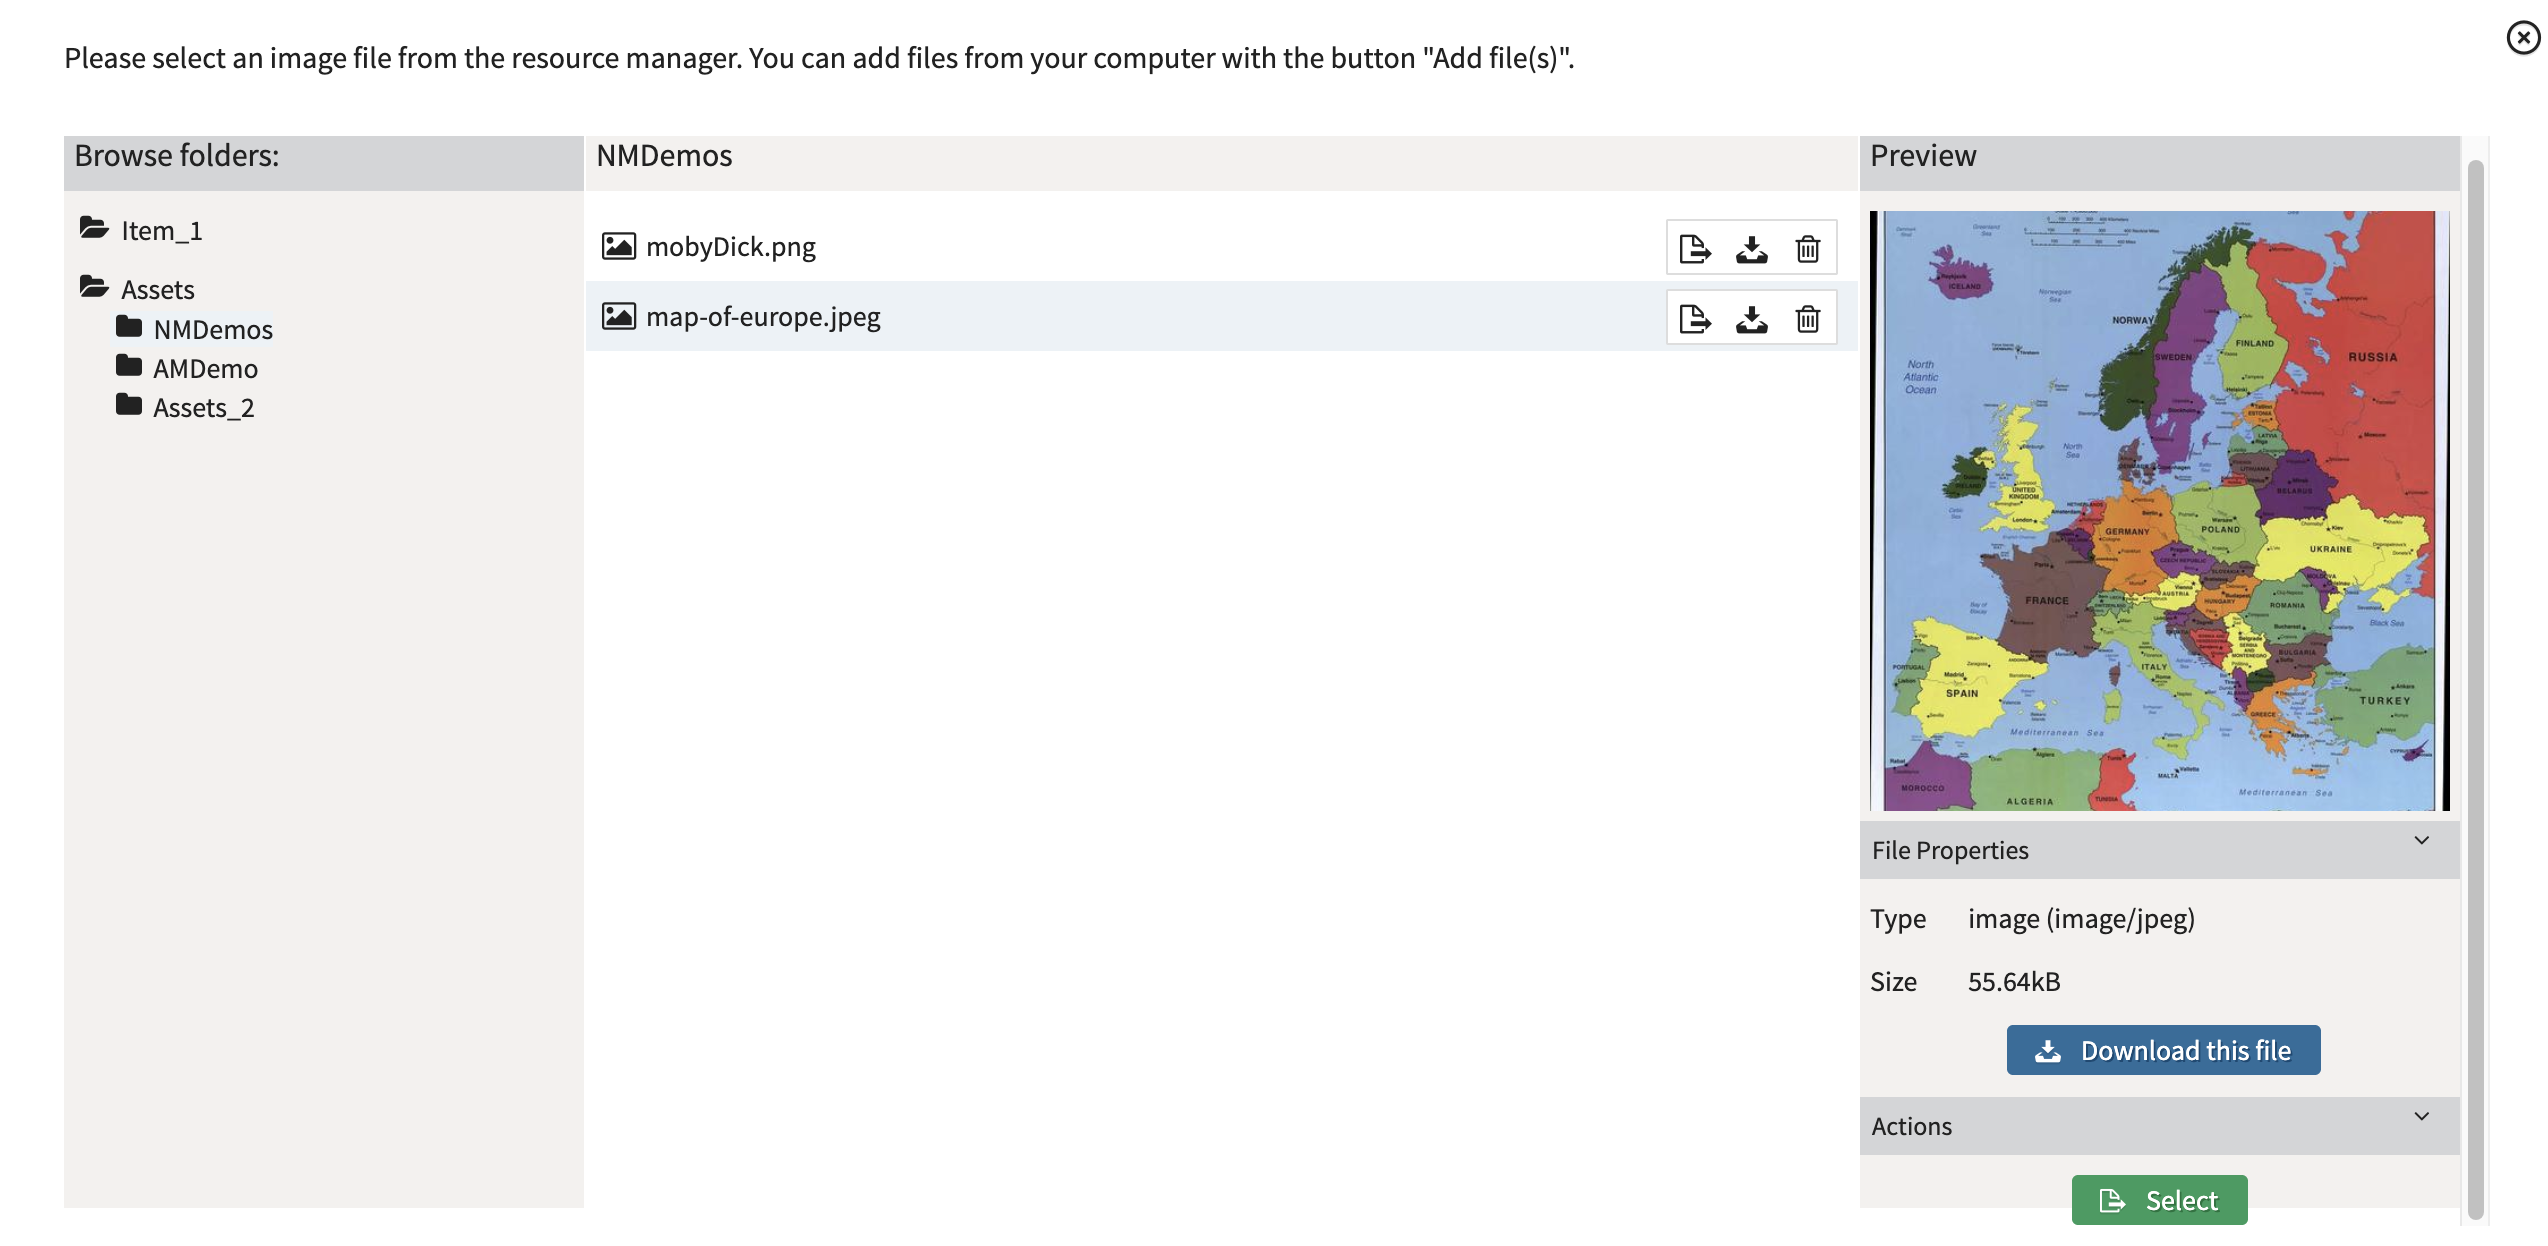
Once the file is uploaded, select it in the list.
-
Click Select to insert the uploaded asset into the item.
5. Configure asset properties
-
Select the inserted asset in the item.
-
Use the Properties panel to adjust settings as needed:
-
Alt Text for accessibility
-
Size
-
Responsive Mode to allow automatic resizing based on available screen space
-
Position (Inline, Left, Right, or Center)
-
For audio files, you can enable Compact Appearance to display only the Play button.
Additional Information
Supported Asset Formats
|
Asset Type |
Supported Formats |
|---|---|
|
Images |
png, jpg, gif, svg, svgz |
|
Audio |
mp3, ogg, vorbis, webm, mpeg, aac, wav |
|
Video |
mp4, avi, ogv, mpeg, ogg, quicktime, webm, x-ms-wmv, x-flv |
|
Passages |
xml |
|
Documents |
|
Asset References and Updates
When you add an asset from the Asset Manager, the item creates a reference to the asset rather than storing a separate copy.
Because only one version of the asset exists in the Asset Manager:
-
Multiple items can use the same asset.
-
Updates to the asset automatically appear in all items that reference it.
-
Duplicate media files can be avoided.
The Asset Manager also supports version history, allowing you to maintain and restore previous versions of assets when needed. Select History for an asset to view which items it is used in.