
Applies to
-
Content developers
Prerequisites
-
A destination folder (class) in which to create the item.
-
Familiarity with the interaction type(s) you want to add.
Purpose
Items are the building blocks of assessments in TAO. They contain interactions that allow test-takers to answer questions or complete tasks. This guide explains how to create an item and add interactions.
Steps
1. Create a new item
-
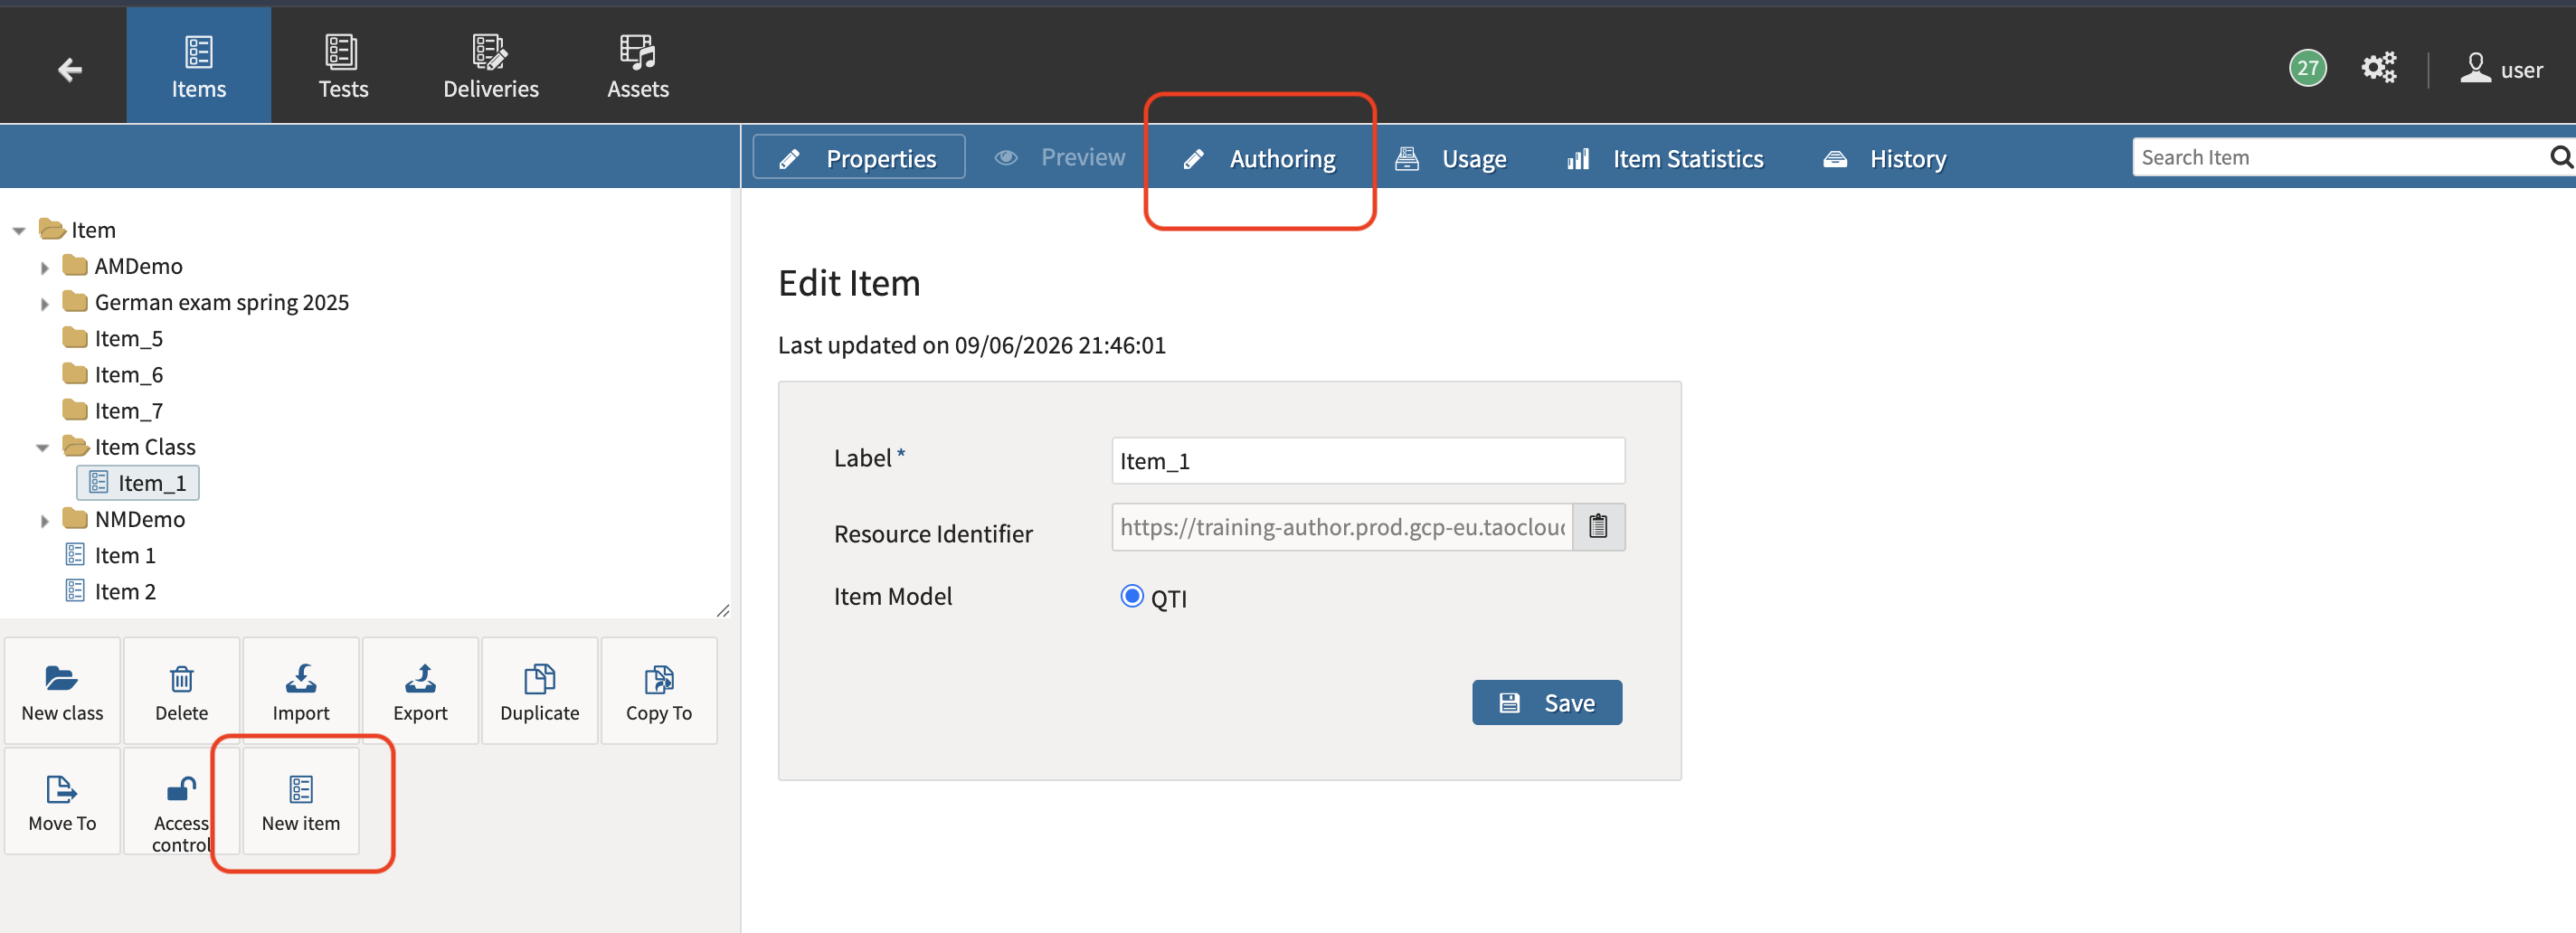
Click Items in the Assessment Builder Bar.
-
Select the folder where you want to create the item.
-
Click New Item in the button bank below the library.
-
Enter a name for the item in the Edit Item dialog box.
-
Click Save.
To create a new folder (class), click New Class, select a location in the library, and create the folder before creating the item.
2. Open item authoring
-
With the item selected in the library, click Authoring in the Action Bar.
3. Add one or more interactions to the item
-
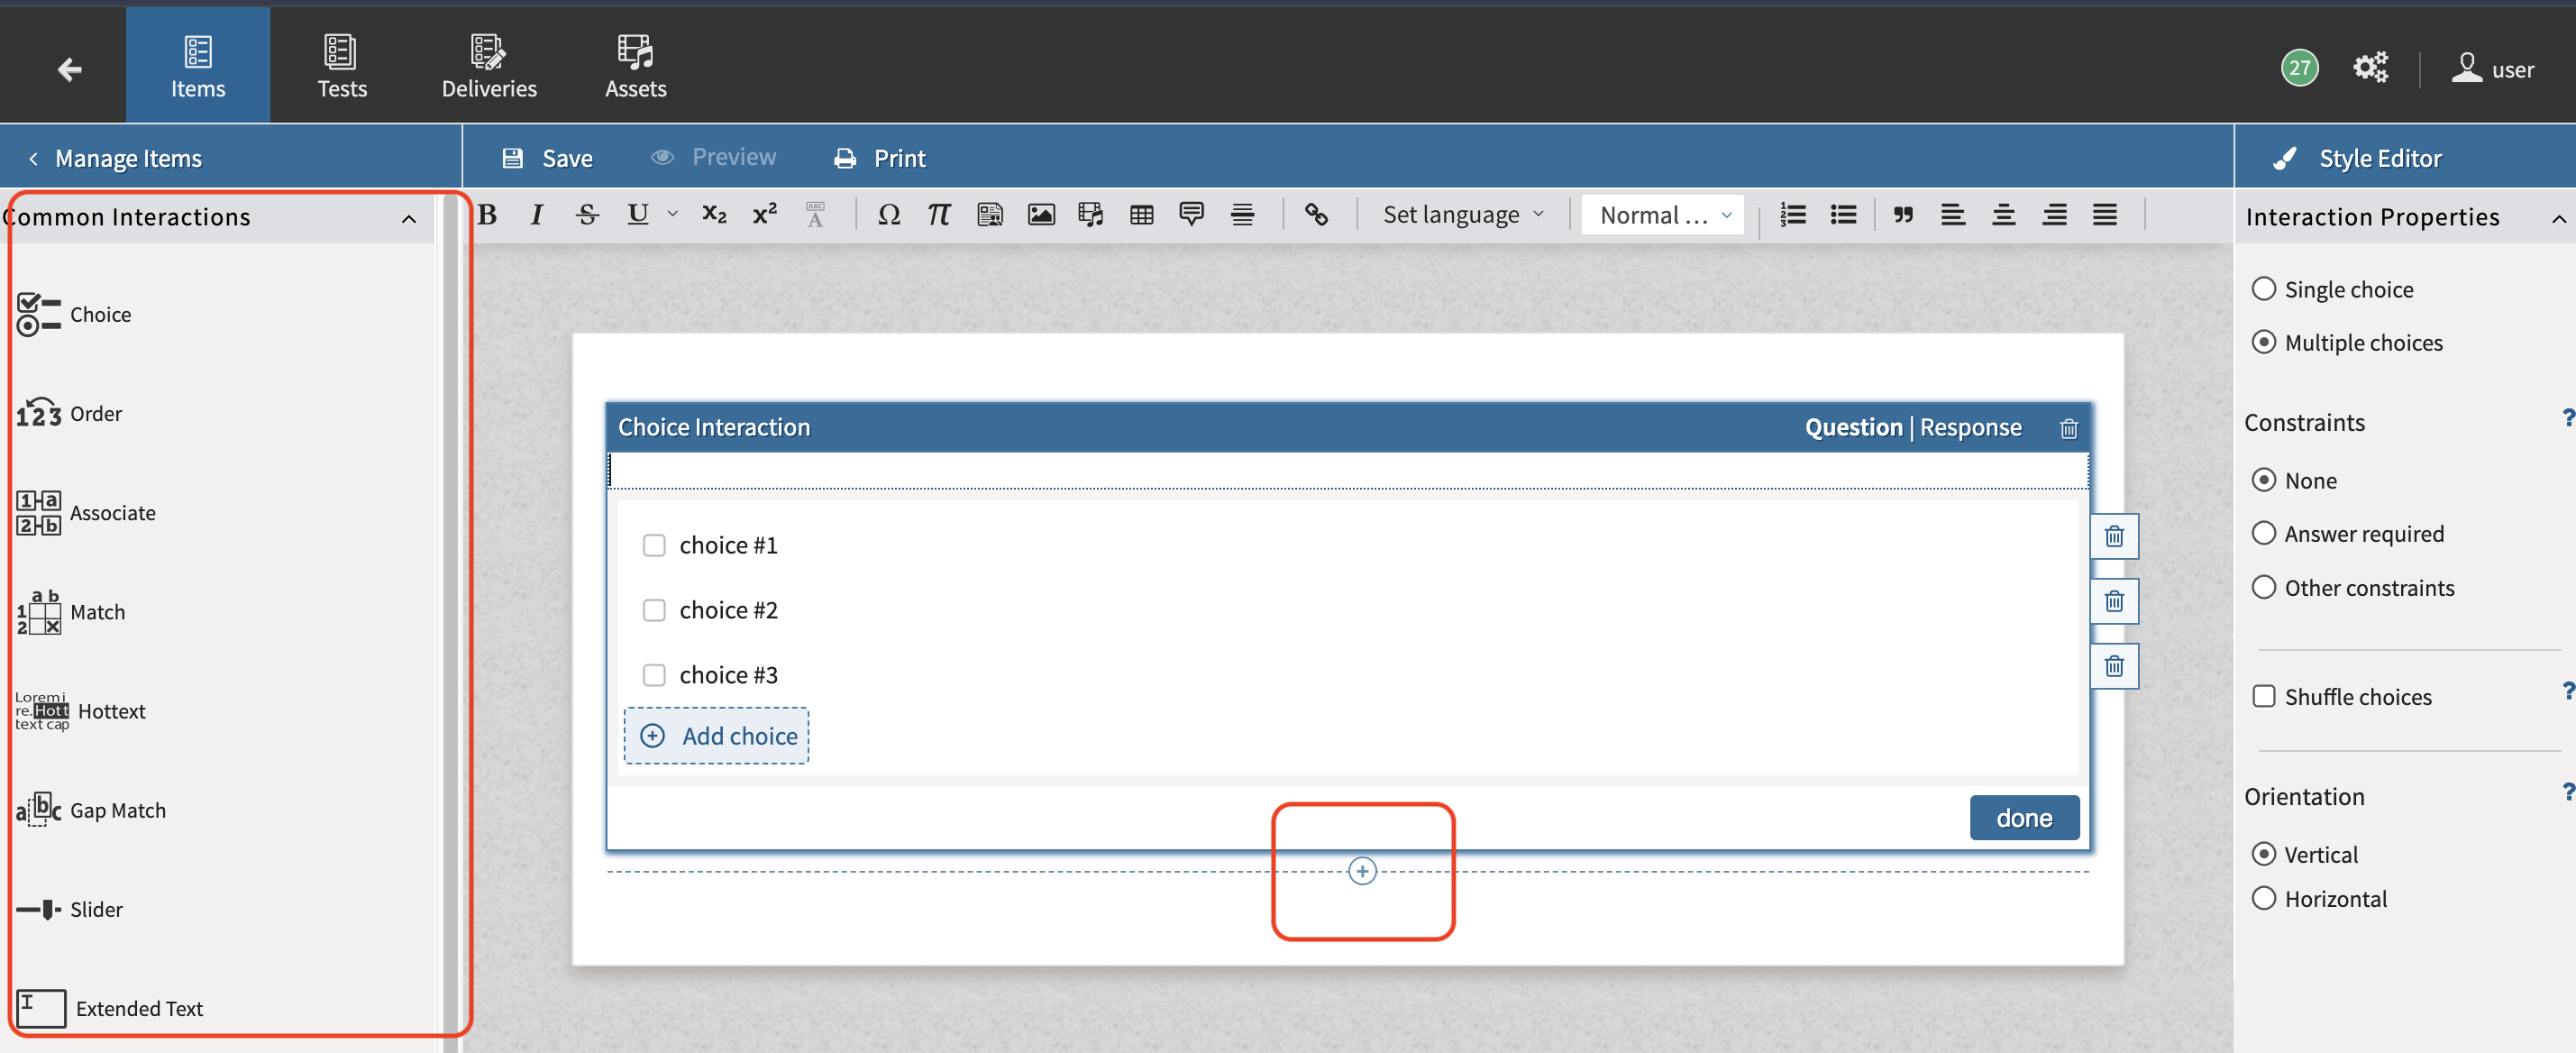
Locate the interaction catalogs in the Interaction Library.
-
Expand the desired interaction category:
|
Interaction Type |
Description |
|---|---|
|
Common Interactions |
Standard assessment interactions commonly used in tests. |
|
Inline Interactions |
Text-based interactions embedded within content. |
|
Graphic Interactions |
Interactions that use images or graphical elements. |
|
Portable Custom Interactions (PCI) |
Custom interactions developed for specific assessment requirements. |
-
Drag an interaction from the library onto the canvas.
-
Configure the interaction as required.
An item can contain a single interaction or multiple interactions.
4. (Optional) Add additional interactions
-
Drag another interaction from the Interaction Library onto the canvas.
-
Place it above, below, or beside an existing interaction.
-
Configure the new interaction.
-
Repeat as needed.
Alternatively, click the + icon beneath an existing interaction to add another interaction while maintaining the current layout.
5. Add Supporting Content
-
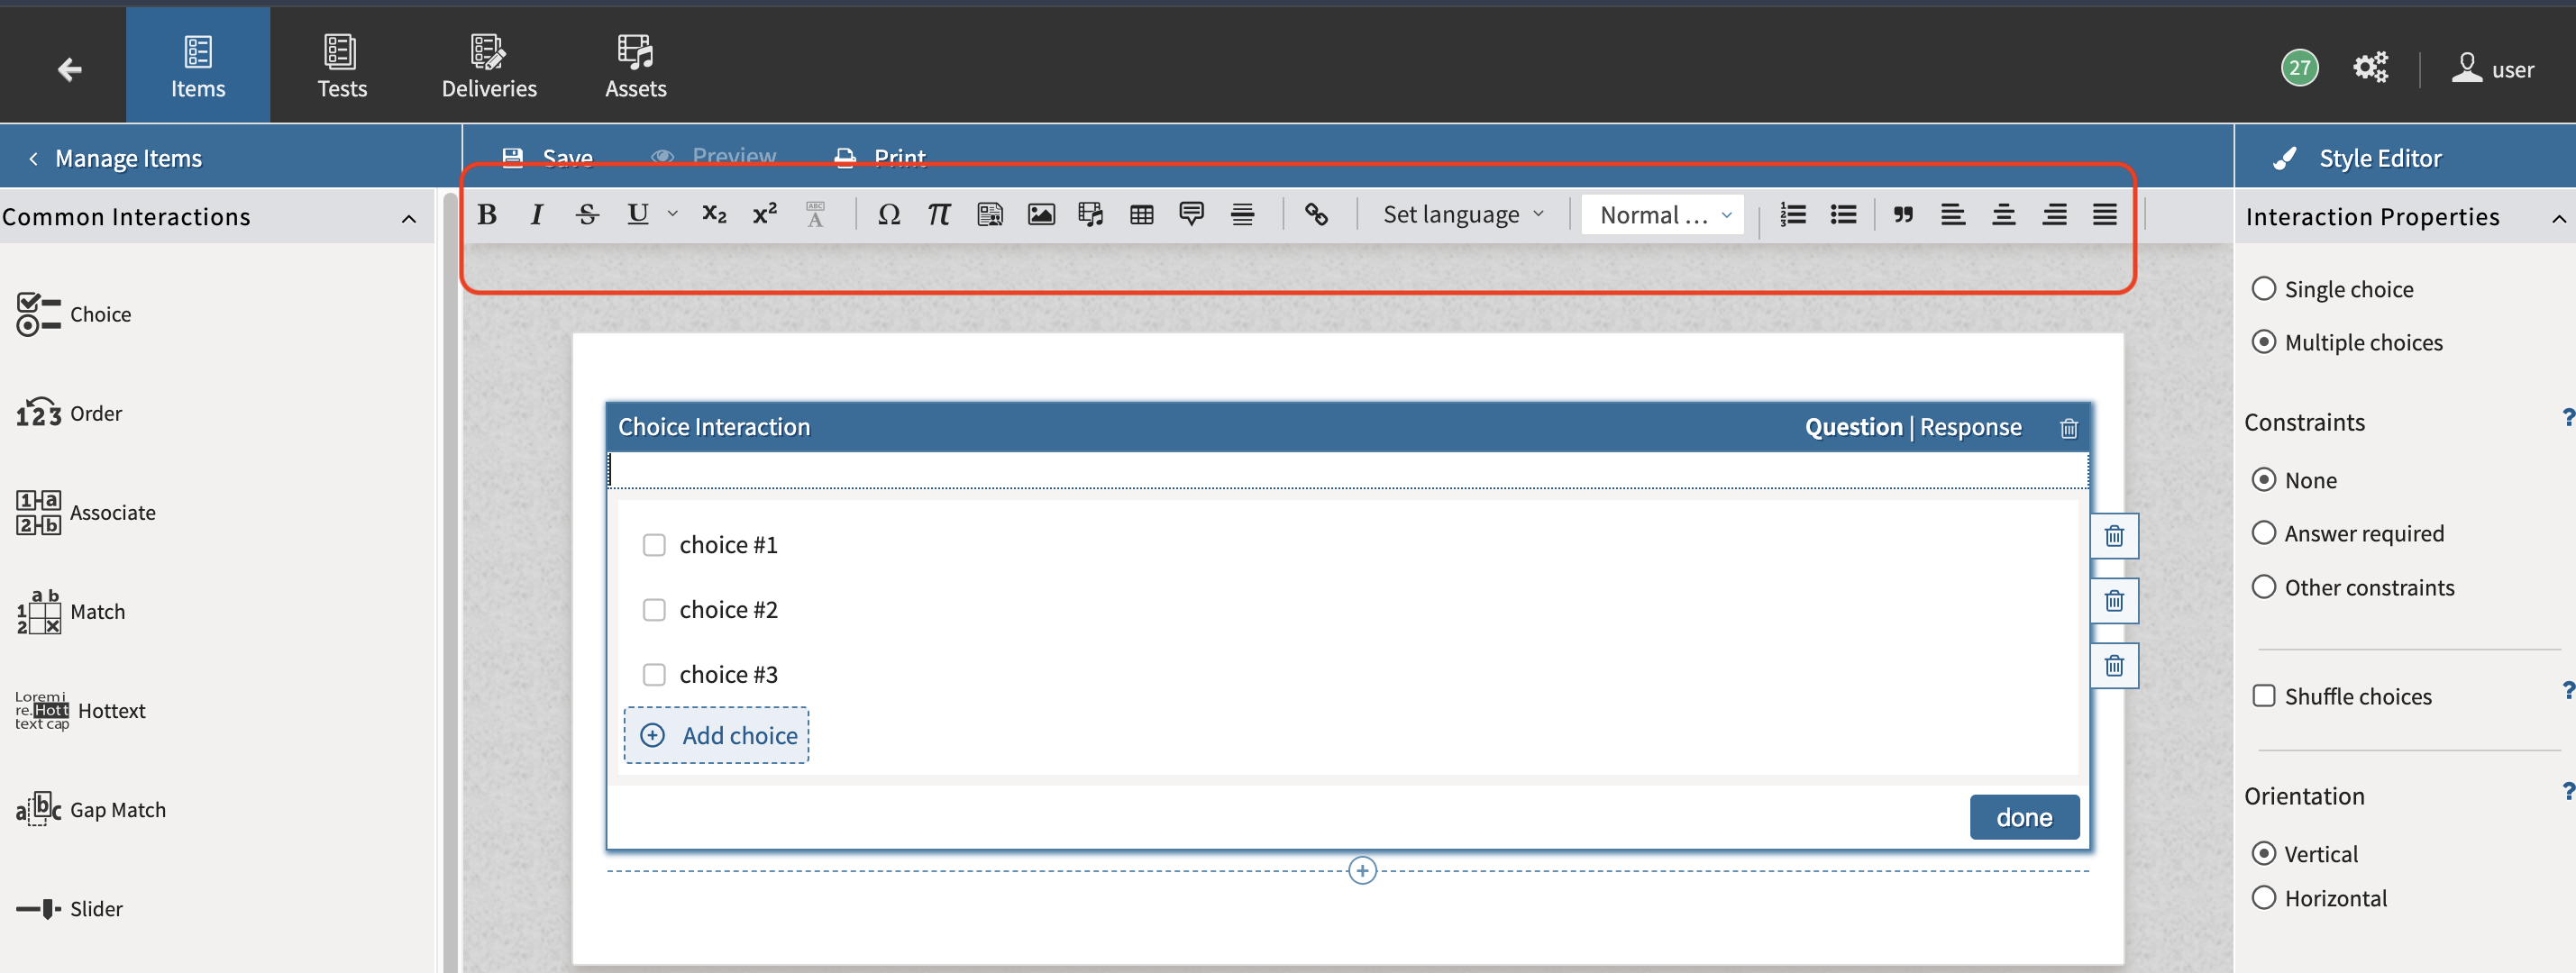
Insert any required text, images, media, or instructional content.
-
The icons to add supporting content are located in the toolbar. To view the toolbar, select within the interaction.
-
6. Preview the Item
-
Click Preview in the Action Bar.
-
Verify that interactions, content, and layout display correctly.
-
Check the appearance on different screen sizes if applicable.
7. Save and maintain the item
-
Save any final changes.
-
Move, copy, or duplicate the item as needed using the available item management tools.