
Applies to
Content developers
Prerequisites
Before completing this task:
-
Have one or more completed items available in the Item Library.
-
Understand the basic structure of the test you want to create.
Purpose
This guide explains how to create a basic test in TAO by assembling existing items into an assessment. Creating a test allows you to define the order of questions, organize content into sections, and prepare an assessment for delivery to test-takers.
Steps
1. Open the Tests module
-
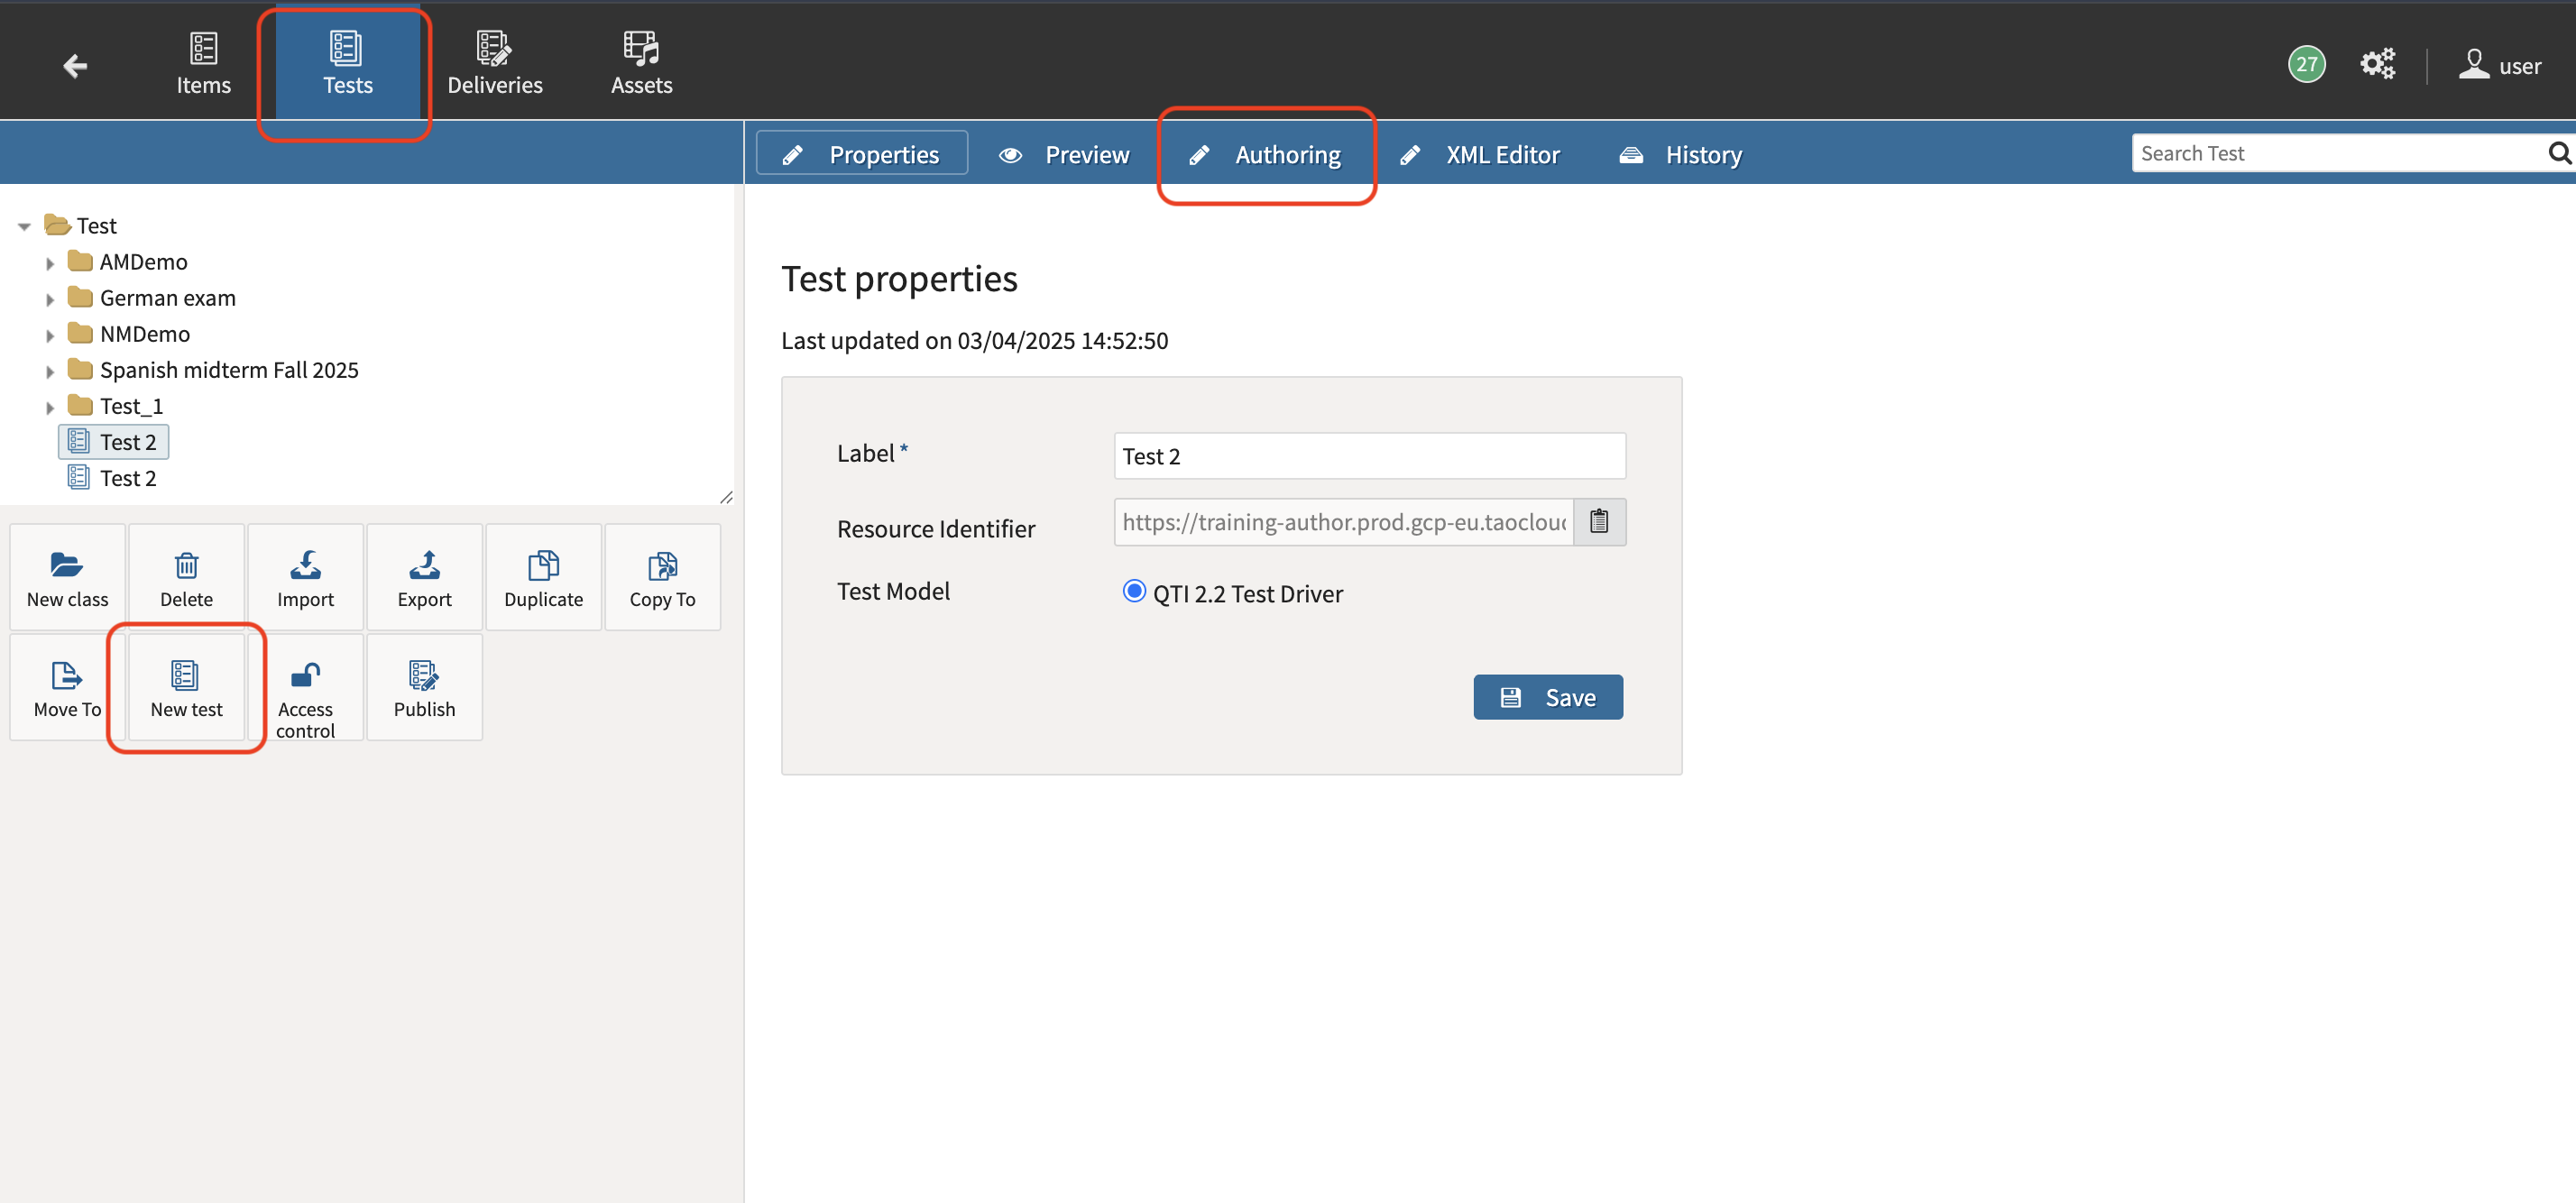
Select the Tests icon in the Assessment Builder Bar.
-
Review the Test Library displayed on the left side of the screen.
-
Navigate to the folder where you want to create the new test.
2. Create a new test
-
Select the destination folder in the Test Library.
-
Click New Test.
-
Enter a name for the test.
-
Click Save.
3. Open the test authoring view
-
Select the newly created test.
-
Click Authoring in the Action Bar.
4. Organize the test structure
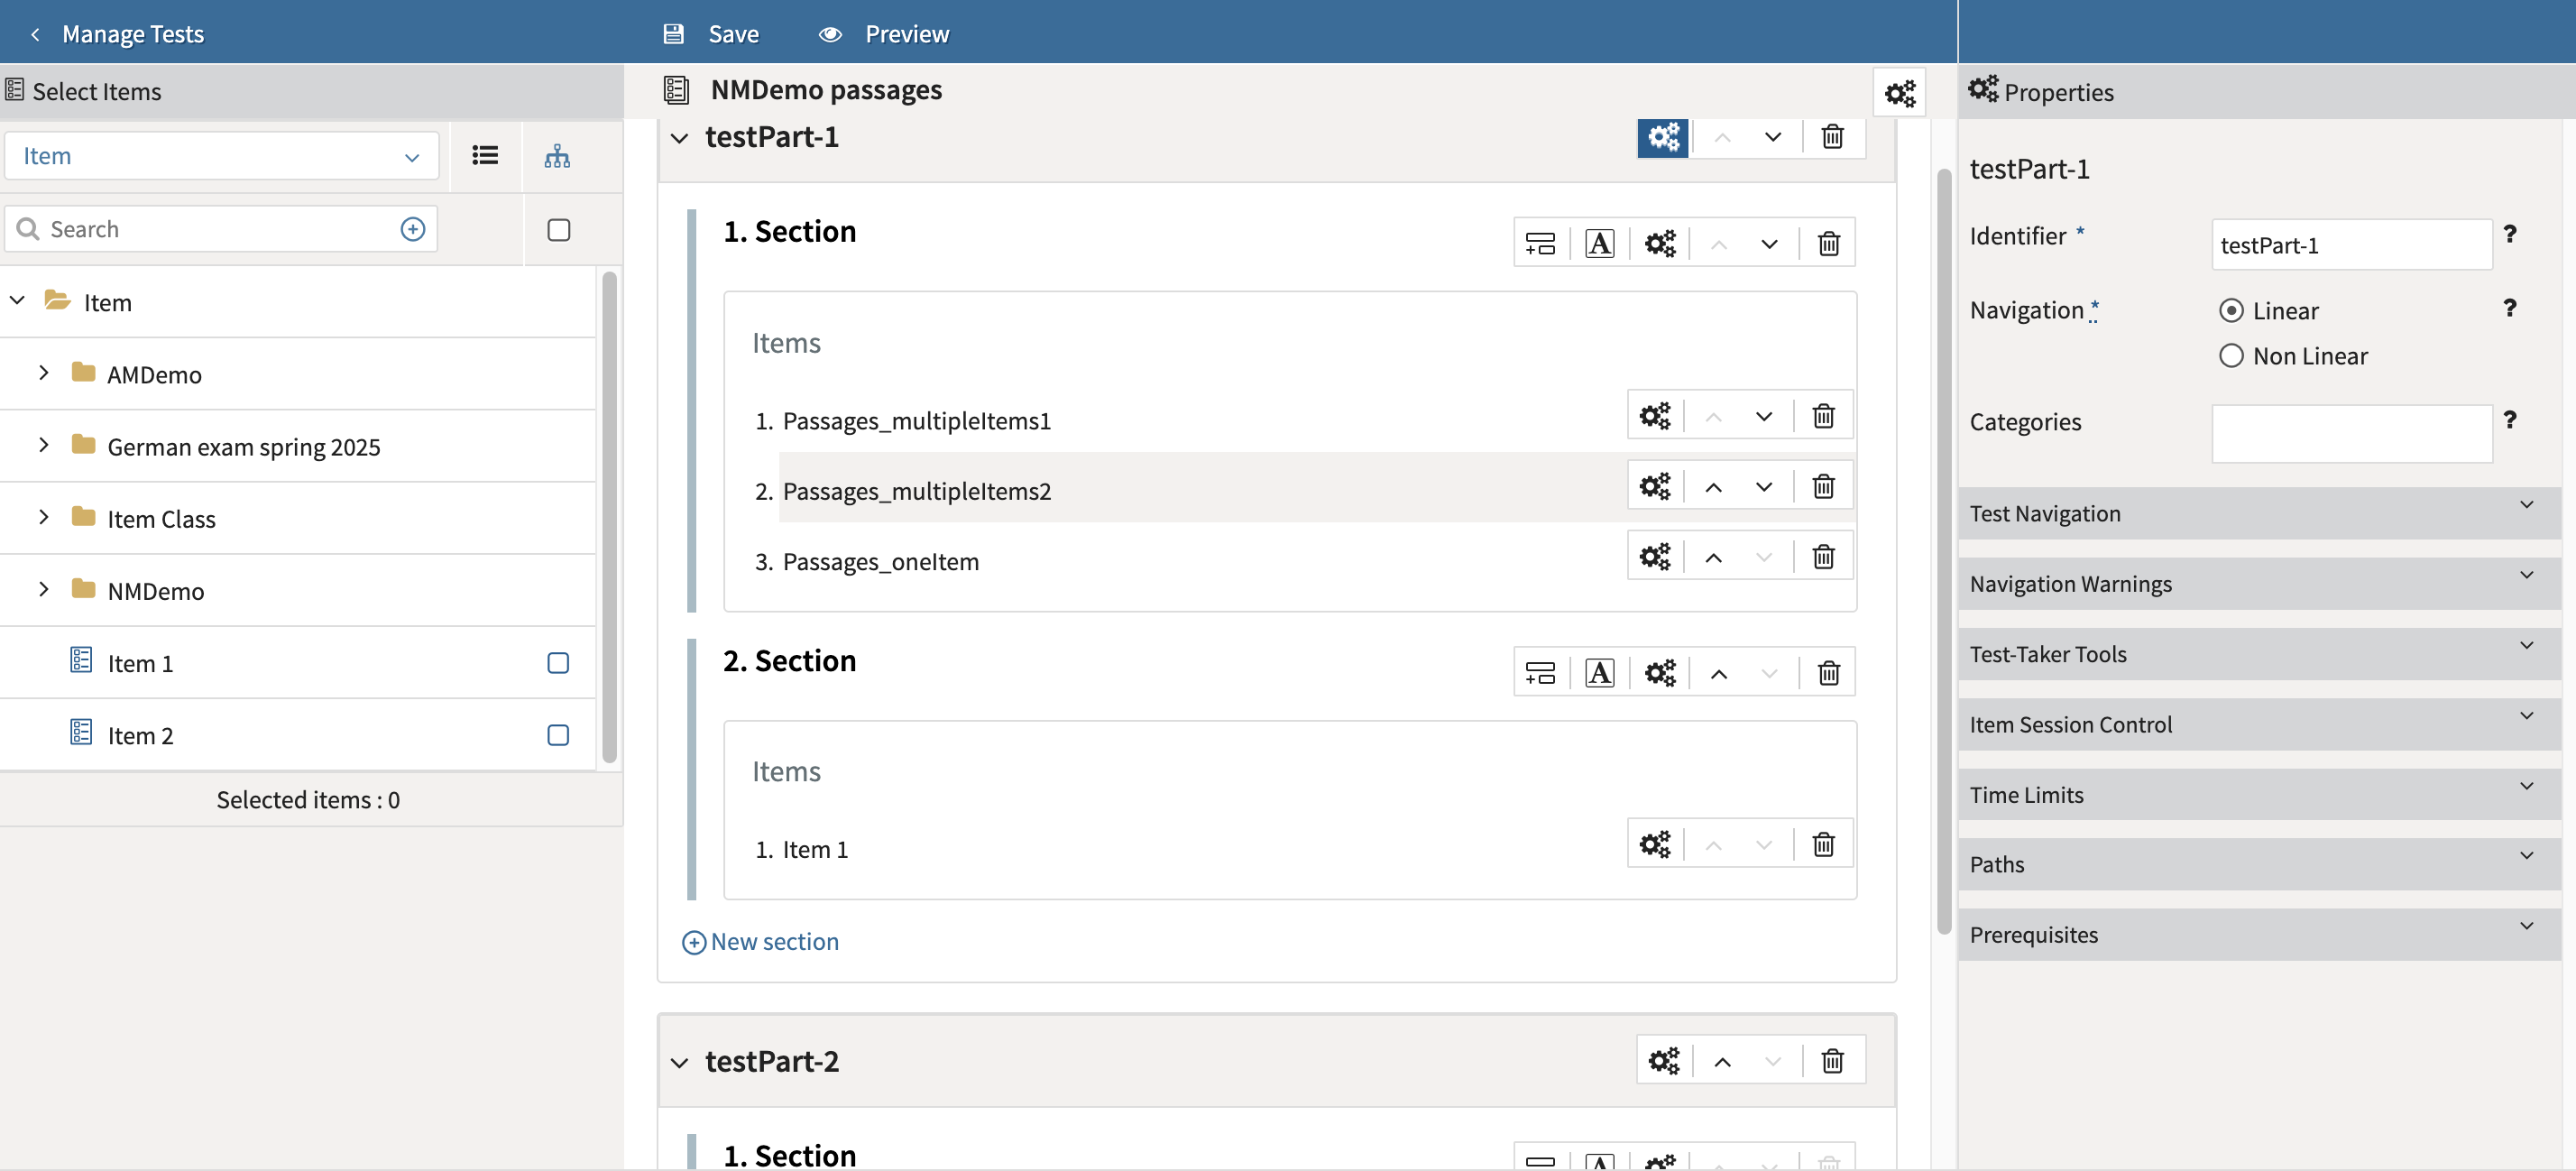
Tests can either have a flat structure (all items added to one test Part) or be organized into Test Parts and Sections:
-
Test Parts are the highest level of organization.
-
Sections are subdivisions within test parts.
To add structure:
-
Click New Section to create an additional section.
-
Click New Test Part to create an additional test part.
If no additional structure is added, all items will be placed in the default Part 1, Section 1.
5. Search for items
-
Use the Item Library on the left side of the screen.
-
Select Item from the drop-down menu above the library.
-
Browse folders containing available items.
You can locate items using one of the following methods:
Basic search
-
Open the appropriate item folder.
-
Enter a keyword in the search box.
-
Review matching results.
Advanced search
-
Click the + icon next to the search box.
-
Select search criteria from the available metadata fields.
6. Add items to the test
-
Select the item you want to include.
-
Click Add selected item(s) here.
-
Repeat for all required items.
Recommended: Add items in the order they should appear in the delivered assessment whenever possible.
7. Reorder or remove items/sections
To modify the item sequence:
-
Use the Up and Down arrows to move items or sections within the test.
-
Select the Delete icon to remove unwanted items/sections.
8. Edit the properties.
-
Select the cog wheels icon to view the configuration properties for the test, test Parts, Sections, or individual Items.
-
Configure the test’s settings:
|
Level |
Configurable properties |
|---|---|
|
Test (entire) |
|
|
Part |
|
|
Section |
|
|
Item |
|
9. Save the test
-
Save your work regularly while building the test.
-
Perform a final save after all items have been added and organized.
Next Steps
After creating the test, you must create a delivery to make the test available for use in a session.