Providing test-level instant feedback (rubric blocks)
Test-takers often want direct feedback about how well they have done in their assessment. It is possible to configure a test to offer them instant test-level feedback, or rubric blocks.
Adding a rubric block to a test Section
Test-level instant feedback is configured in the form of rubric blocks, which are added to test Sections. The instant feedback defined by the rubric blocks will display for all items added to the section where it is configured.
Click on Tests from the Assessment Builder Bar, and select your test from the Library.
Click on Authoring in the Action Bar. This brings you to the test editor.
Create your test by adding items to test Parts and Sections.
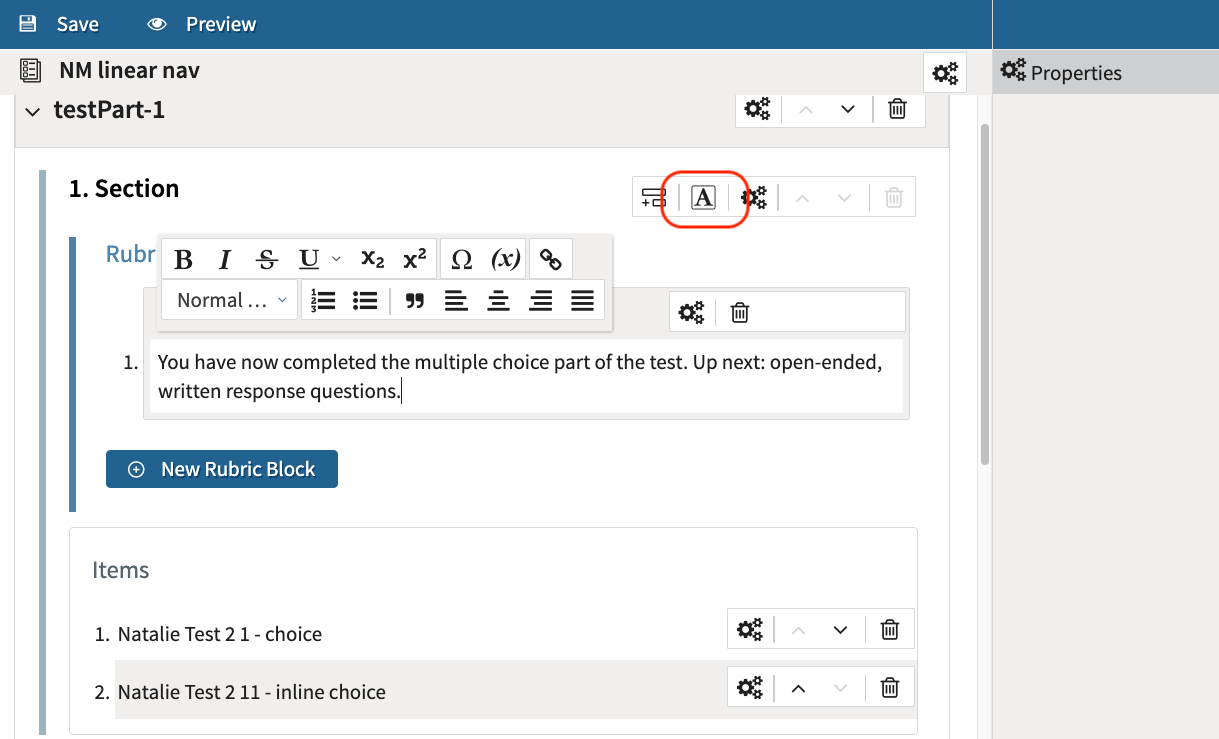
Click on the A icon to the right of a section title. This adds a rubric block to the section.
Once you have added a rubric block, a text box will appear with formatting options. Enter the text (and any other elements) in this box.
There are two methods for configuring rubric blocks:
Without constraints: In this case, the feedback block does not need to be “activated” by the test taker meeting predetermined conditions (such as Pass/Fail). With this configuration, the rubric block is displayed for everyone who completes the section.
With constraints/conditions: This is when the rubric block needs to be “activated” as a feedback block; conditions need to be defined for the test taker to meet, and the system decides which feedback to display (or not).
For more information on configuring rubric blocks according to these methods, see the sections below.
Configuring a rubric block with no conditions
Configuring a rubric block with no conditions means that the rubric block will display the same feedback for every test taker who finishes the Section. For example, if a test contains two sections on different topics, the test taker could (after completing the first section) view a rubric block explaining what the next section will cover.

Configuring a rubric block with conditions
You can provide rubric blocks as a form of feedback based on how a test taker performed in a section. This configuration occurs after a rubric block is marked as “activated”.
1. Configure your test for Outcome Processing.
Before you can provide test-takers with instant feedback based on scoring conditions, you need to configure the method of scoring for your test. To do this, complete the following steps:
Click on the settings icon to the right of test name at the top. This is depicted by three interlocking cogs.
Open the Scoring panel, and select either Total Score or Cut score in the drop-down menu of the Outcome processing box.
Total Score: You can view the total score, as well as any individual category or weights, in the Maximum number of achievable points box in test properties. To view the total score for any individual Sections:
Add a Category for each Section in the Test (Section properties → Categories).
In the Test properties, under Scoring: check the box for Category Score. The table will display each Section’s maximum score.
Cut Score: Define a Cut score for your test.
This Cut score needs to be a ratio (between 0.0 and 1.0) and is computed by dividing the maximum score by the total score. If Category score is checked, the same cut score will be applied to all categories (set to individual items).
When a Cut score has been defined, expand Outcome declarations to regenerate the Outcome Variables and ensure that they correspond to the settings applied.
The full set of Outcome variables and their descriptions can be found in the section Configuring Scoring for Tests.
2. Write the feedback captions.
Click on the A icon to the right of a section title. This adds a rubric block to the section.
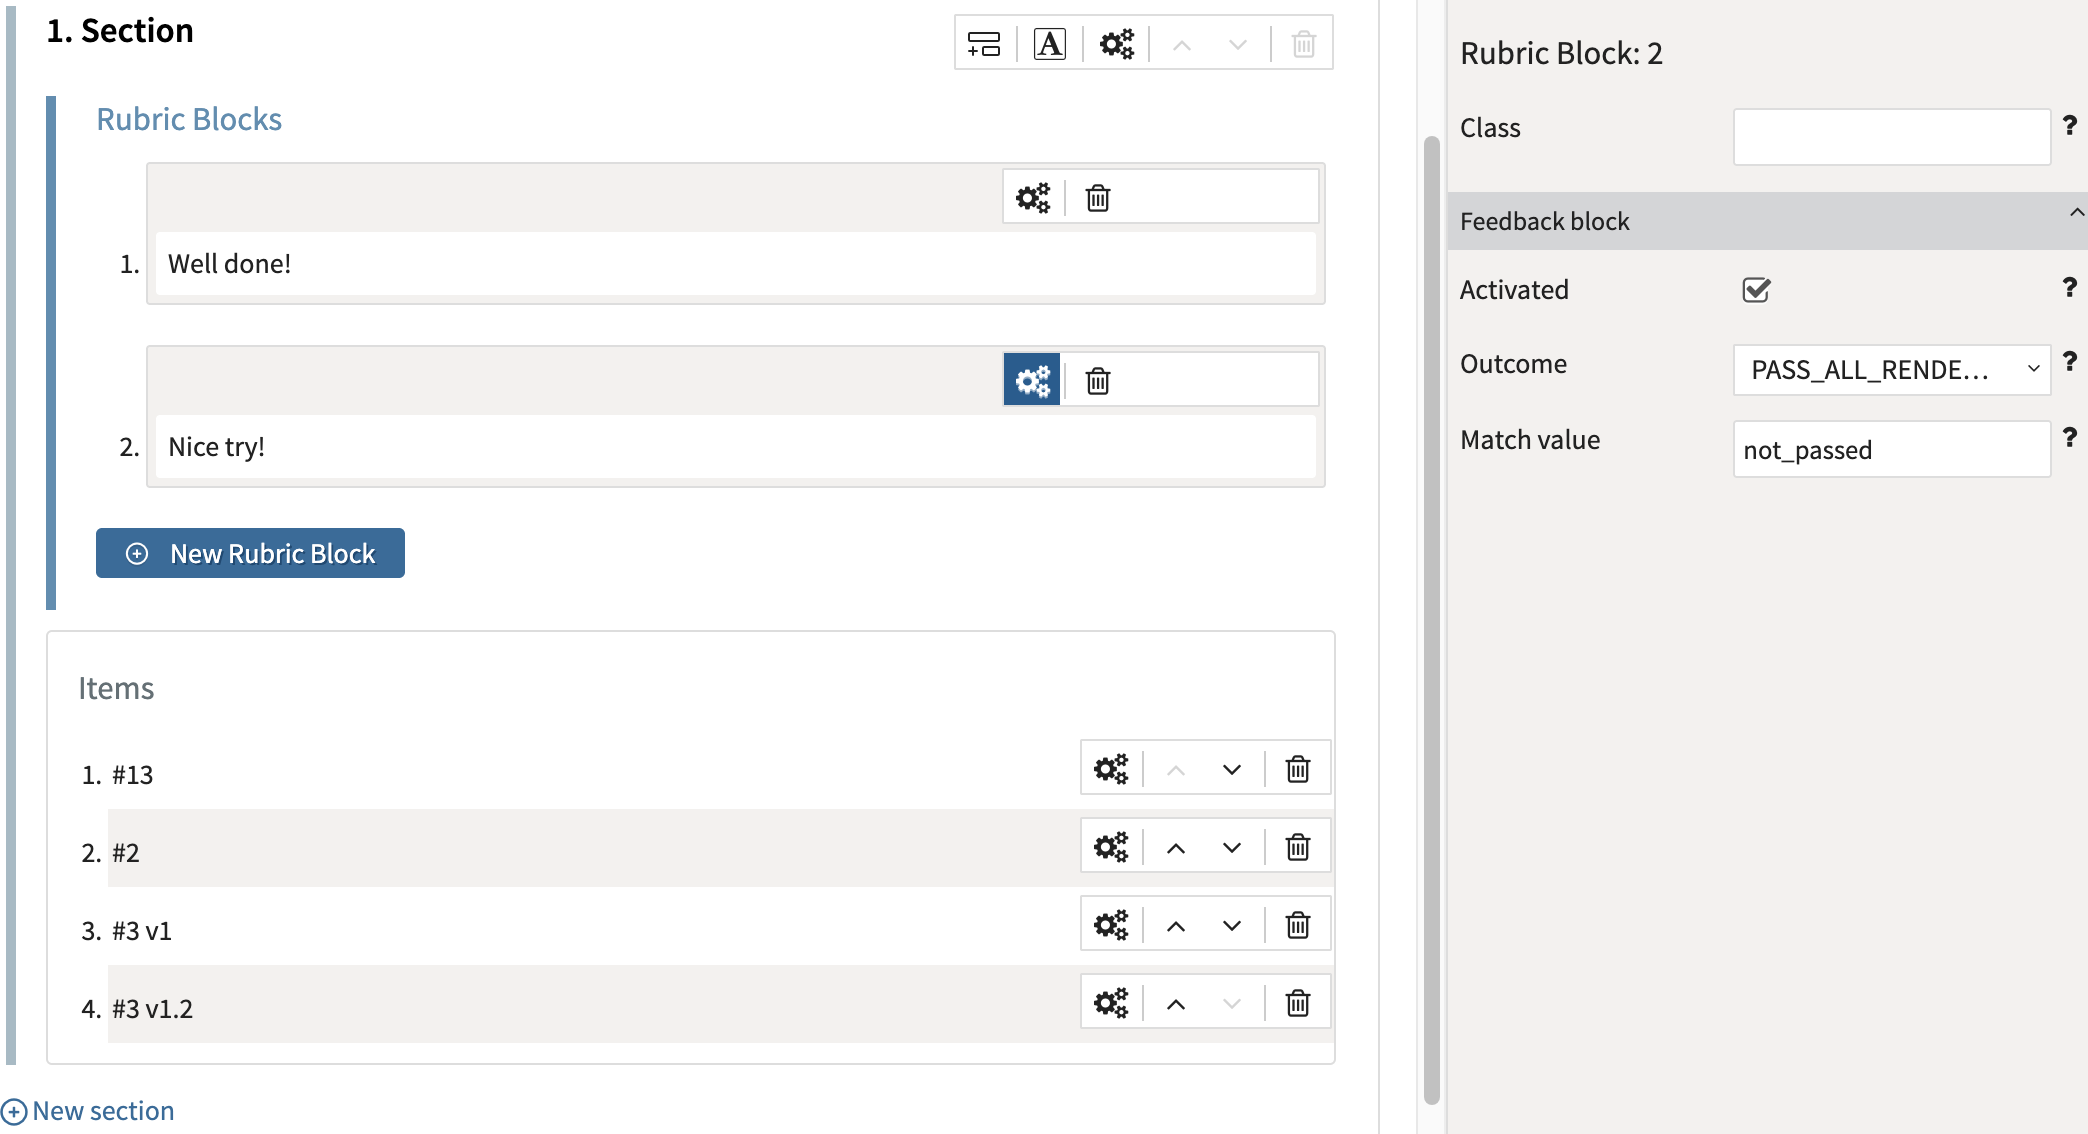
Click inside the blue New Rubric Block and insert an appropriate caption, such as ‘Well done!’ for a pass (if Cut Score was selected).
Add more rubric blocks as needed by clicking inside the blue New Rubric Block. Insert a contrasting caption, such as ‘Almost!’ for a fail (if Cut Score was selected).
3. Configure the feedback conditions
Specify when each of the captions should be displayed. The configured outcome variables can be used to display the appropriate caption(s), such as pass or fail:
Click on the Properties icon on the right of each rubric block. The properties panel will open on the right:

Adding rubric blocks (instant feedback) to a test Section
If you would like the captions in a specific style, you can add a style sheet in the class box. This can also be left blank.
Expand the Feedback Block panel and check the Activated box so that your rubric block/caption can be displayed as feedback.
Select the relevant outcome variable for your test (defined in the test-level properties) from the drop-down menu in the Outcome box, and then a value in the Match Value box which indicates the circumstances in which this caption should be displayed.
If you added categories for your sections, you can select an outcome variable for the corresponding Category. Otherwise, the selected outcome variable will reflect how the test taker performed in the section.
For pass/fail captions, choose PASS_ALL_RENDERING from the menu in the Outcome box, and enter passed in the Match value box if the caption is for a positive result, and not_passed if the caption is for a negative result.
4. View the final outcome.
Save the test and create a new Delivery to view the final outcome.
