
Introduction
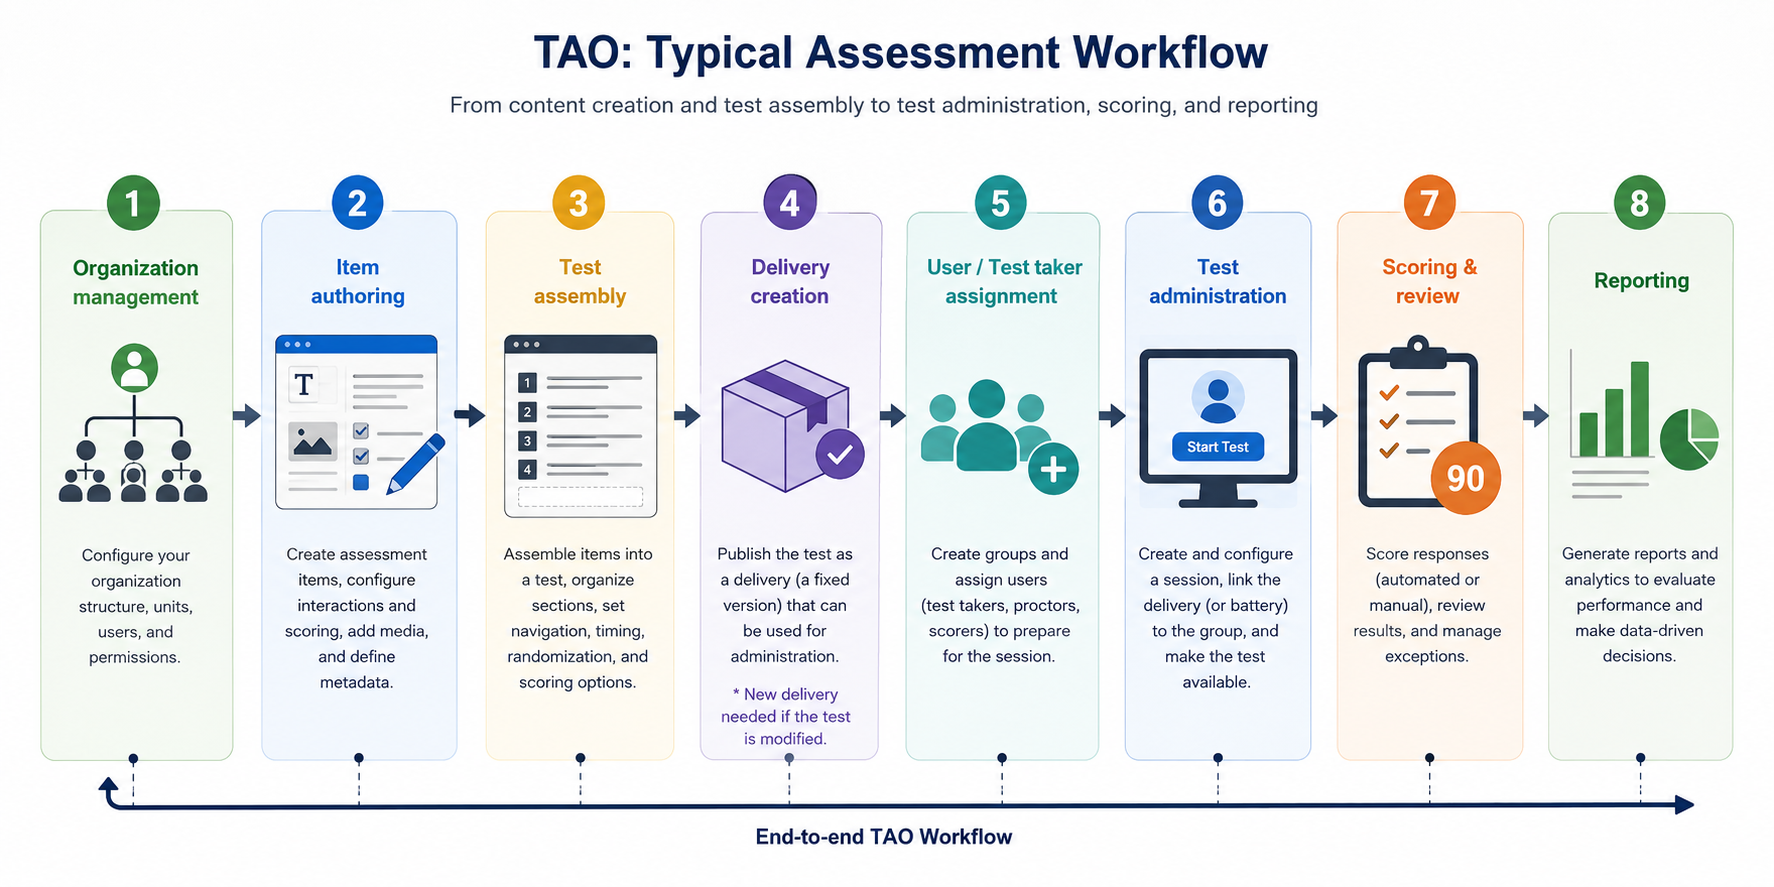
TAO provides a complete assessment workflow, from content creation and test assembly to test administration, scoring, and reporting.
End-to-end workflow summary
The typical TAO workflow follows the sequence below:
Organization management → Item authoring → Test assembly → Delivery creation → User/Test taker assignment → Test administration → Scoring & review → Reporting
Step 1: Configure your Organization structure
Before creating assessments, it is recommended to first establish your organizational structure within the Organization module. Establishing your organizational hierarchy before creating users, groups, or assessments helps ensure proper access control and simplifies administration.
-
The Organization module serves as the foundation for user management and permissions.
-
Organizations are structured as a hierarchy of organizational units, with permissions cascading downward from the root level.
-
All users and groups must be assigned to an organizational unit.
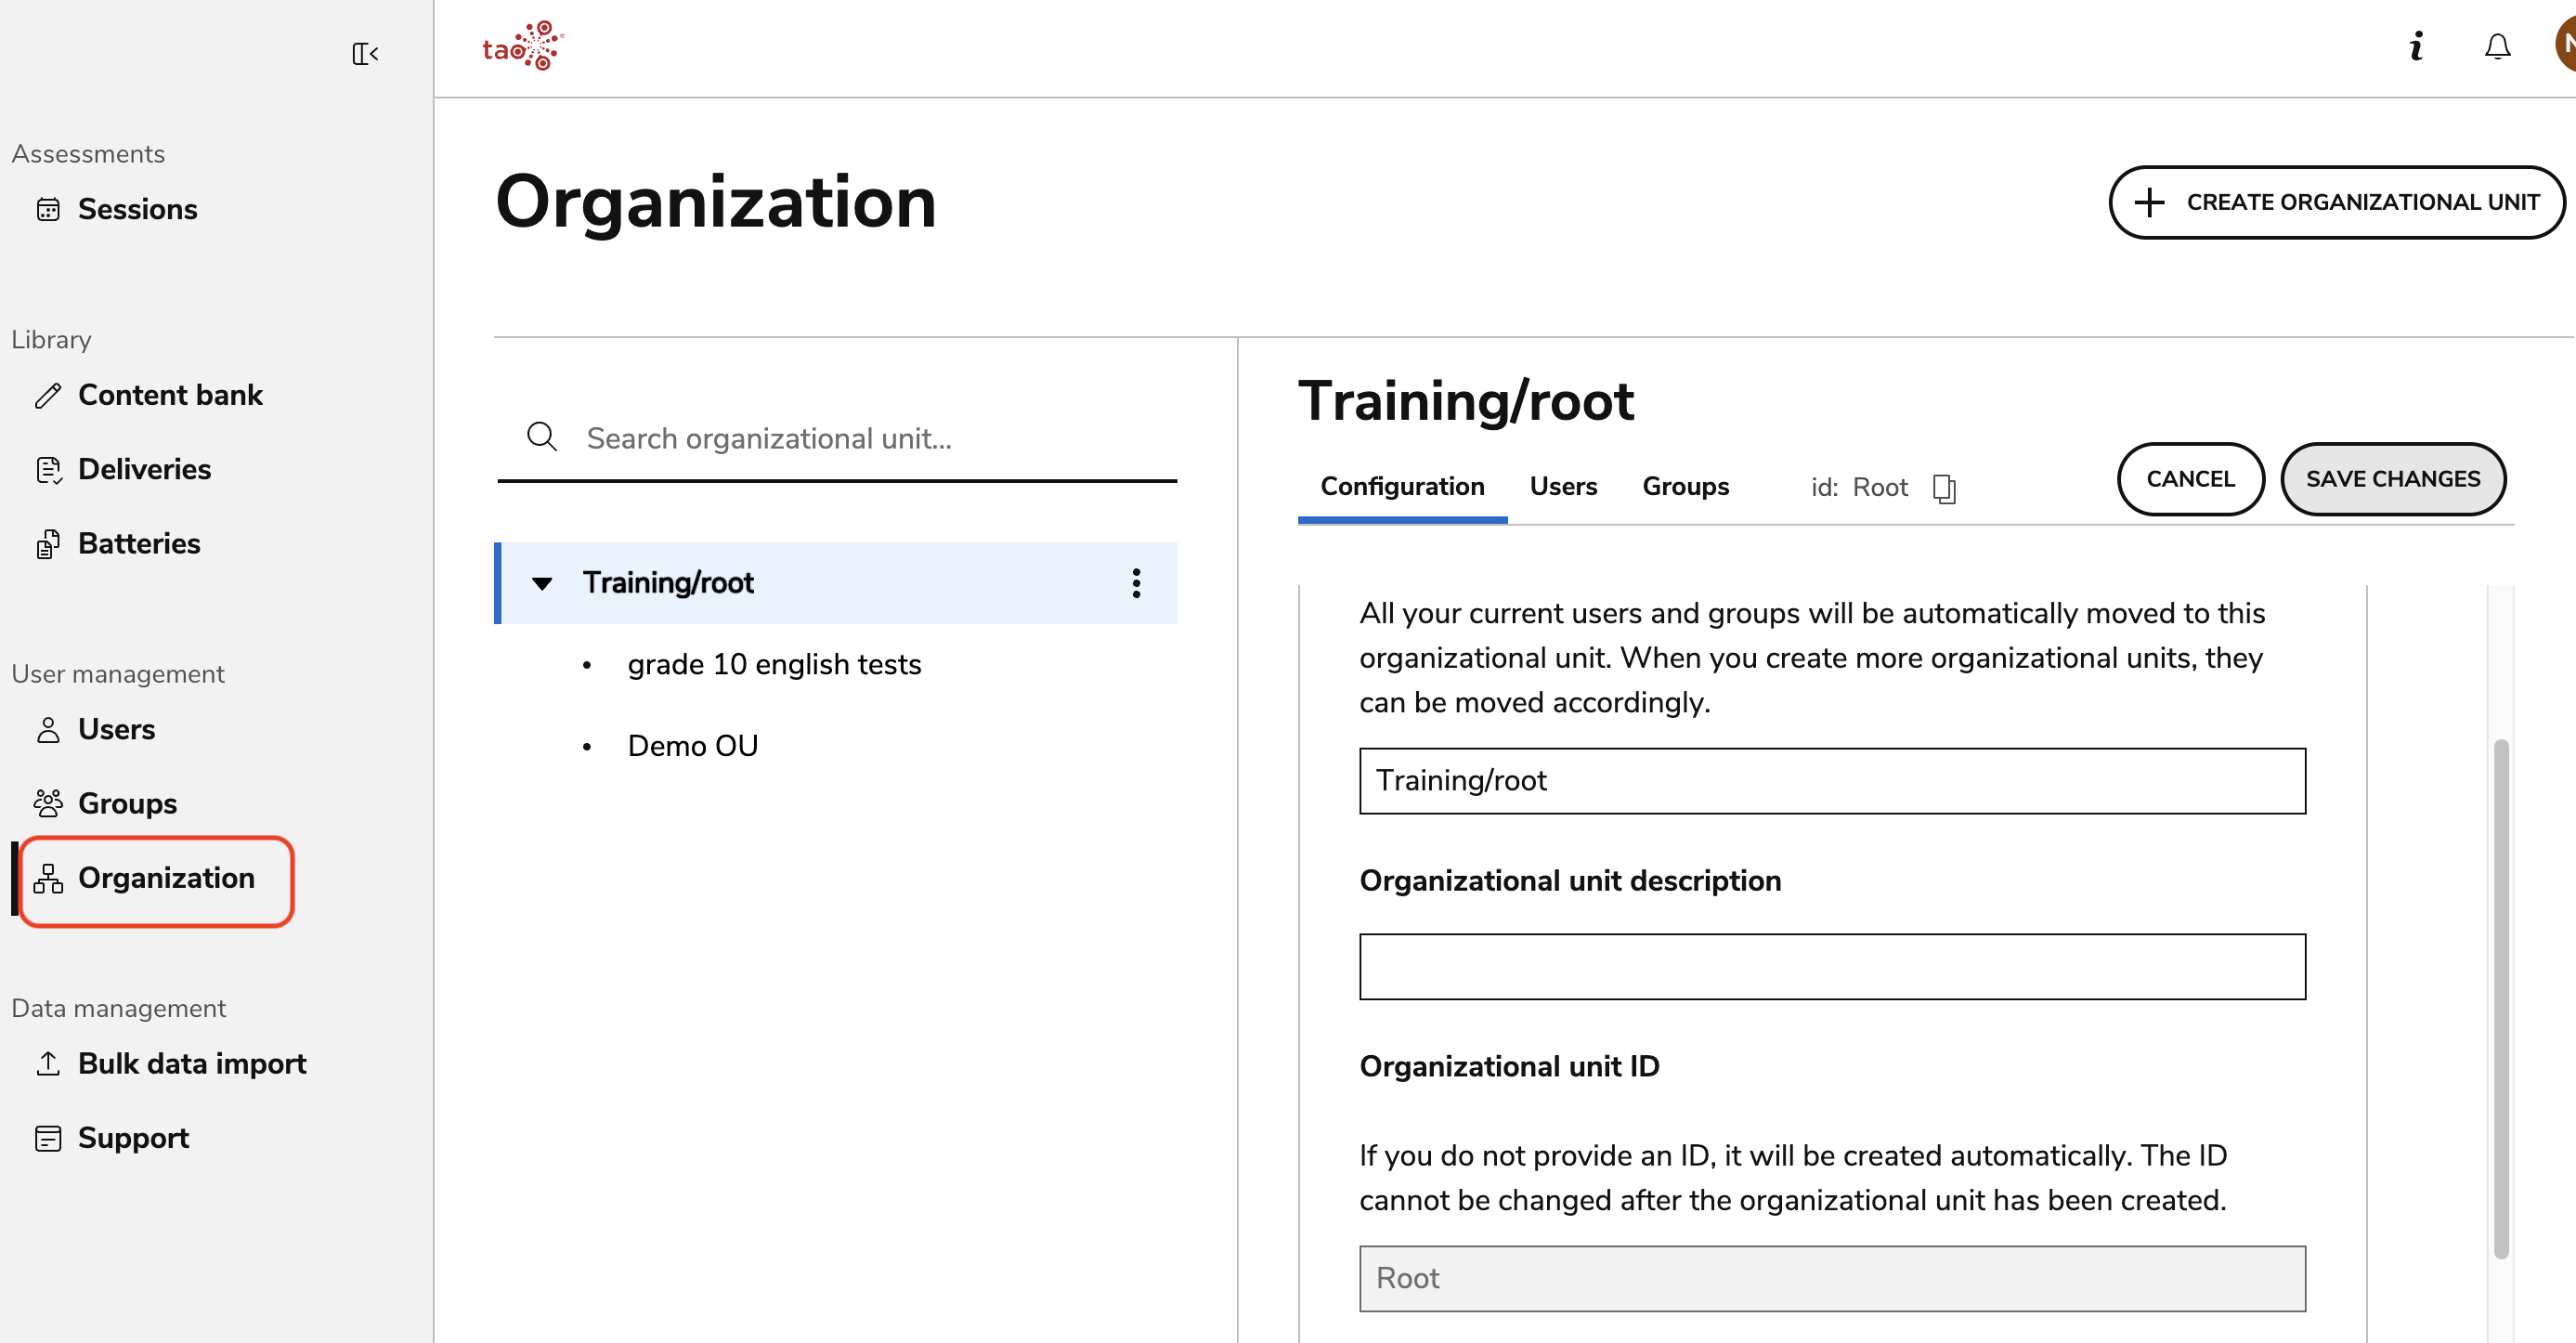
For more information, see Organization management in the User Guide.
Step 2: Create assessment items
The assessment creation process begins with authoring individual items. Items serve as the building blocks for tests and can be reused across multiple assessments.
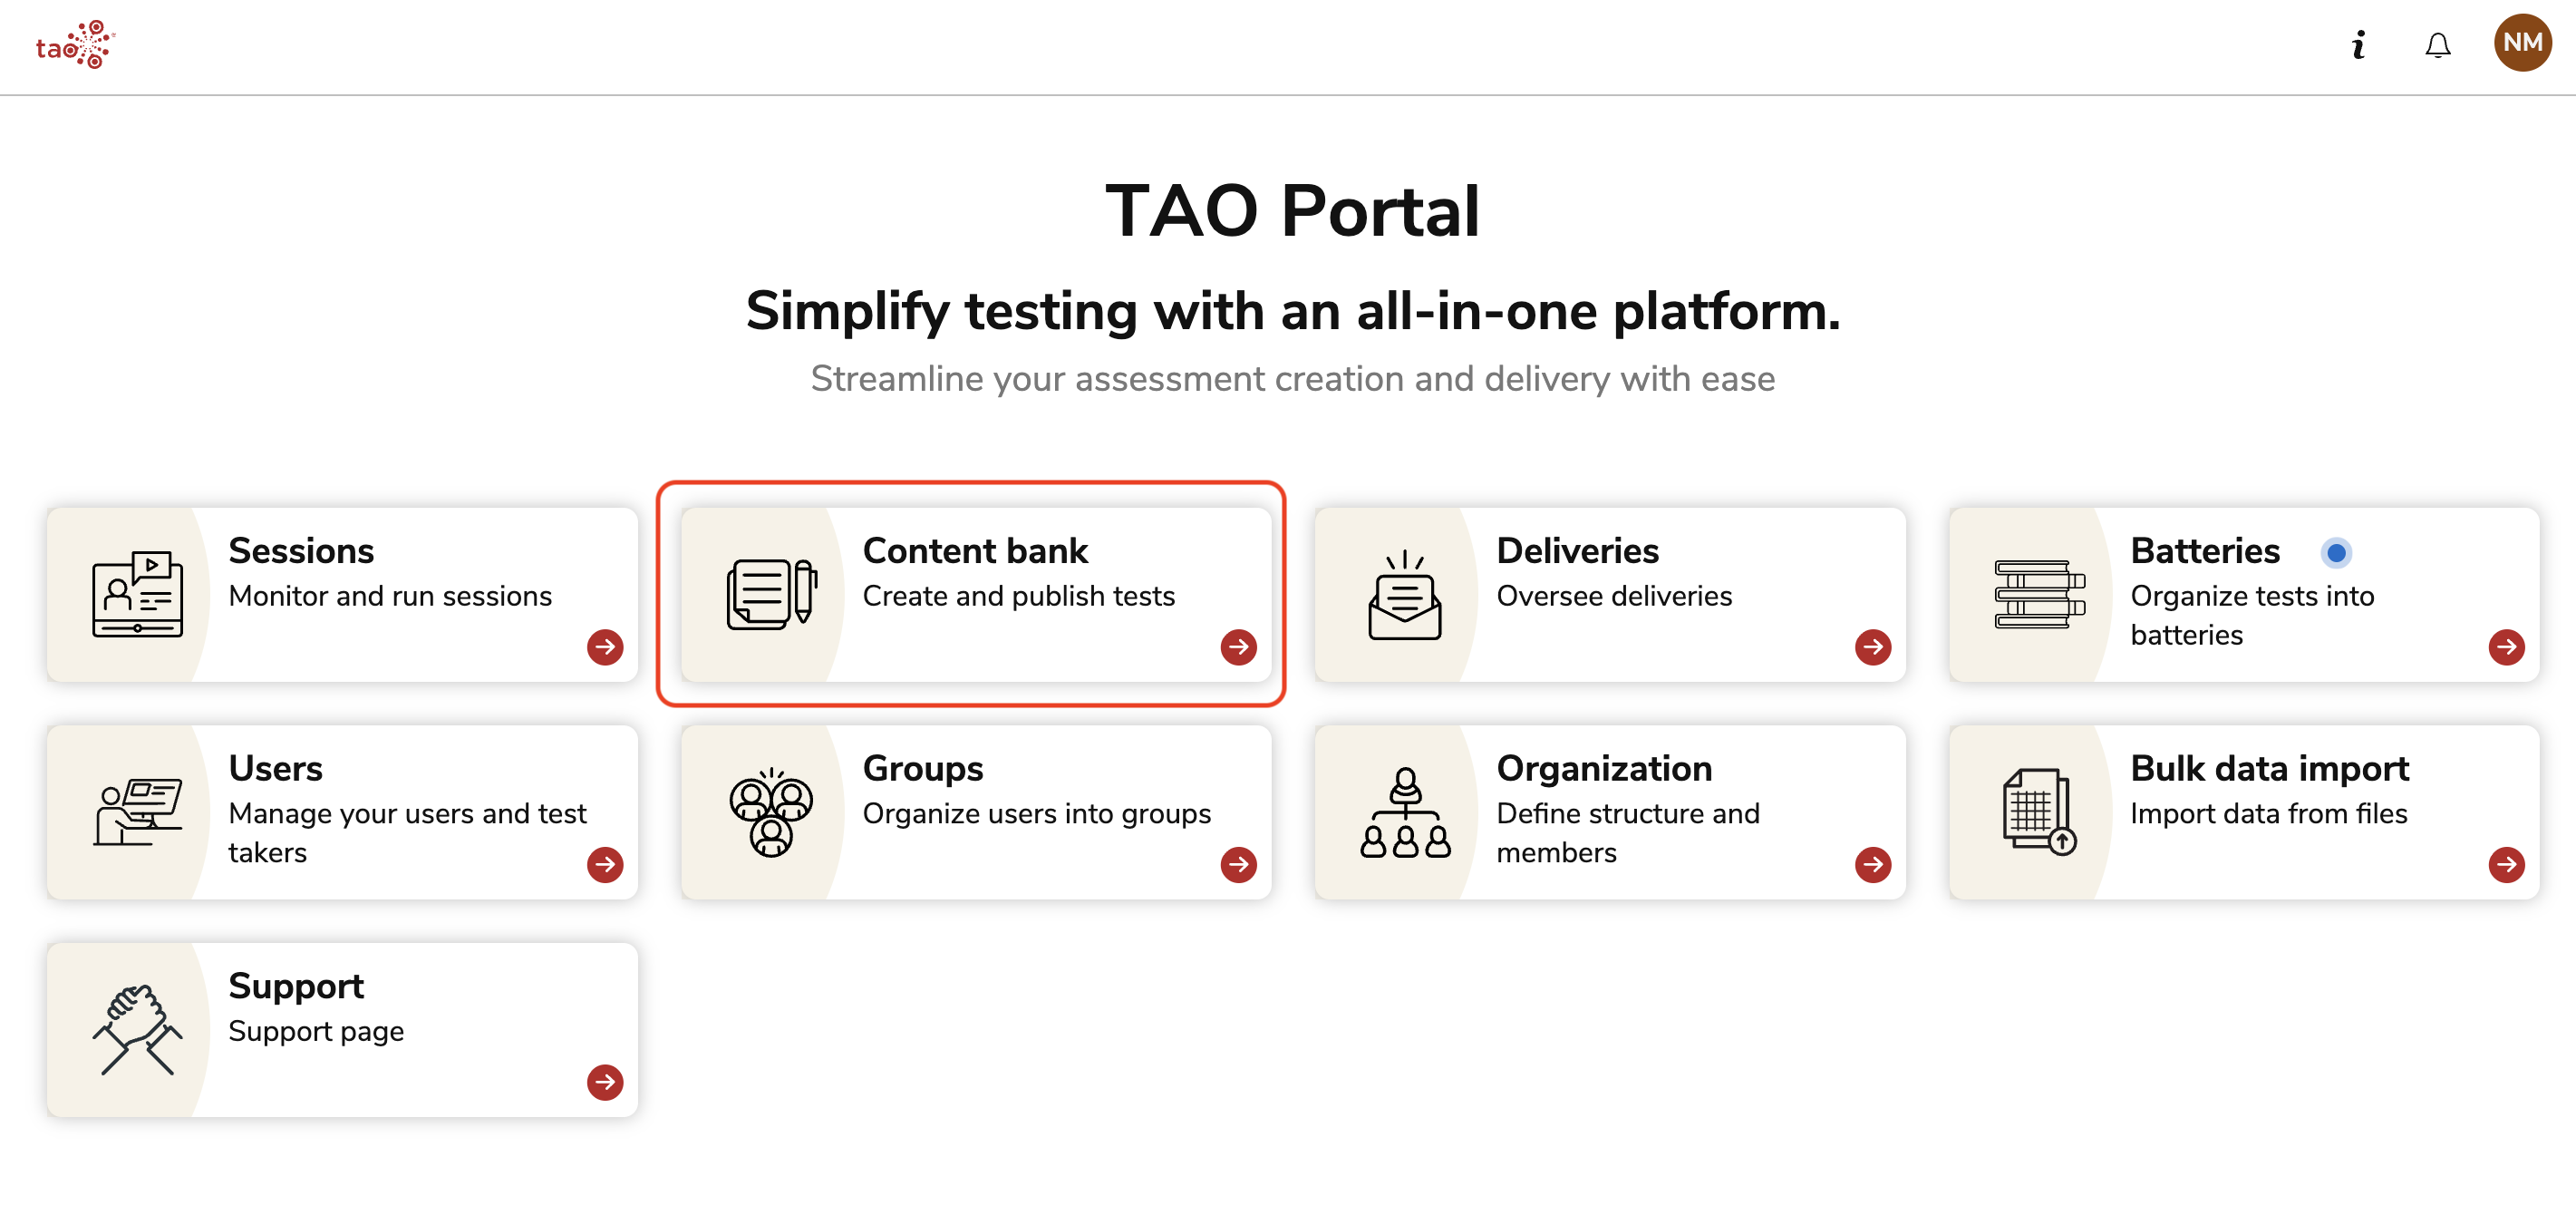
Using the item authoring tool in the Content Bank, content creators can:
-
Create assessment items
-
Configure item interactions and scoring
-
Add media and supporting content
-
Define item metadata
-
Configure items for manual scoring when required
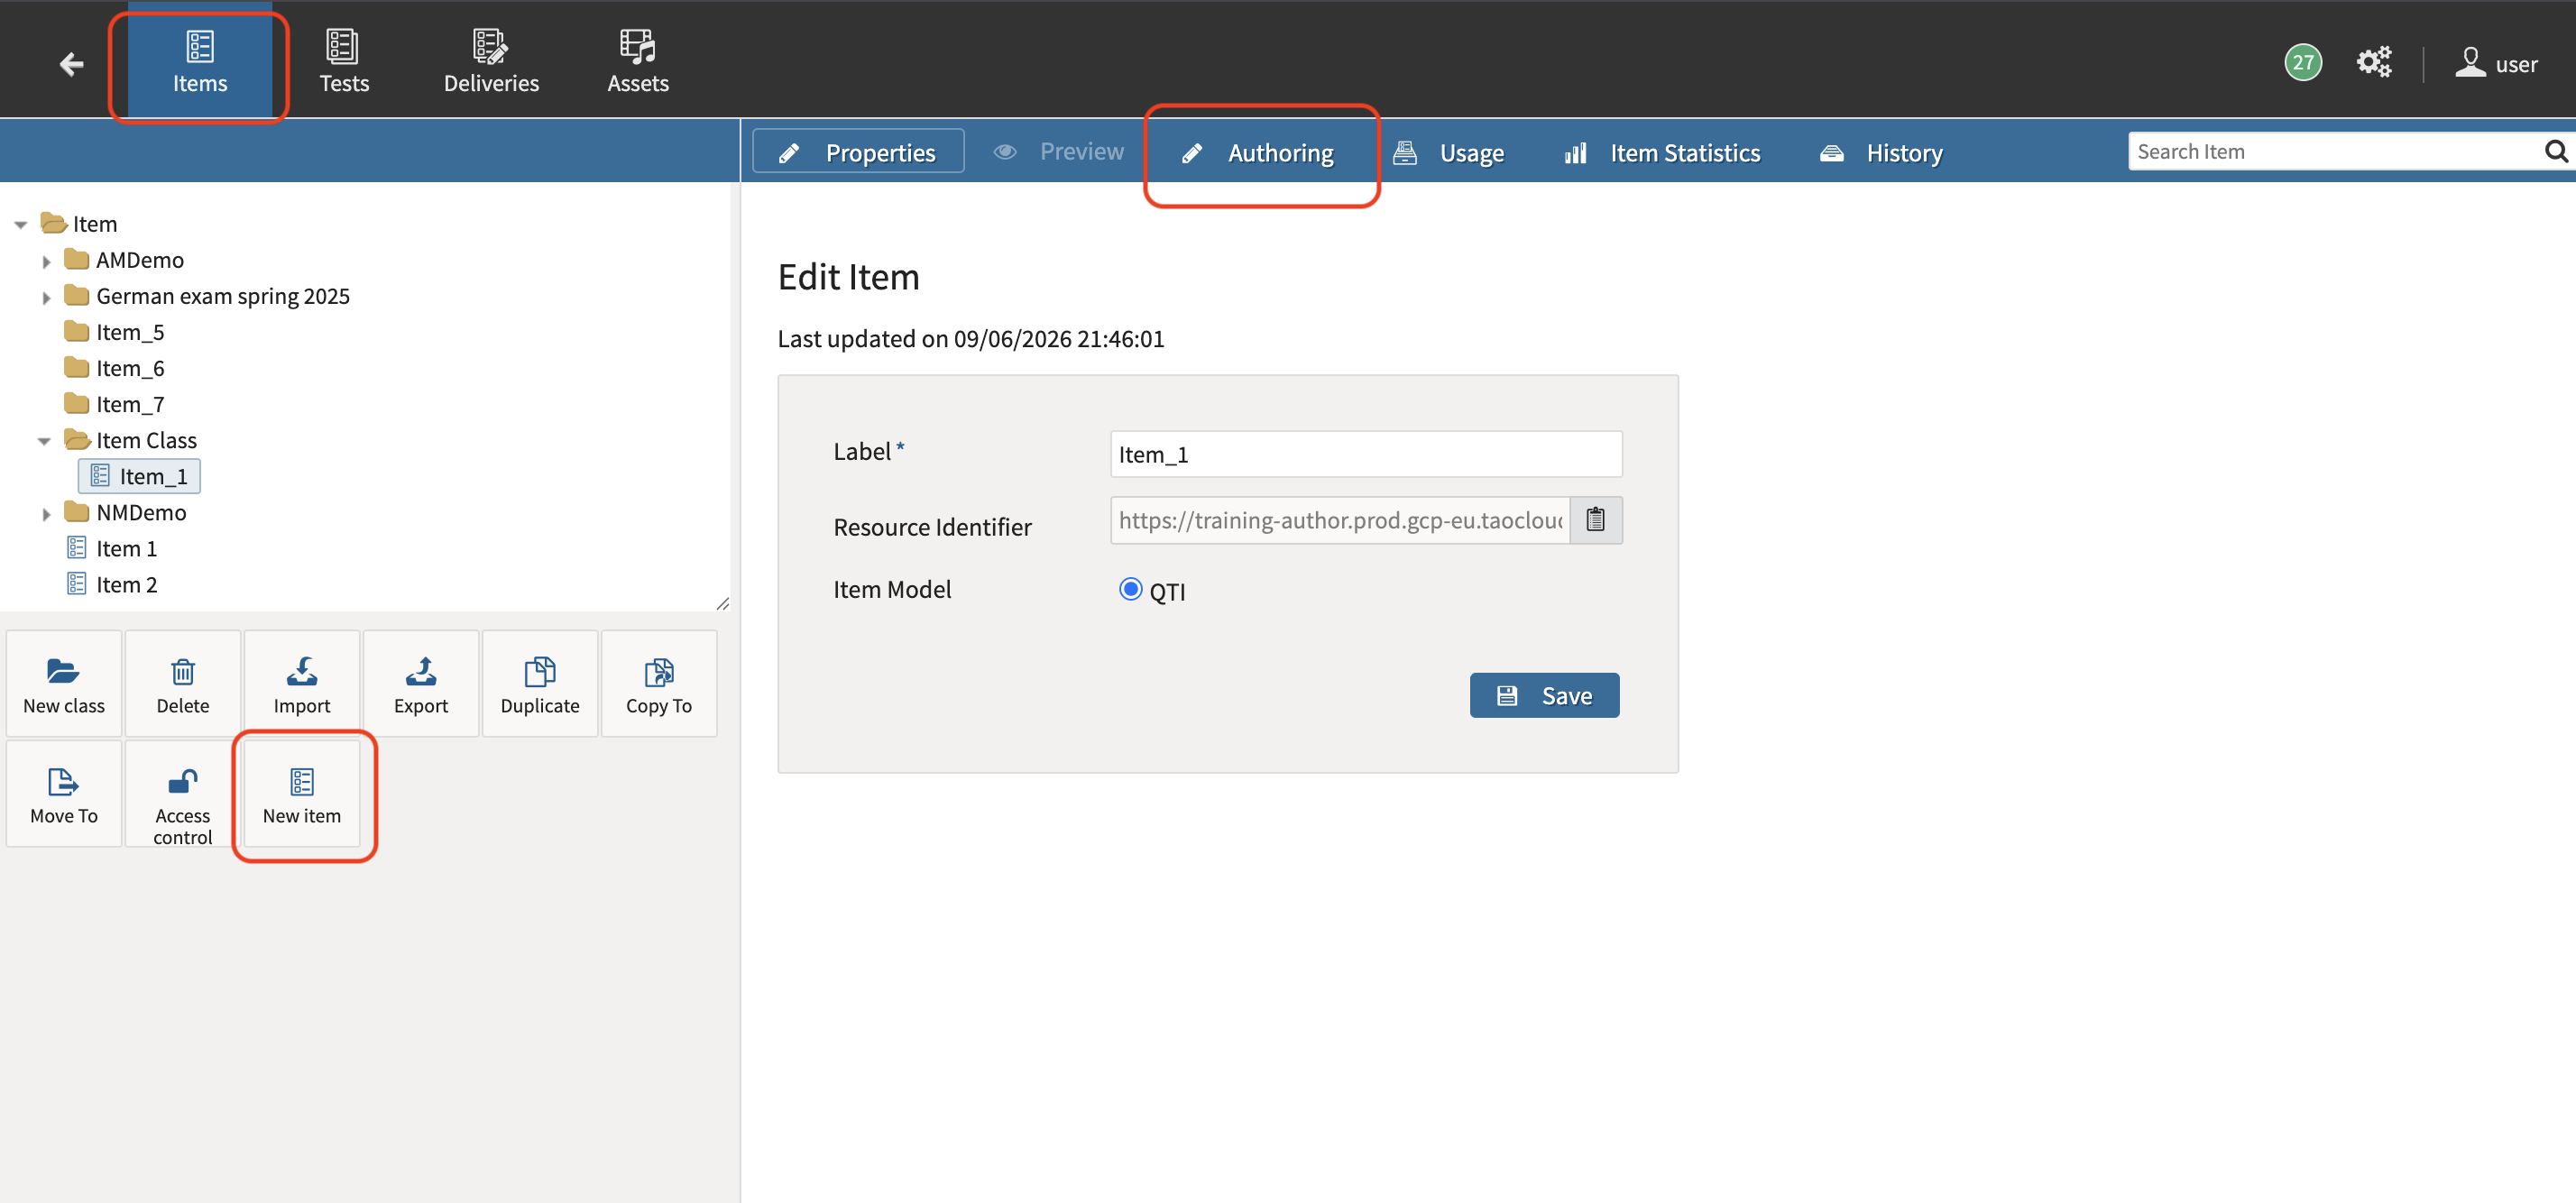
For more information, see Item creation in the User Guide.
Step 3: Assemble a test
Once items have been created, they can be assembled into a test. The completed test defines the assessment experience but is not yet available to test takers.
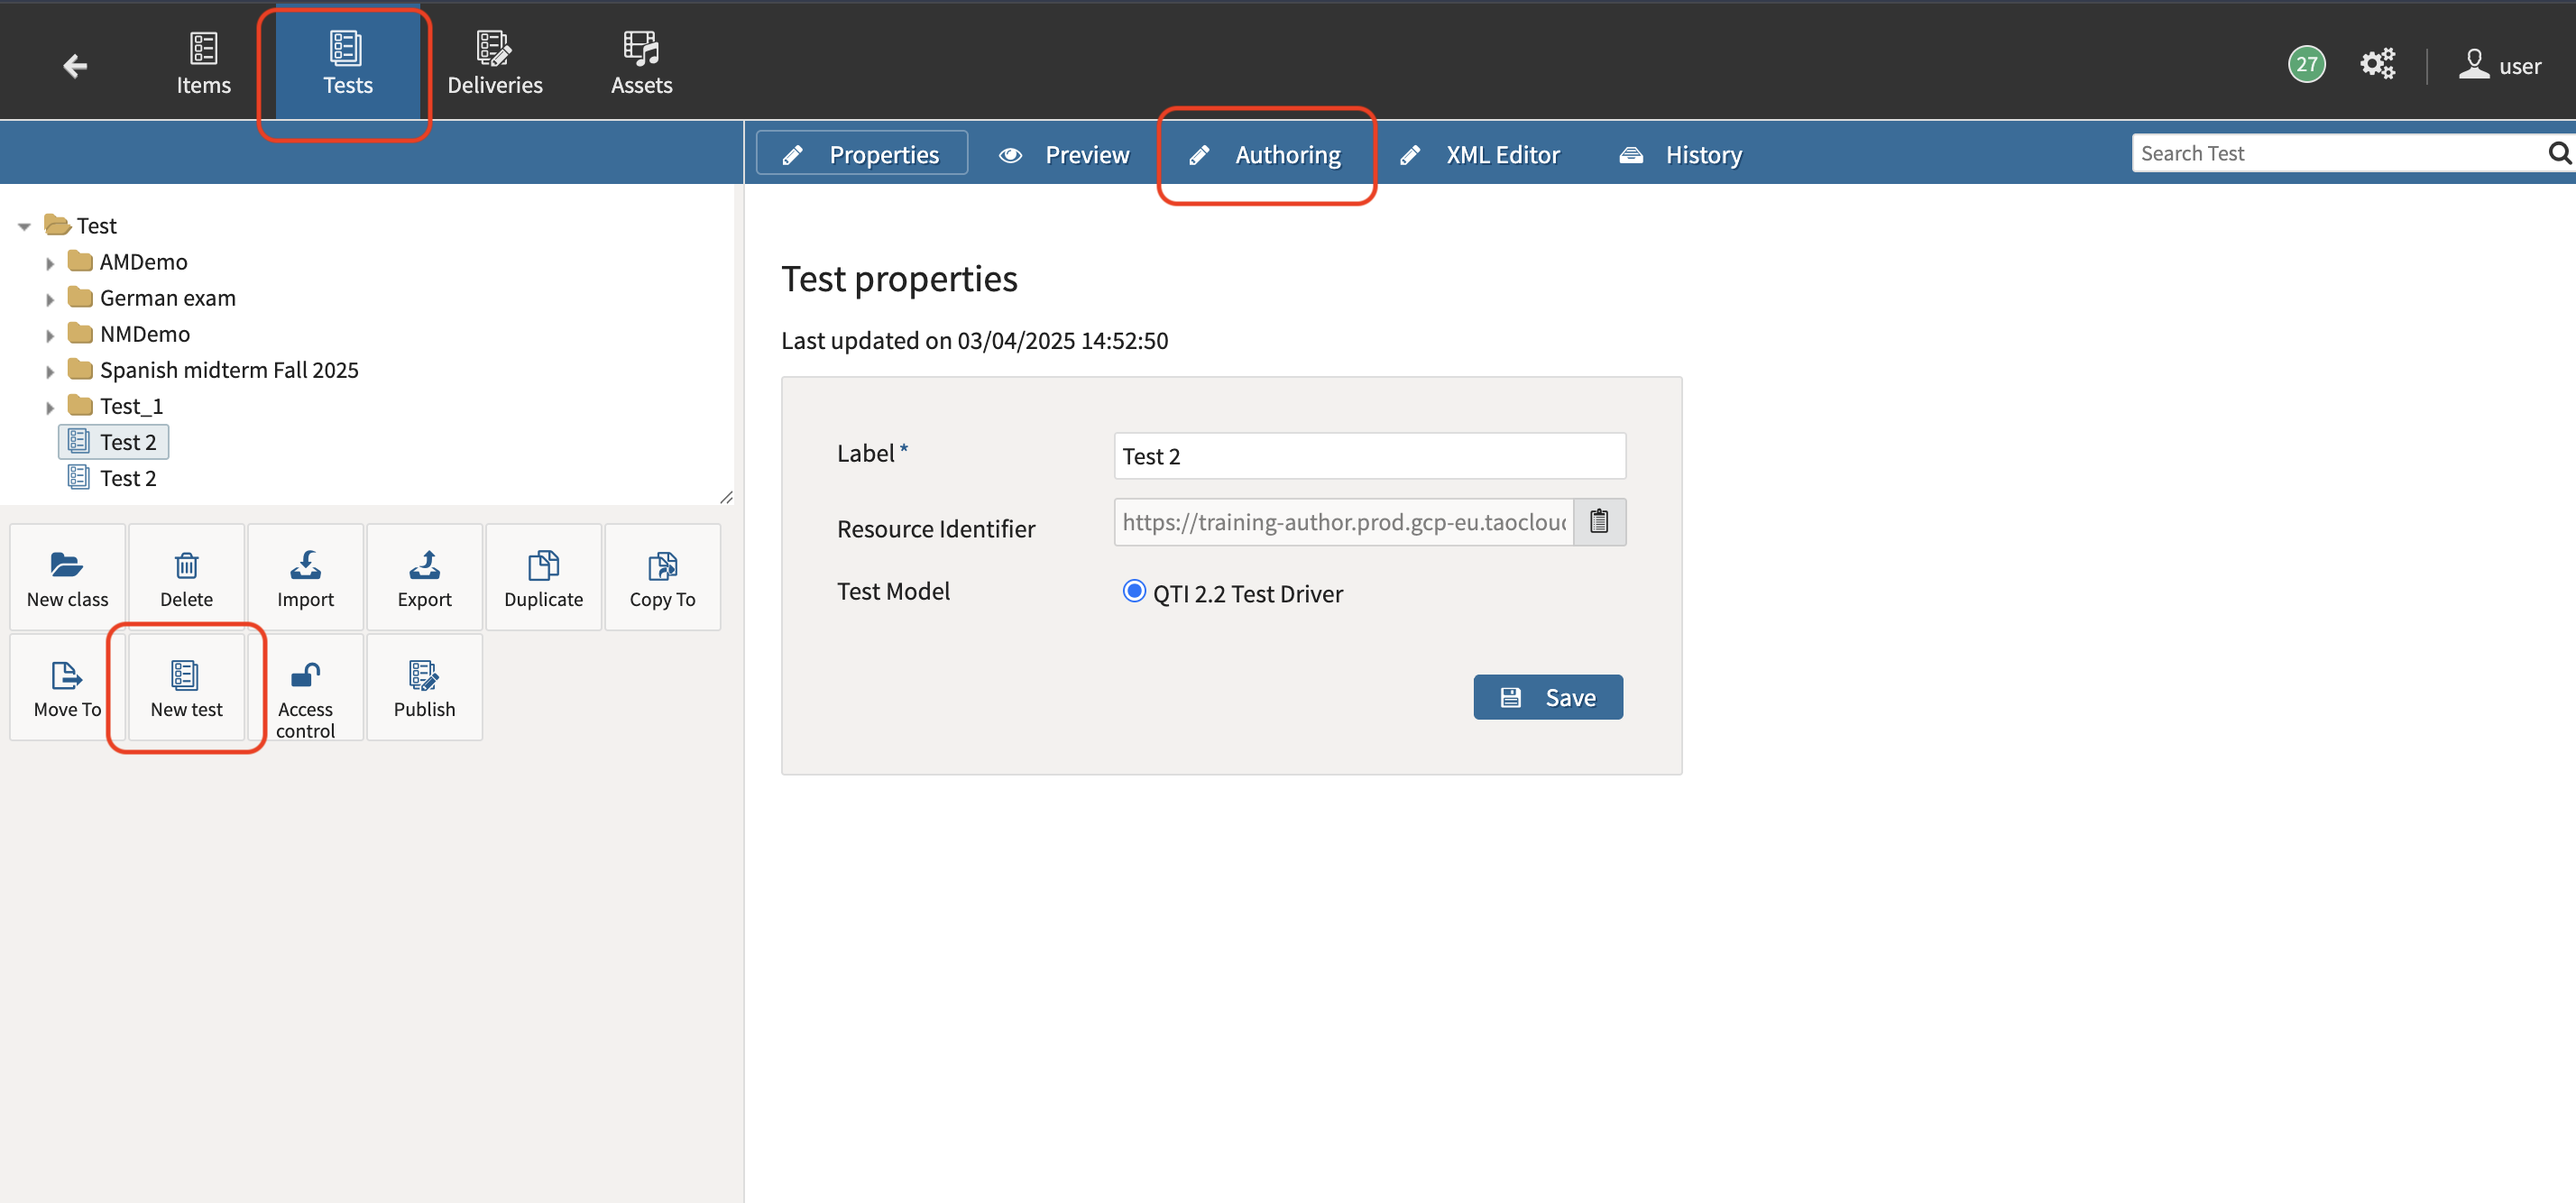
During test assembly, administrators can:
-
Add and organize items into sections
-
Configure test navigation options
-
Enable test-taker tools and accommodations
-
Randomize items or sections
-
Configure scoring settings
-
Create adaptive tests
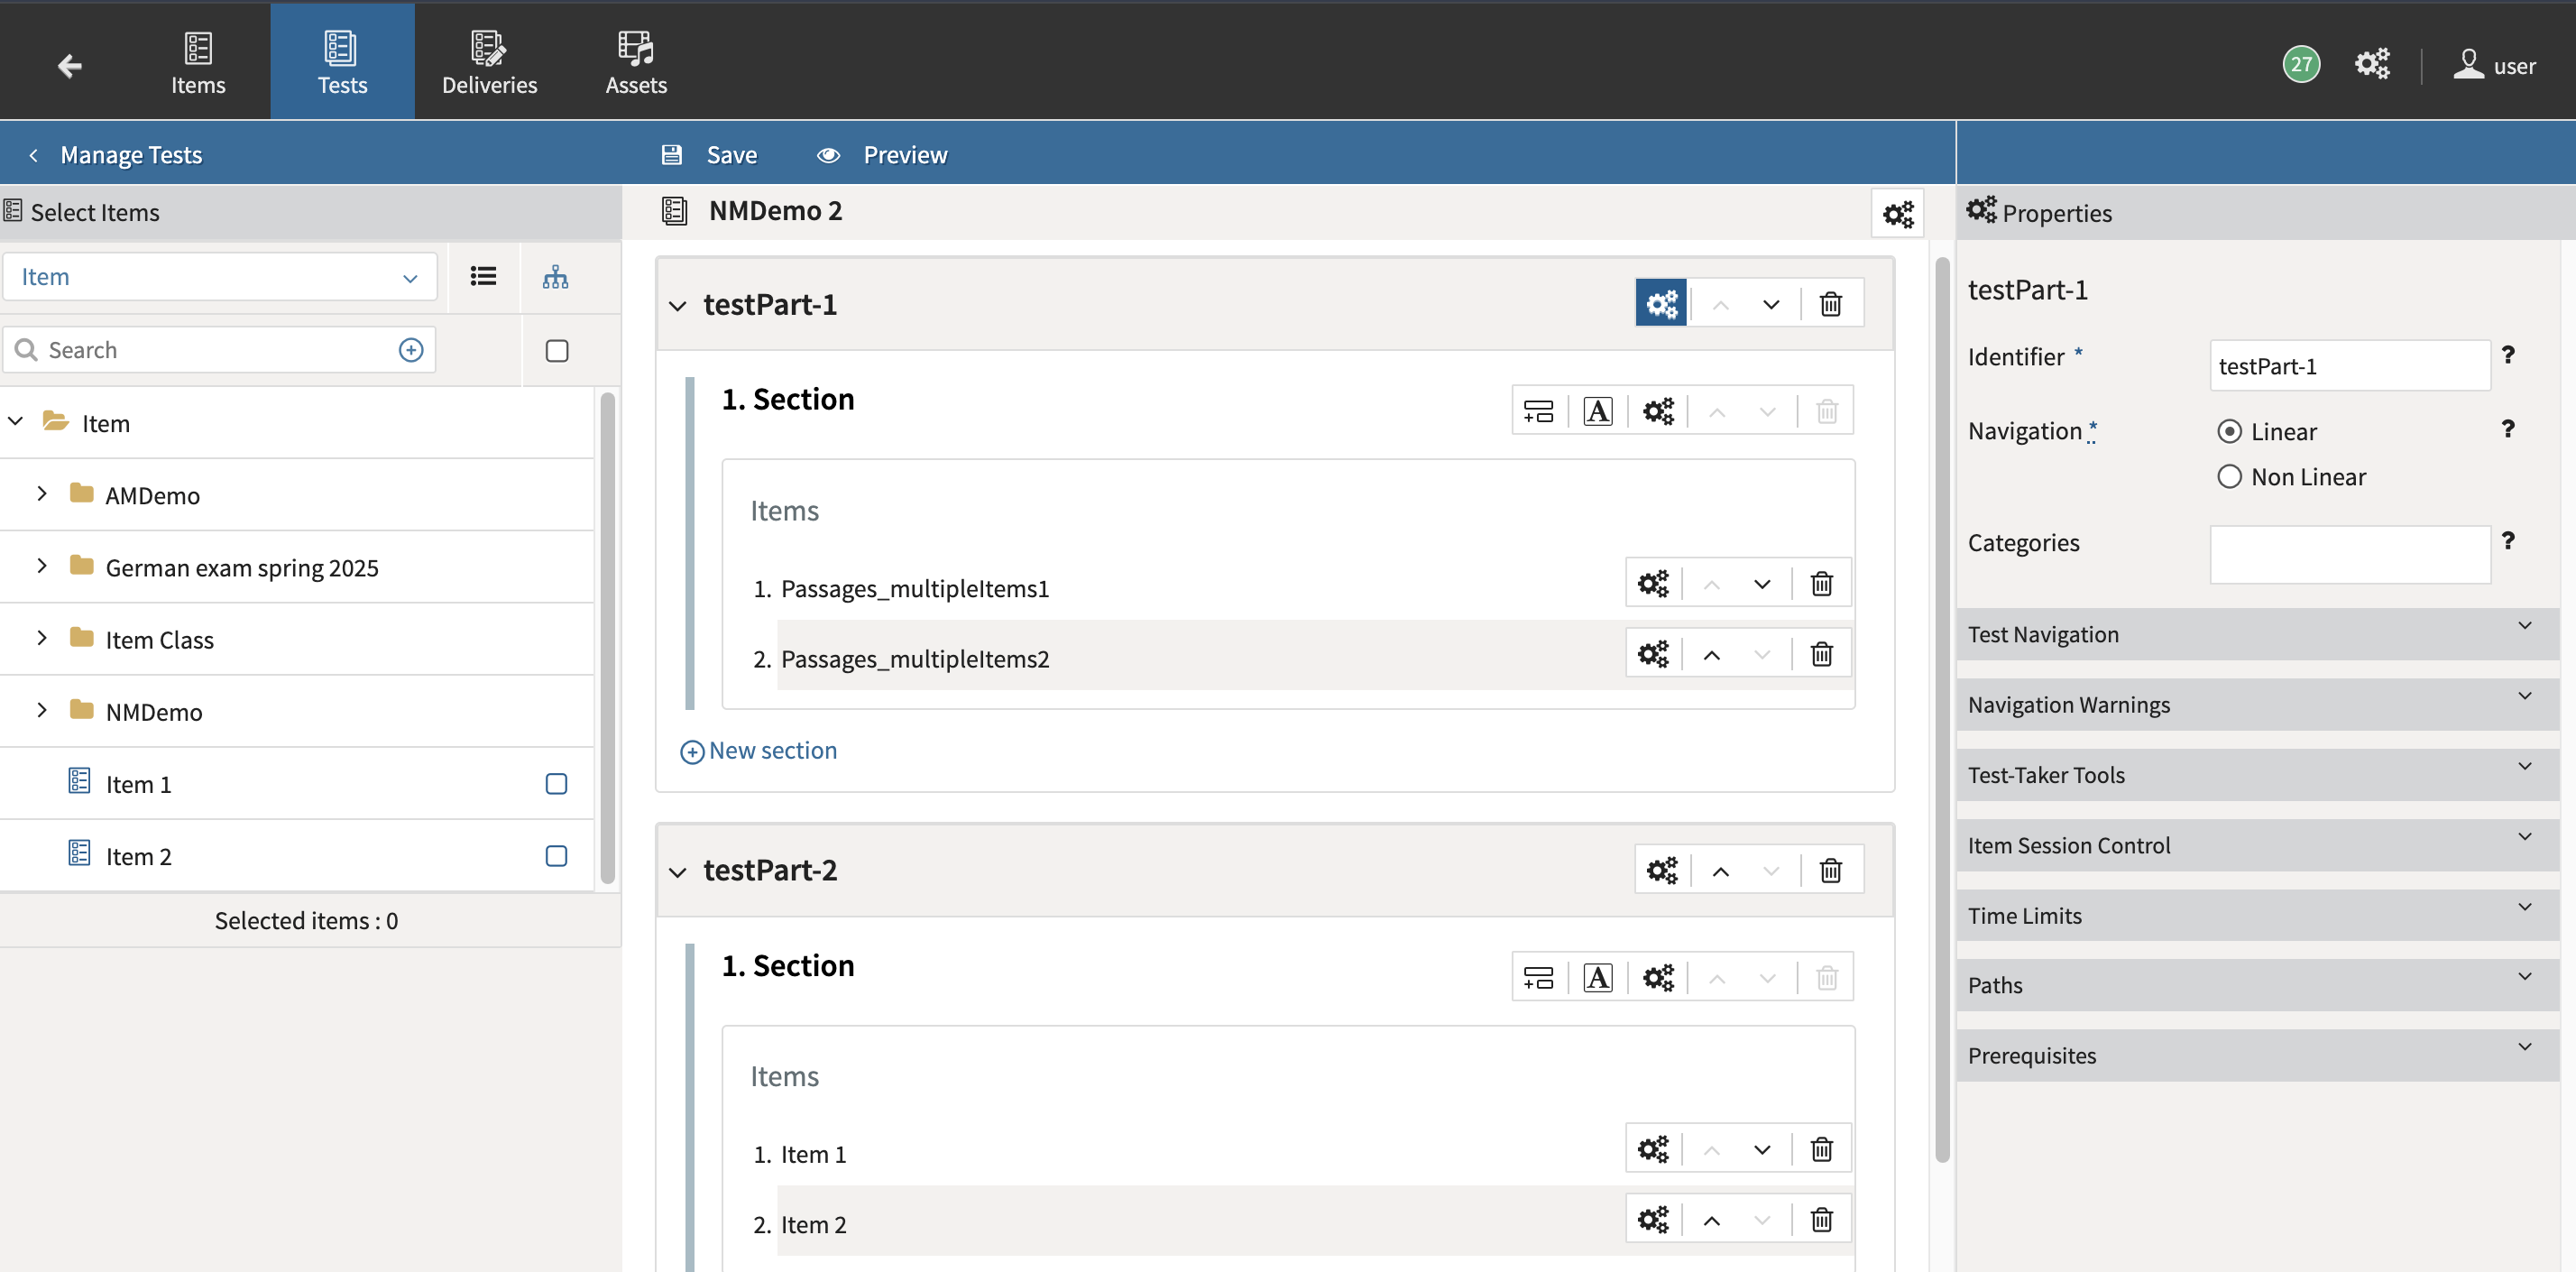
For more information, see Test assembly in the User Guide.
Step 4: Publish a delivery
To make a test available for administration, it must be published as a delivery.
-
A delivery is a fixed, published version of a test at a specific point in time.
-
Once a delivery is created, it does not automatically reflect future changes made to the original test.
Important: If a test is modified after publication, a new delivery must be created to include those changes.
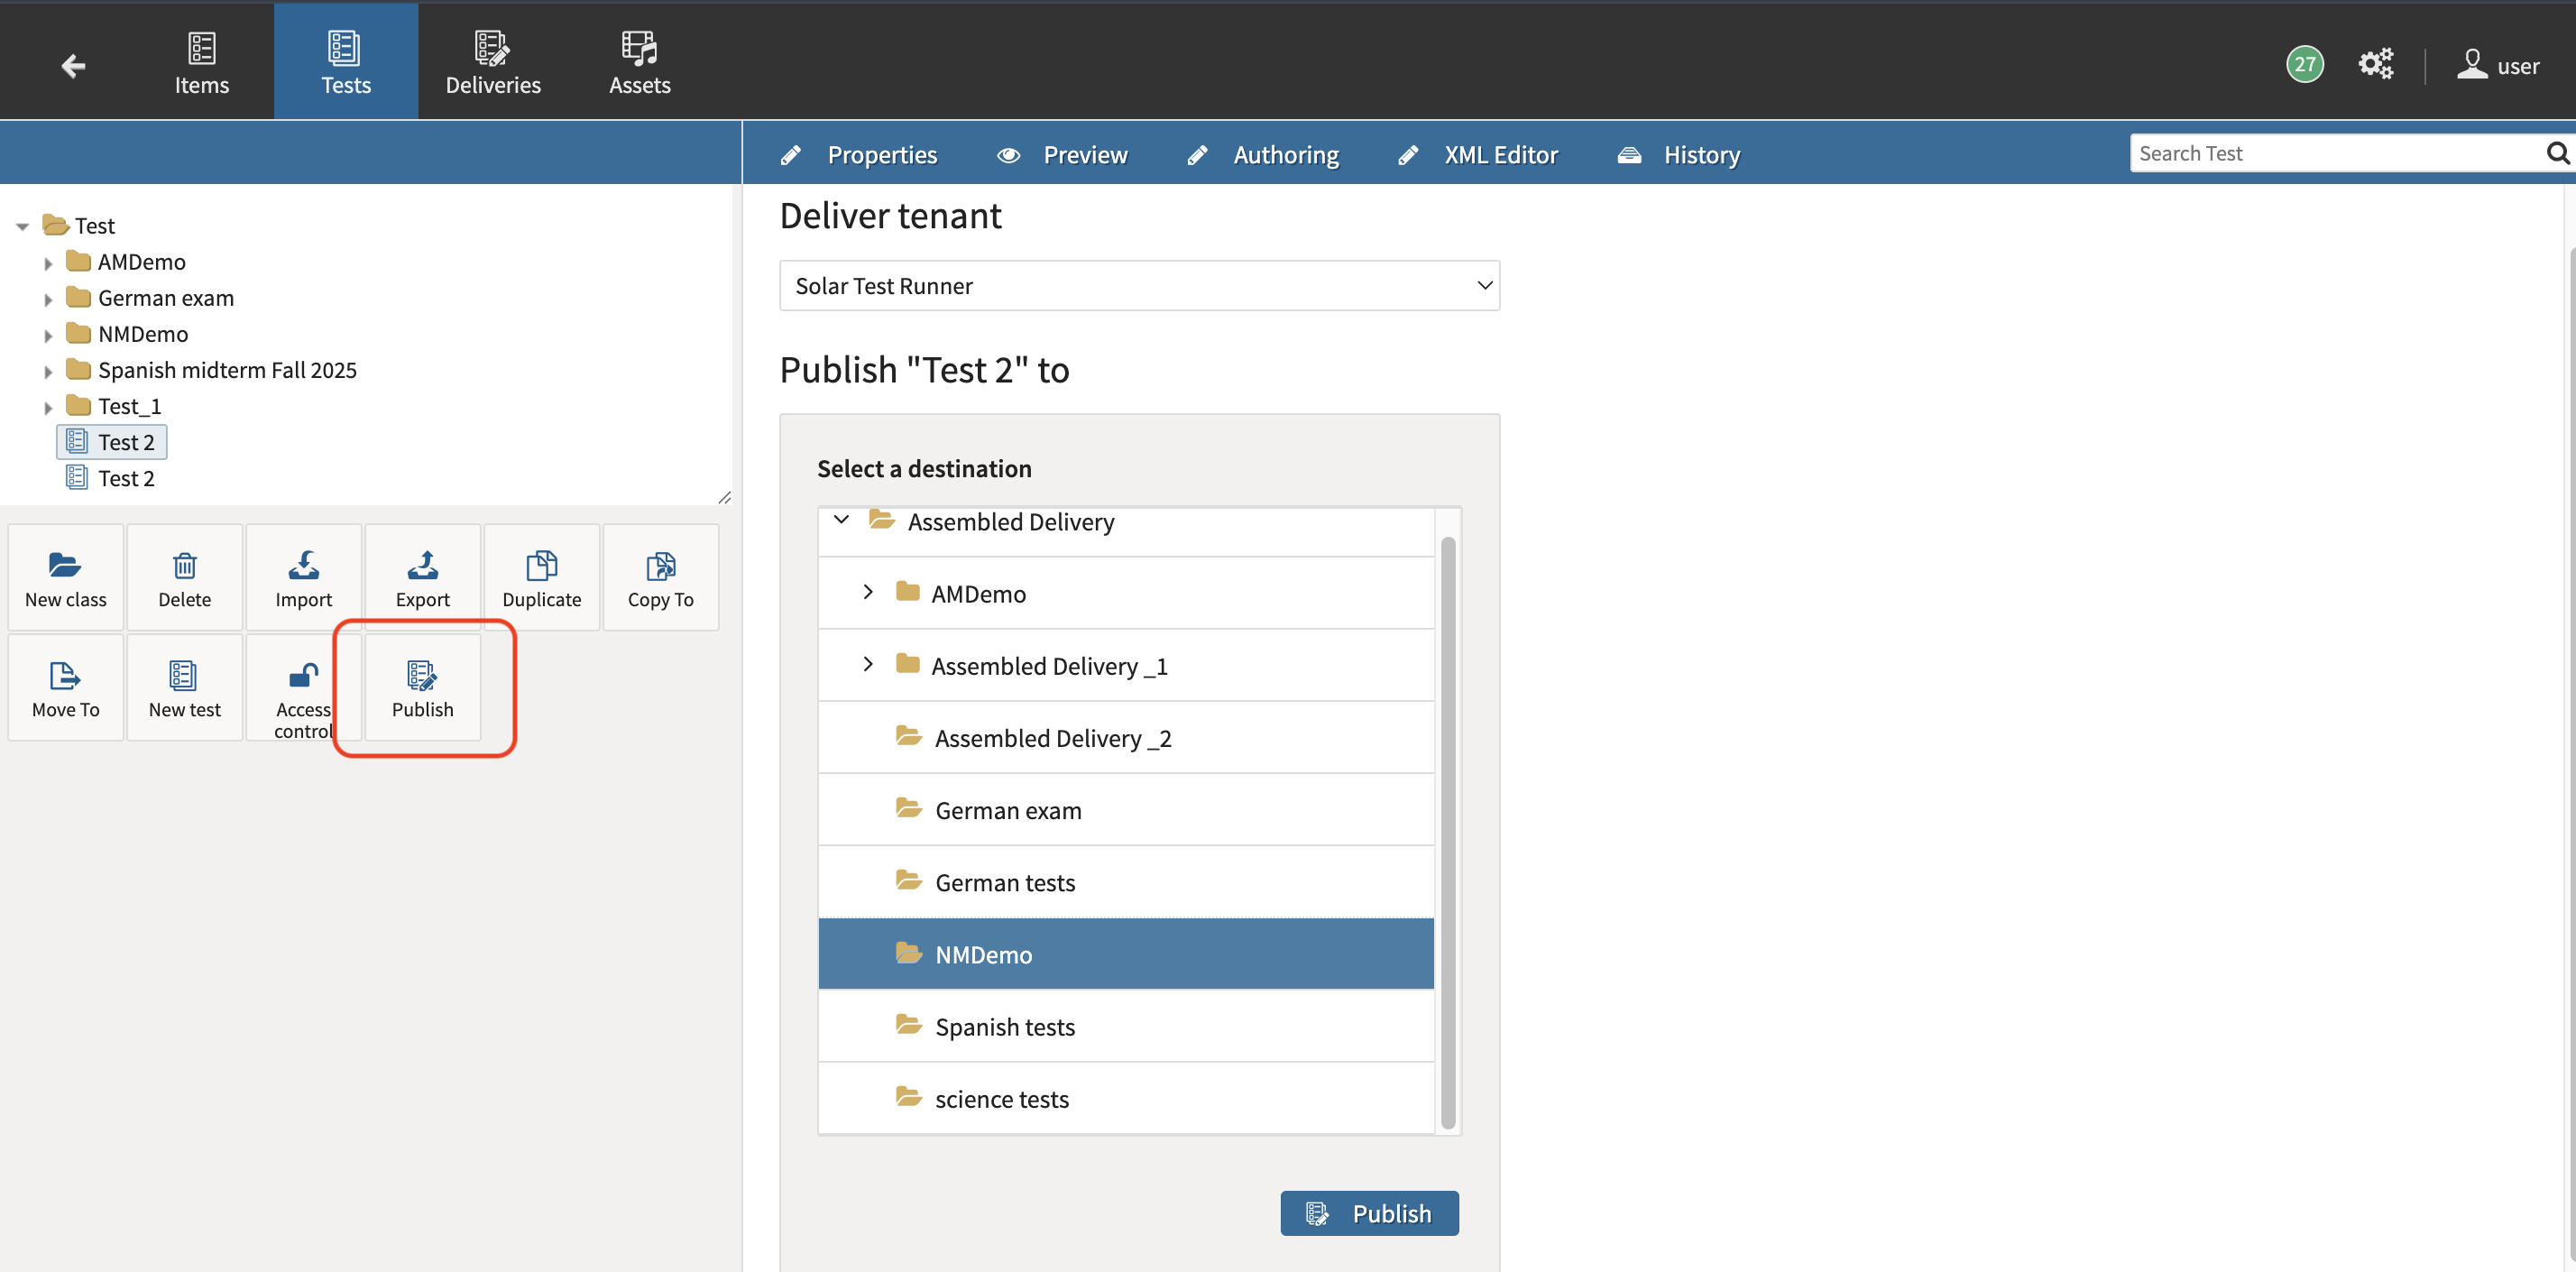
For more information, see Publishing a test in the User Guide.
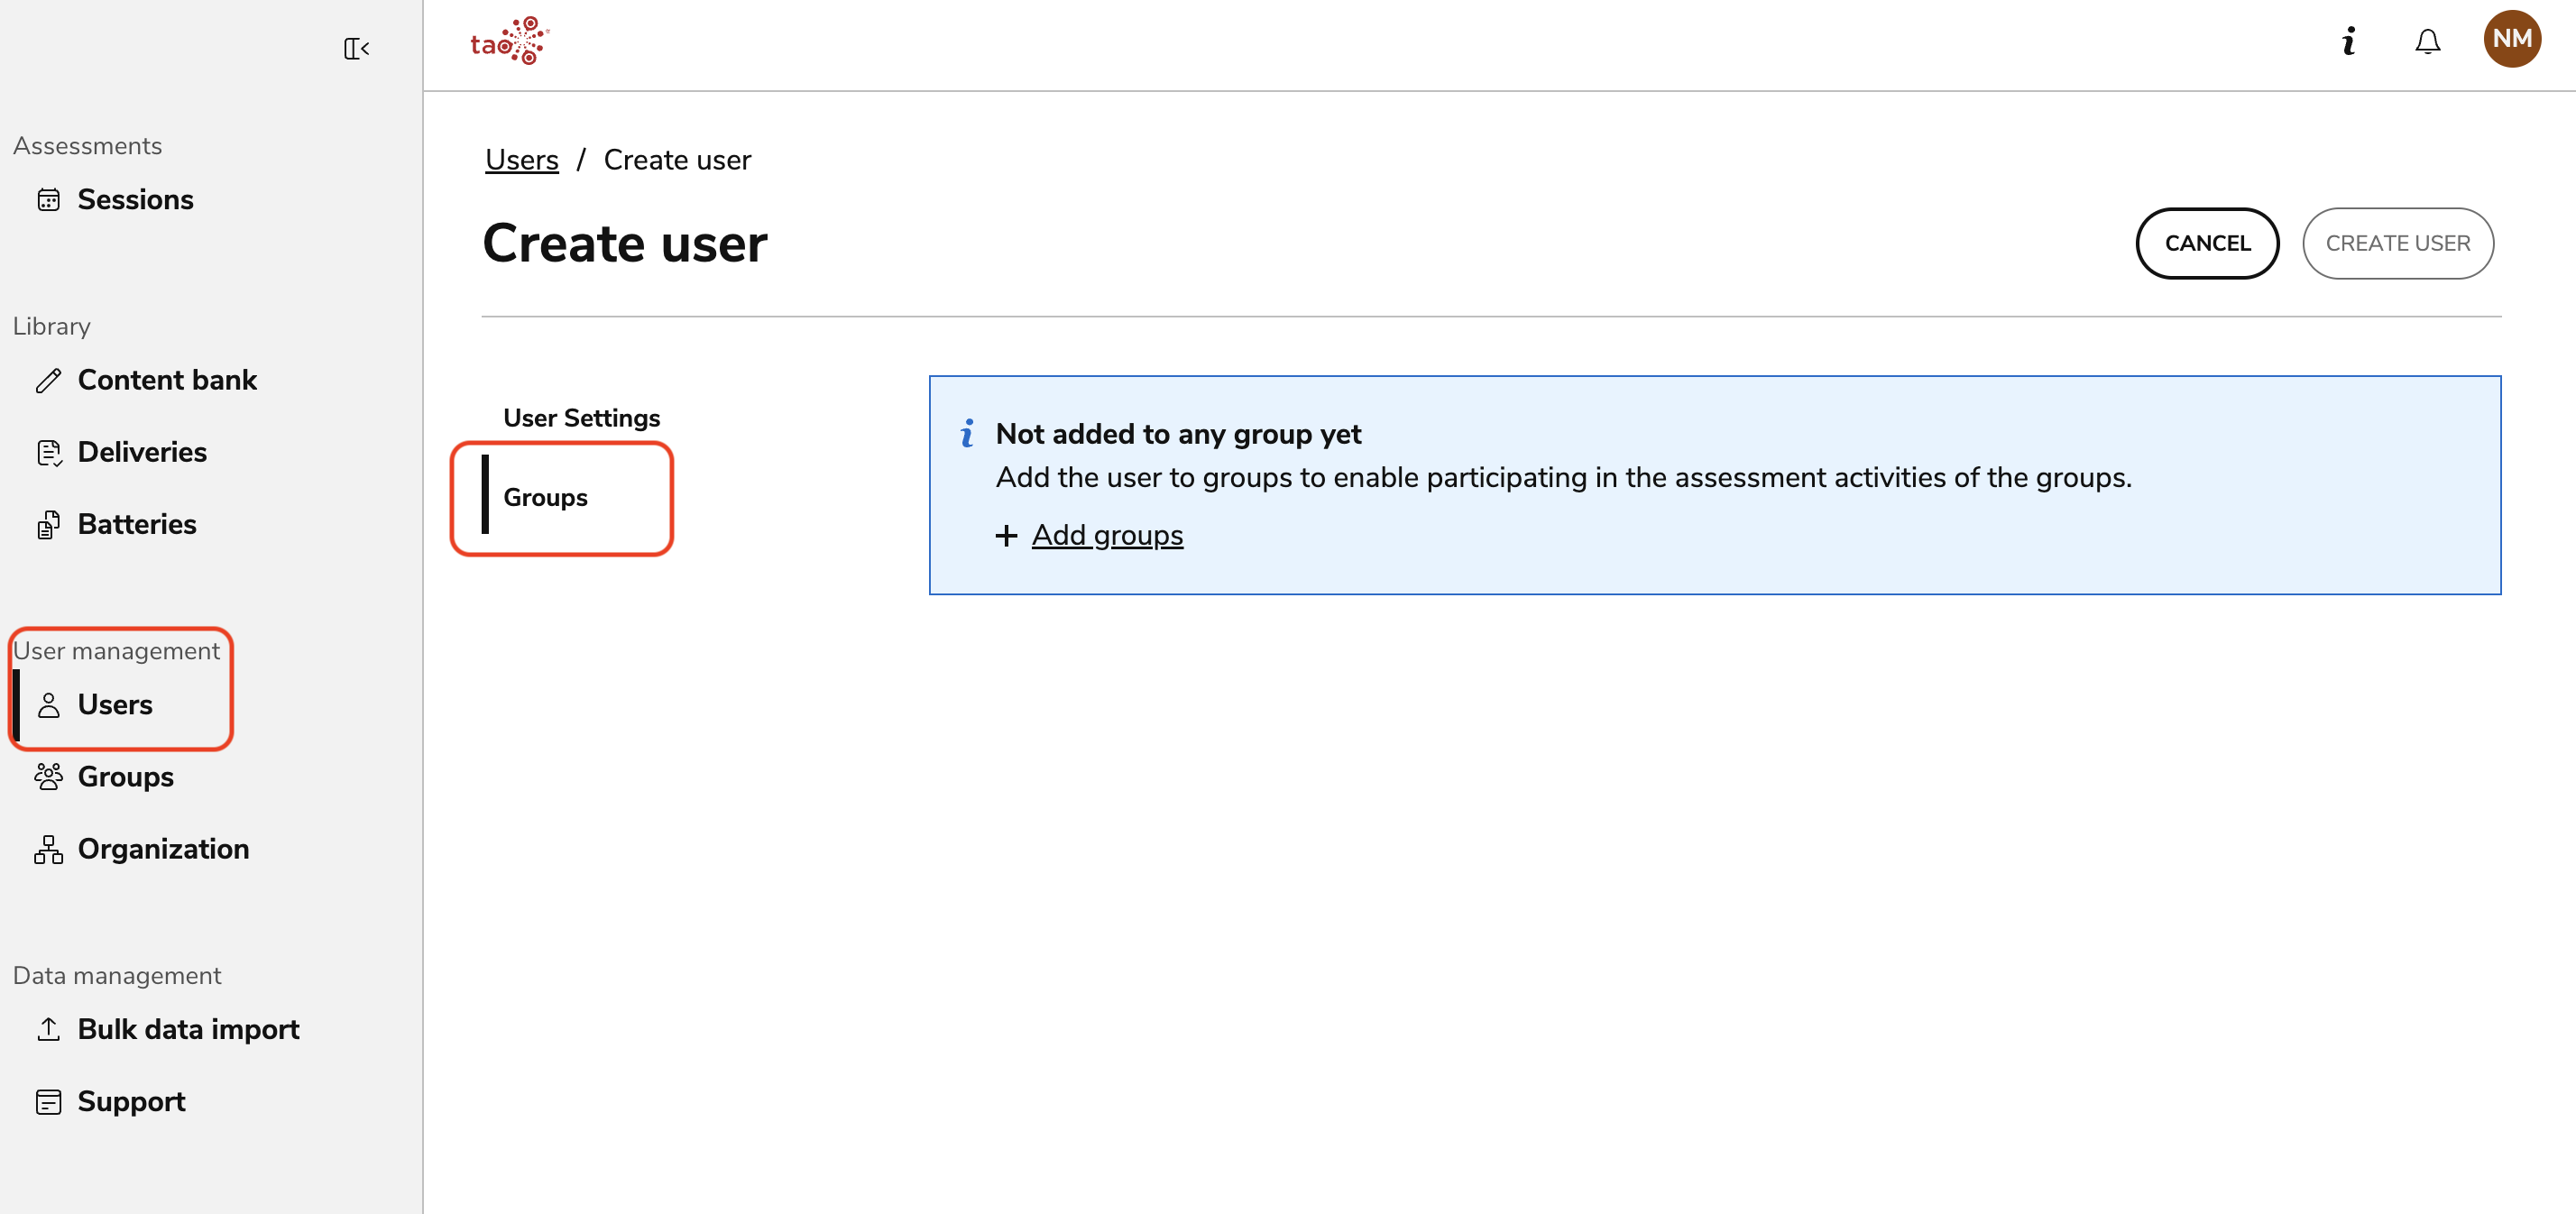
Step 5: Create and roster a group
Before creating a test session, a group must be created and populated with the appropriate users. Once users have been added to the group, the group can be assigned to a session.
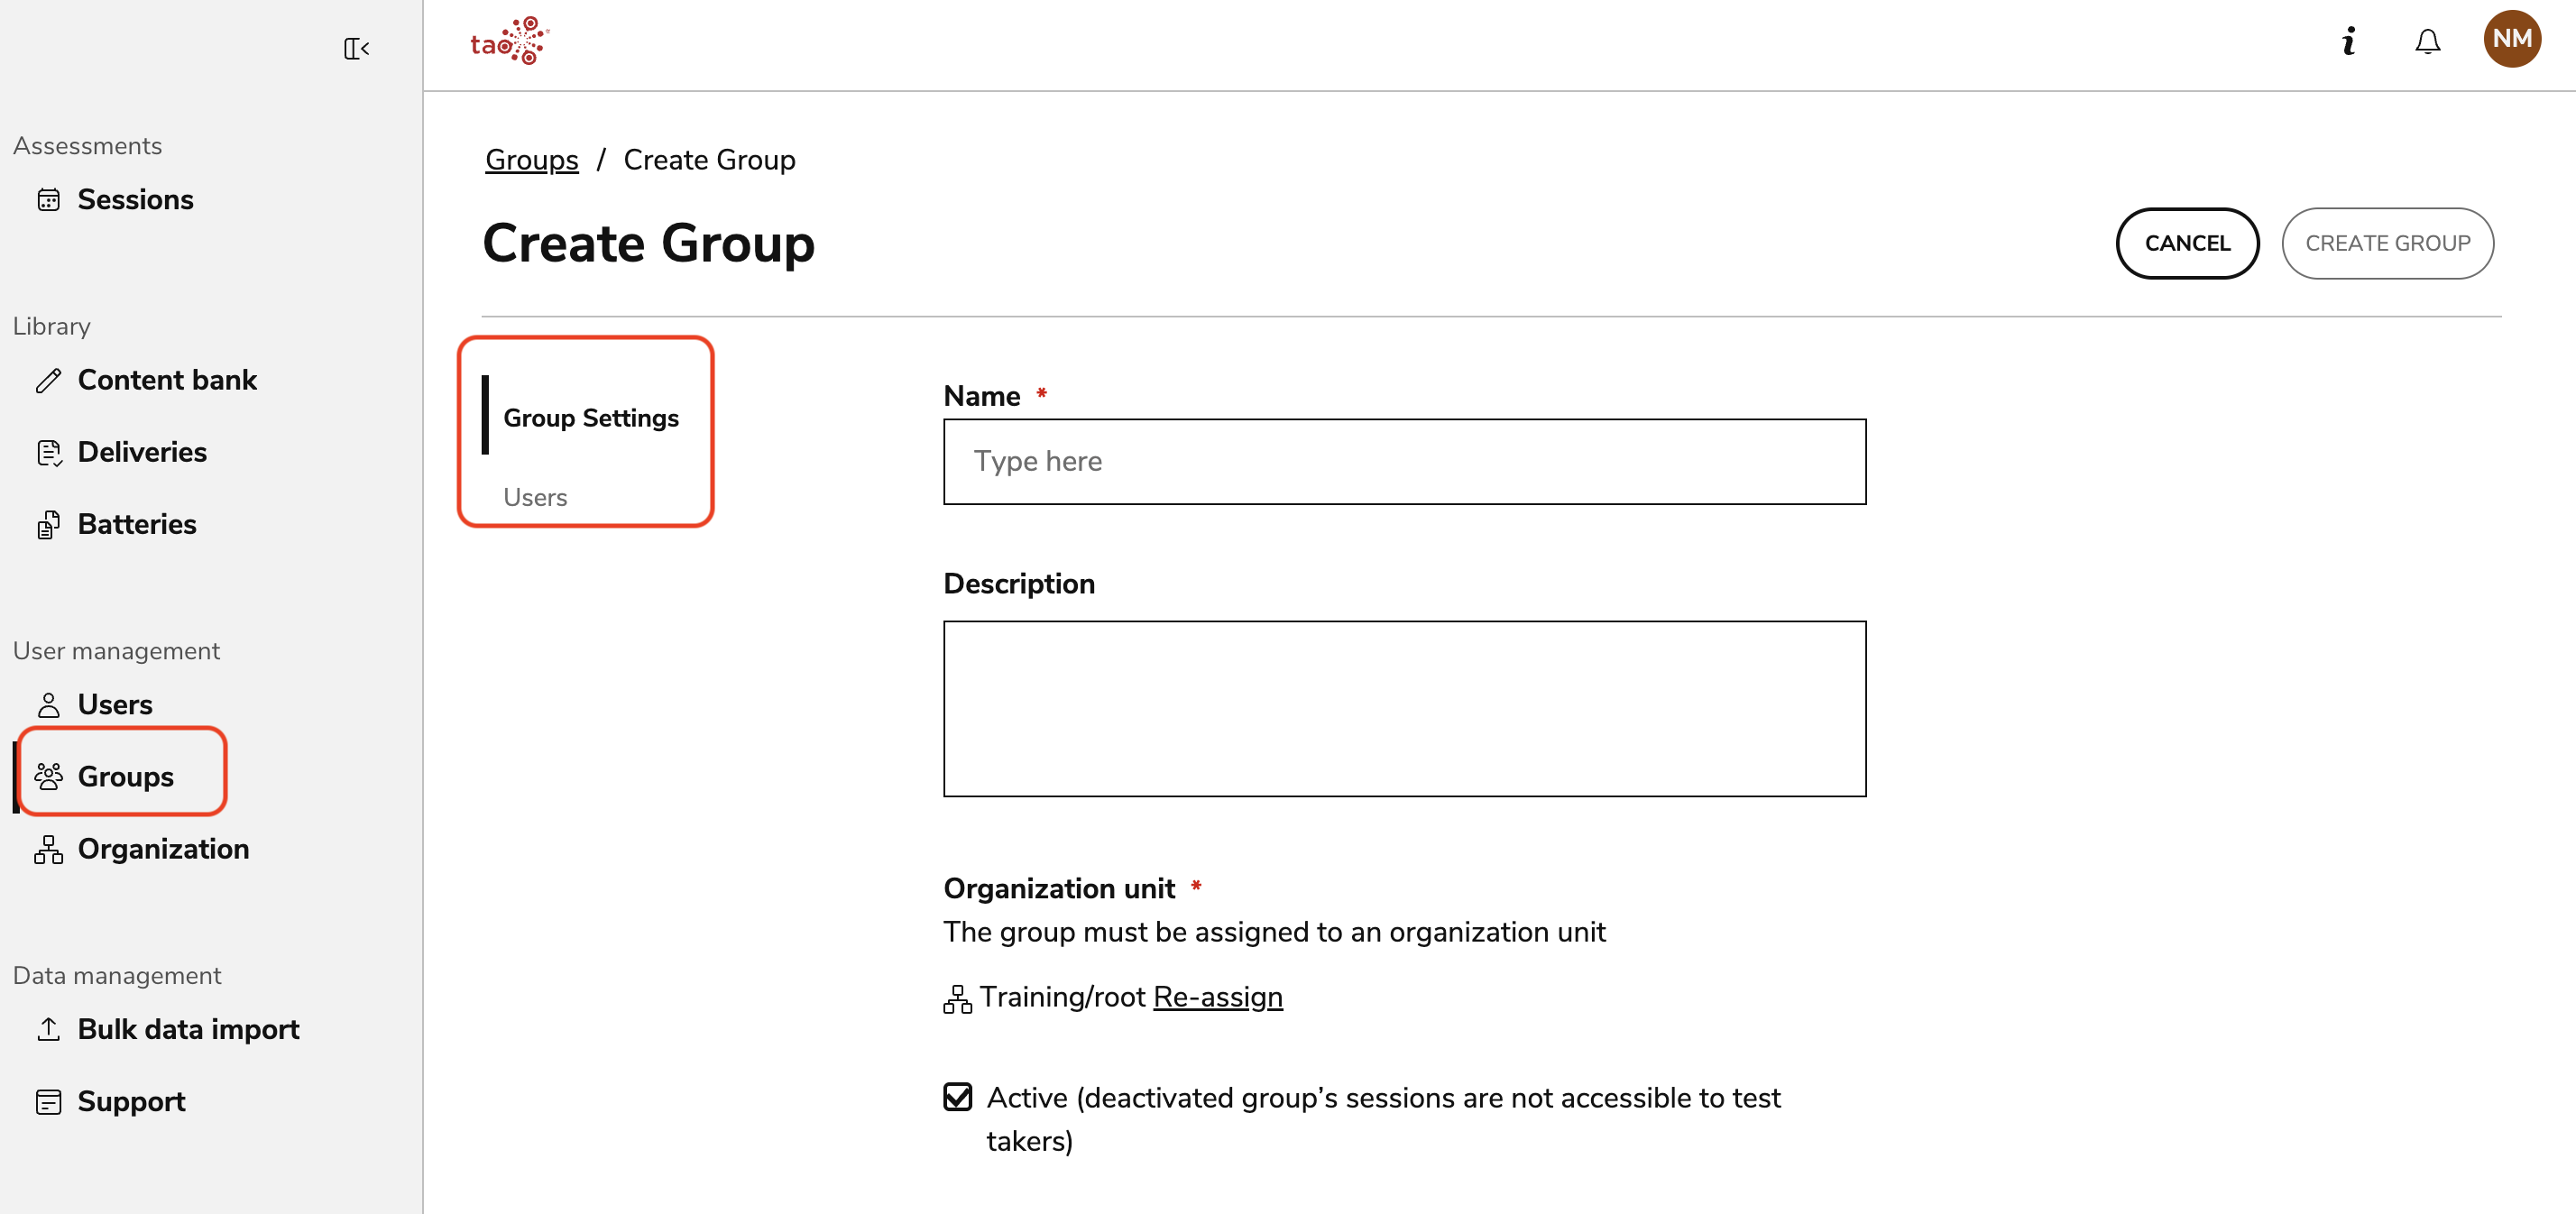
Groups may include:
-
Test takers
-
Proctors
-
Scorers (for manually scored assessments)
Step 6: Create a session
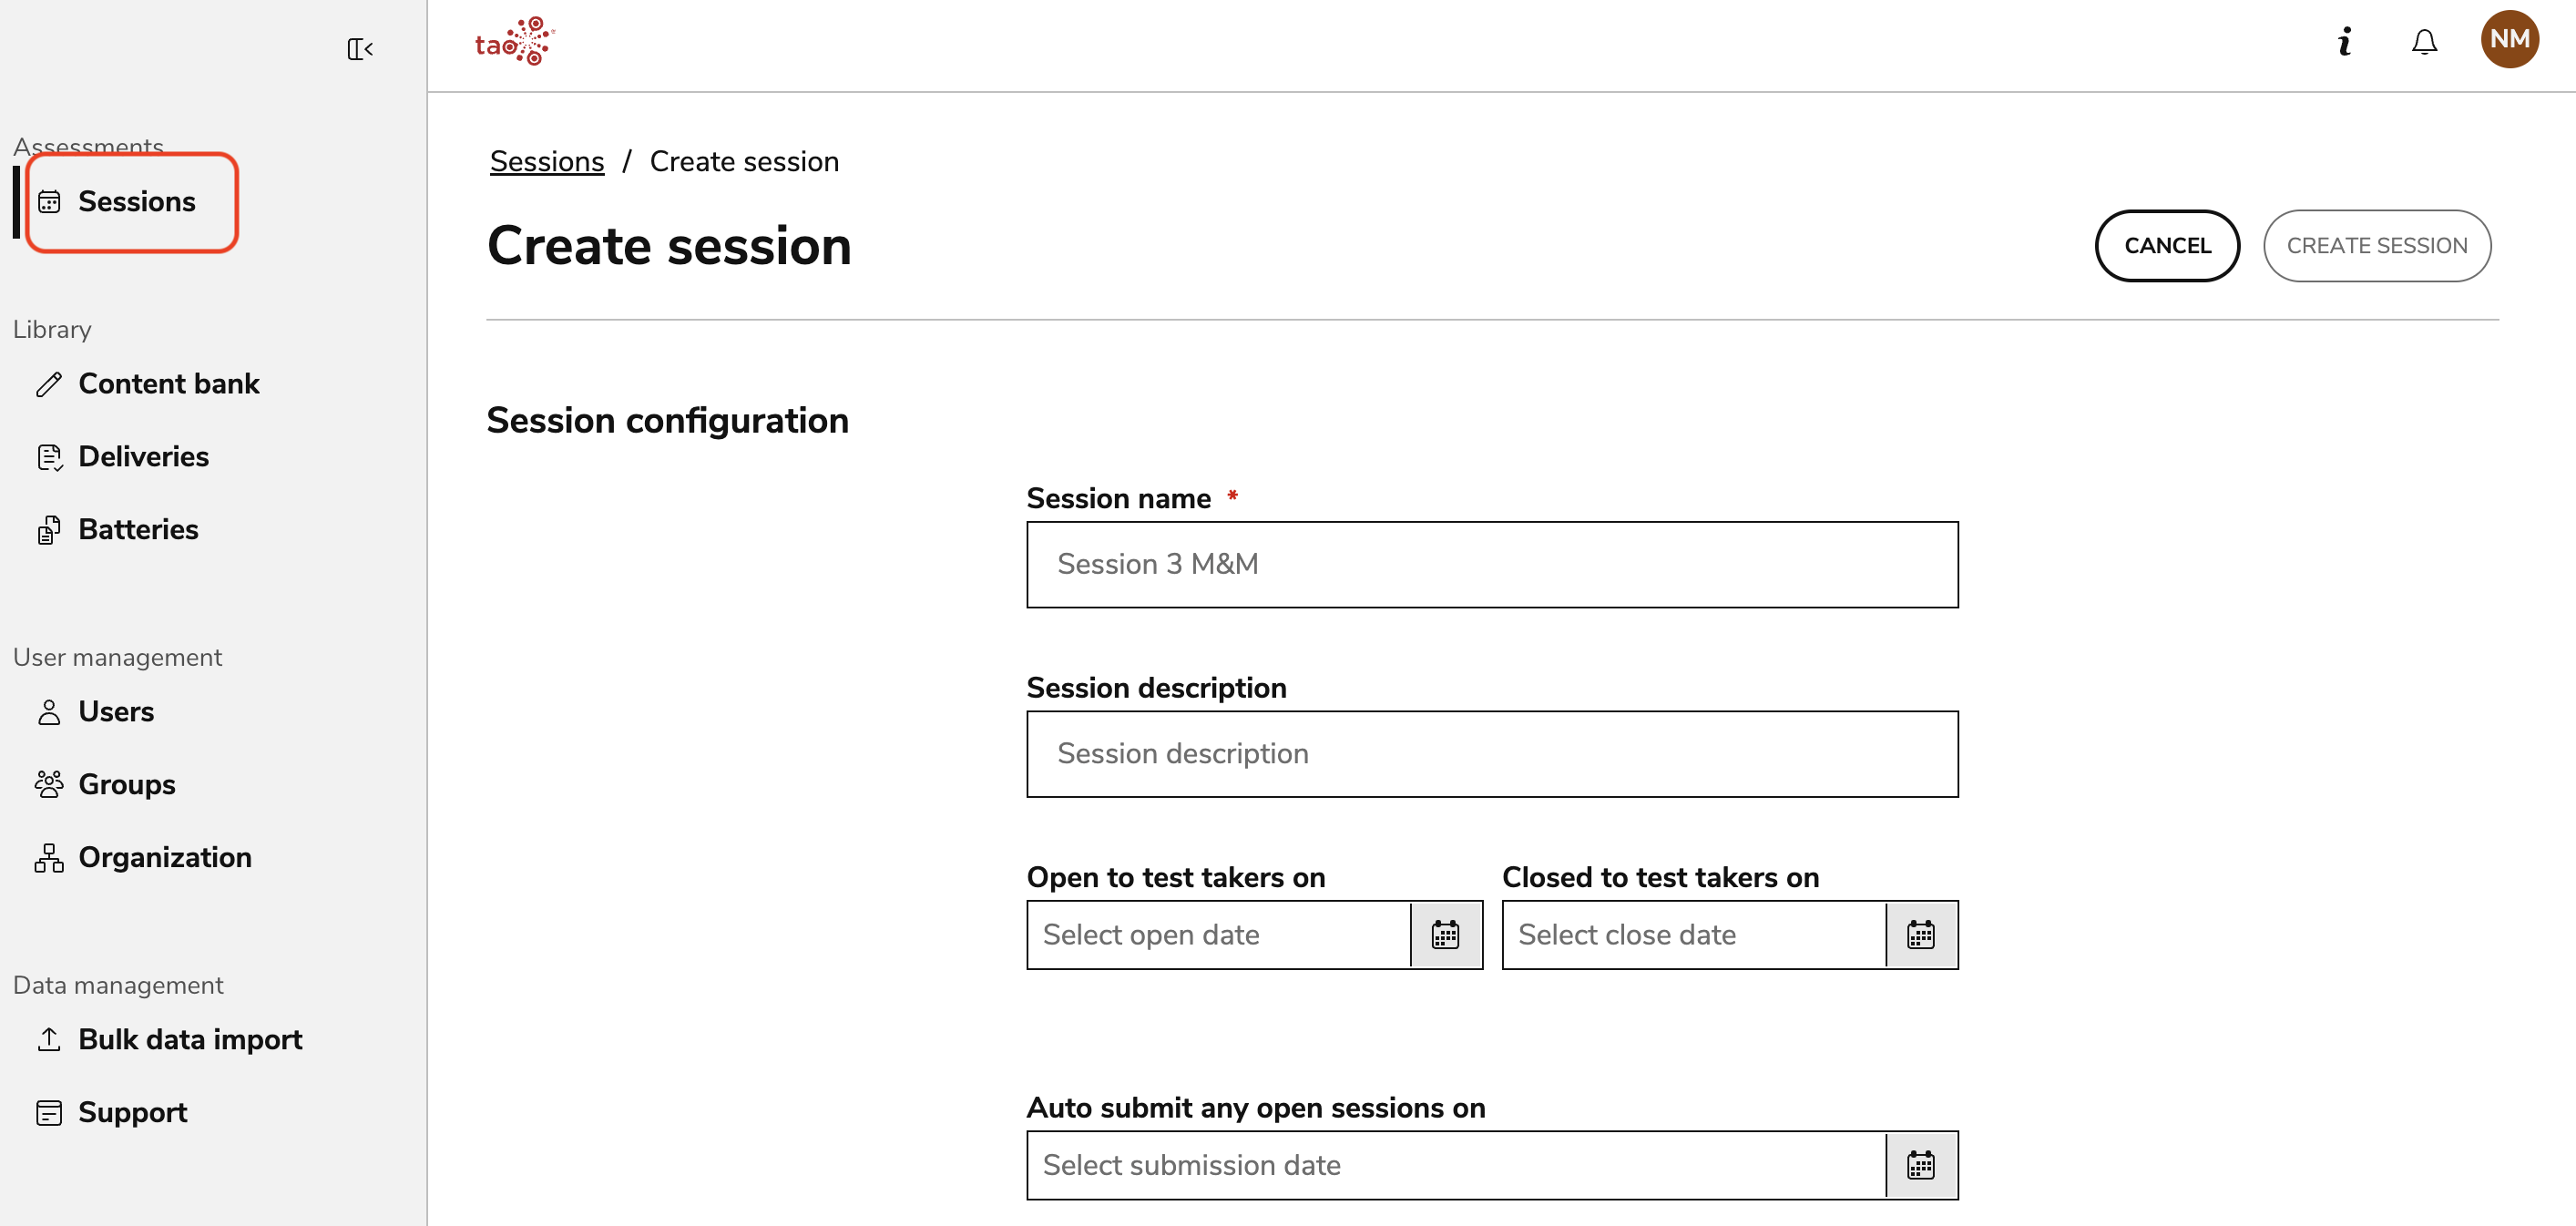
A session is the mechanism through which test takers access and complete an assessment. Once configured, the session can be activated and made available to participants.
When creating a session, administrators link:
-
A delivery
-
A group of test takers
Session configuration options may include:
-
Accessibility settings
-
Session start and end dates
-
Time limits and timing controls
-
Security settings
-
Additional administrative options
Optional: Create a battery
For assessments that require multiple tests, administrators can create a battery.
-
A battery is a collection of two or more deliveries that are administered together.
-
Instead of linking a session to a single delivery, administrators can link the session to a battery, allowing test takers to complete multiple assessments within a single testing workflow.
For more information, see Planning sessions in the User Guide.
Step 7: Administer the session
When a session becomes active, test takers can access and complete their assigned assessments within the configured testing window.
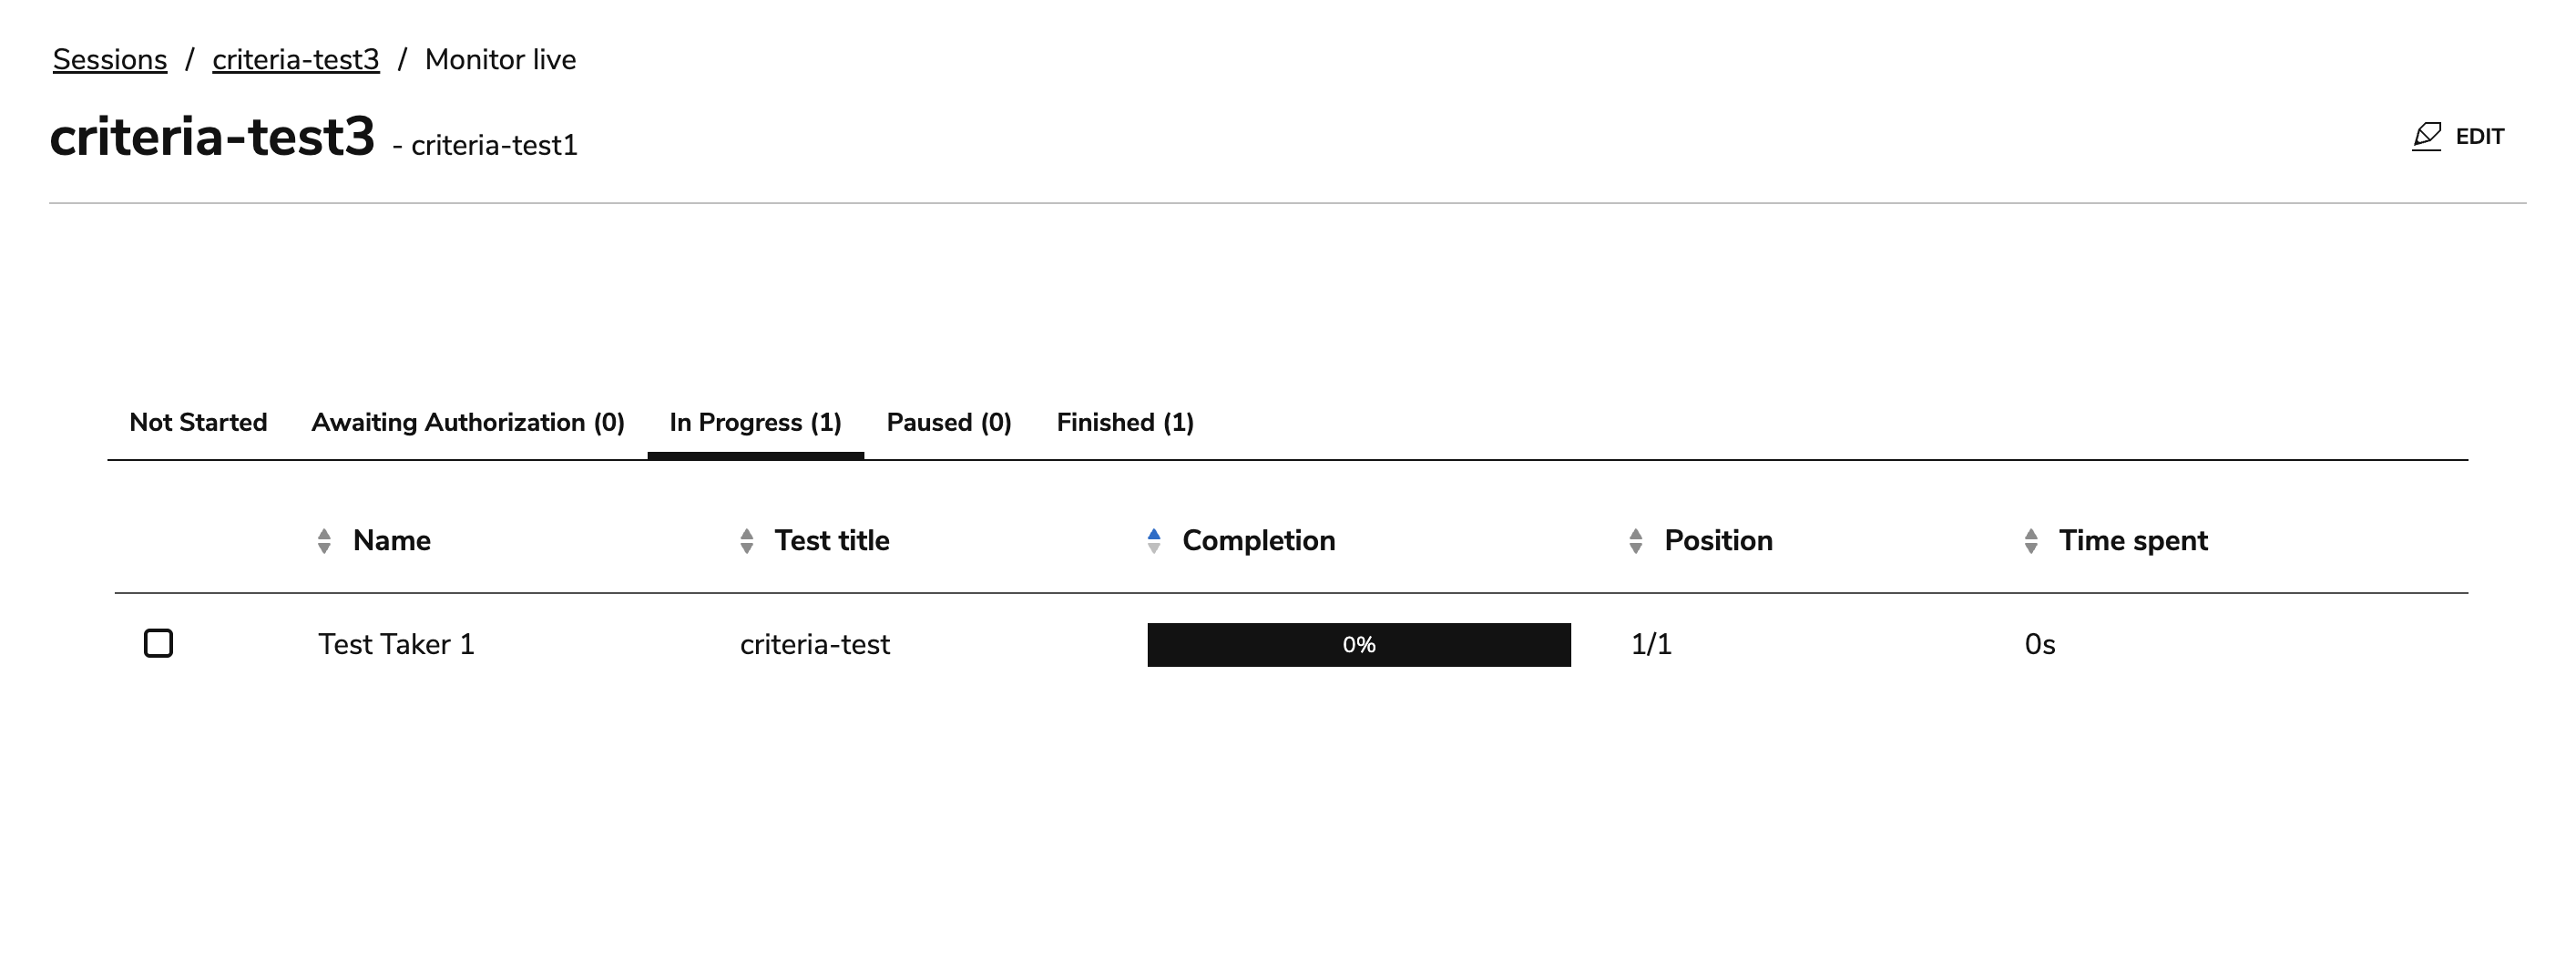
Proctors can oversee testing activity using Live Monitoring, which provides real-time visibility into participant progress.
From the Live Monitoring view, proctors can:
-
Monitor multiple sessions simultaneously
-
Pause individual test takers
-
Resume paused sessions
-
Extend testing time
-
Terminate sessions when necessary
For more information, see Monitoring in the User Guide.
Step 8: Review and score completed assessments
After test completion, scoring can occur automatically, manually, or through a combination of both methods.
Automatic scoring
For automatically scored items, results are processed immediately and scores become available through the session overview. You will be able to review each completed session.
Manual scoring
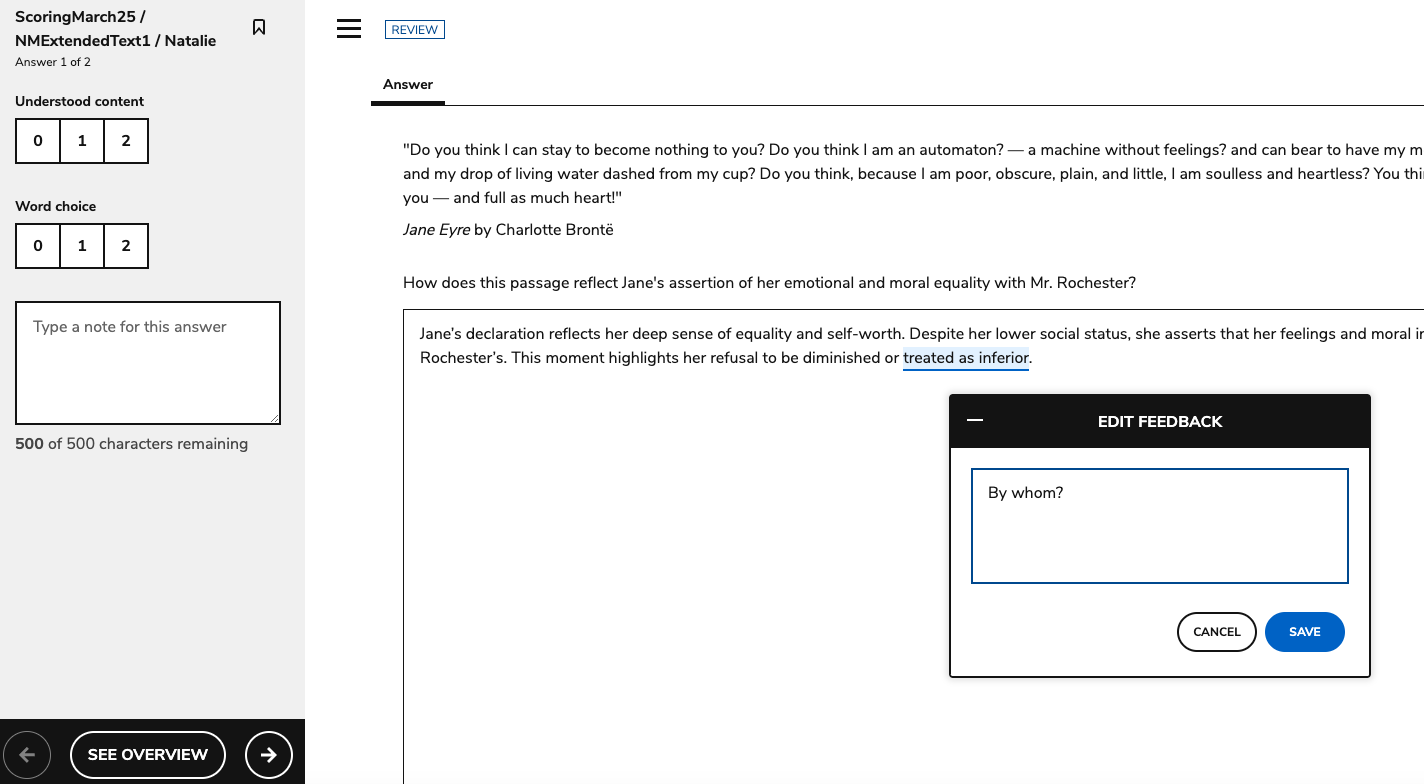
If one or more items have been configured for manual scoring, designated scorers or administrators can access completed responses from the Session Overview page.
Scorers can:
-
Review responses
-
Apply scores using configured rubrics
-
Submit scores for processing
-
Rescore completed assessments when necessary
Final results are not available until all required scoring activities have been completed.
For more information, see Scoring in the User Guide.
Step 9: View results and analytics
Once all scoring has been processed, assessment results become available through the Session Overview page.
Depending on permissions and configuration, users may access:
-
Individual test results
-
Final scores
-
Test reviews
-
Response data
-
Session-level reporting
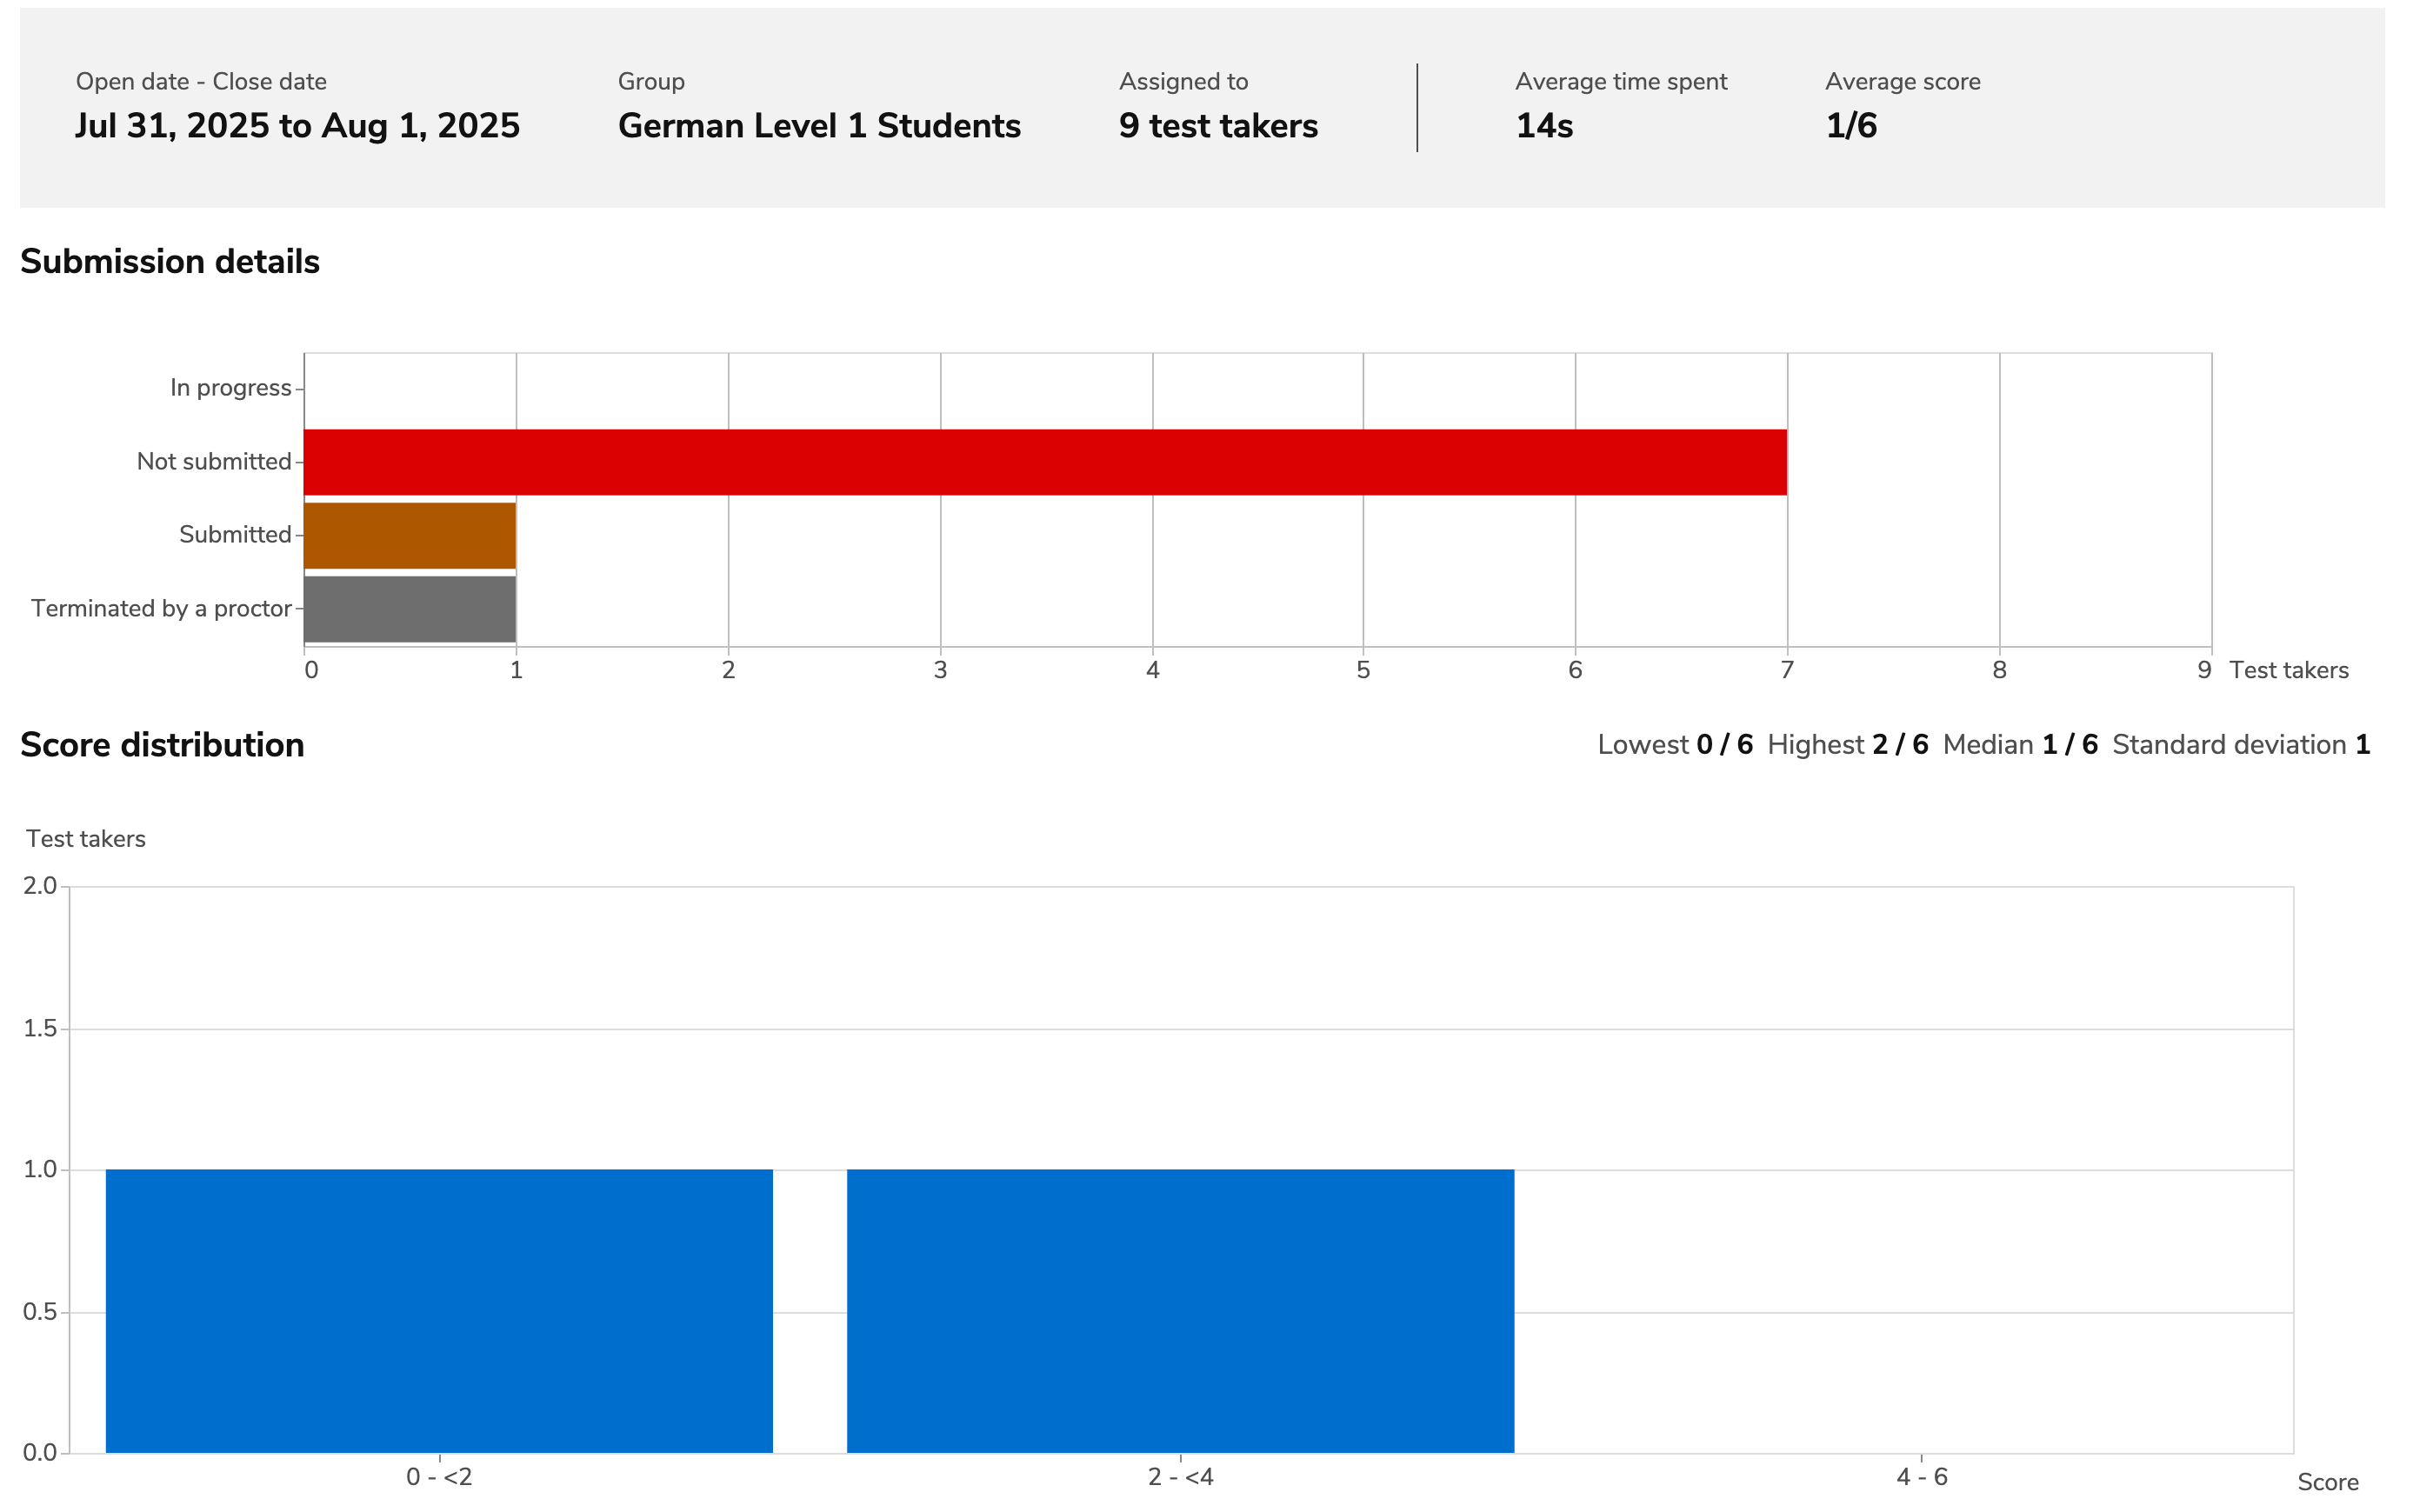
For more information, see Reporting in the User Guide.