How to use accessibility tools during a test

Related articles

Applies to

Test takers participating in an assessment through the TAO Portal. The tools available during a test may vary depending on how the test session is configured.

Purpose

This guide explains how to use the accessibility and support tools that may be available during a test. These tools can help you read and interact with test content, adjust how content is displayed, take notes, and work through questions.

Steps

1. Use the highlighter

The Highlighter tool is represented by a pencil icon and allows you to highlight prompts and supporting text.

  1. Select the text you want to highlight, then select a color from the highlighter bar. Alternatively, select a color first, then select the text you want to highlight.

  2. Continue highlighting text as needed. Your highlights are preserved if you navigate away from the question and return to it later.

highlightertt.png

2. Use the calculator

The Calculator tool is located to the right of the Highlighter tool.

  1. Select the Calculator icon to open the calculator.

  2. Use the calculator to perform the necessary calculations.

  3. After completing the calculation, type your answer in the appropriate answer field.

calculatortt.png
  1. For certain interactions, a math editor will be available to type and enter formulas into a text box. Please note that, unlike the calculator, the math editor does not perform calculations.

wiristt.png

3. Listen to text with the read aloud tool

The Read Aloud tool is represented by a speaker icon and allows you to hear test content read aloud.

  1. Select the speaker icon to open the Read Aloud tool.

  2. Select the mouse button, then select a specific part of the text to hear it read aloud. The word currently being read is highlighted.

  3. Select Play to hear all text on the page read aloud. The word currently being read is highlighted.

  4. Select Stop to stop the text from being read aloud.

  5. Select the settings icon, represented by interlocking gears, to adjust the reading speed or select a different voice.

readaloudtt.png

4. Use the line reader

The Line Reader tool allows you to visually isolate part of the text, which can help you focus on individual lines in longer passages.

  1. Select the Line Reader icon to open the tool.

  2. Select the arrow on the left side of the Line Reader to increase the size of the highlighted area.

  3. Select and use the lines in the center of the Line Reader to move it up or down the page.

line-readertt.png

5. Use full-screen mode

The Full Screen tool is located to the right of the Line Reader tool. Some assessments may require you to use full-screen mode.

  1. Select the Full Screen icon to enter full-screen mode.

6. Mask or eliminate answers

If available for your assessment, Answer Masking and Answer Eliminator can help you work through answer options in Choice interactions.

  1. Select the gears icon to the right of the toolbar.

gears-icontt.png
  1. Enable Answer Masking to mask and unmask answer options.

answermaskingtt.png
  1. Enable Answer Eliminator to eliminate (cross out) answer options from consideration.

answereliminatortt.png

7. Print test content

If the Print Out feature is available, you can print the contents of a test item, including text blocks, images, or passages.

  1. Select the Print button.

  2. Follow your device's printing instructions to print the item. Interface elements such as buttons and icons are removed from the printed content.

printouttt.png

8. Use the scratchpad

The Scratchpad is represented by a notepad icon and provides a space to write notes, make sketches, and work out answers.

  1. Select the notepad icon to open the Scratchpad.

  2. Select the Text tool to add plain text.

  3. Select the Brush tool to make freehand drawings.

  4. Select the Shape tool to add rectangles, ellipses, or lines.

  5. Select the Select tool, represented by an arrow, to select and move items on the Scratchpad.

  6. Select the Erase tool to delete items.

  7. Use the Undo and Redo arrows in the top-right corner of the Scratchpad to undo or redo changes.

scratchpadtt.png

9. Adjust accessibility settings

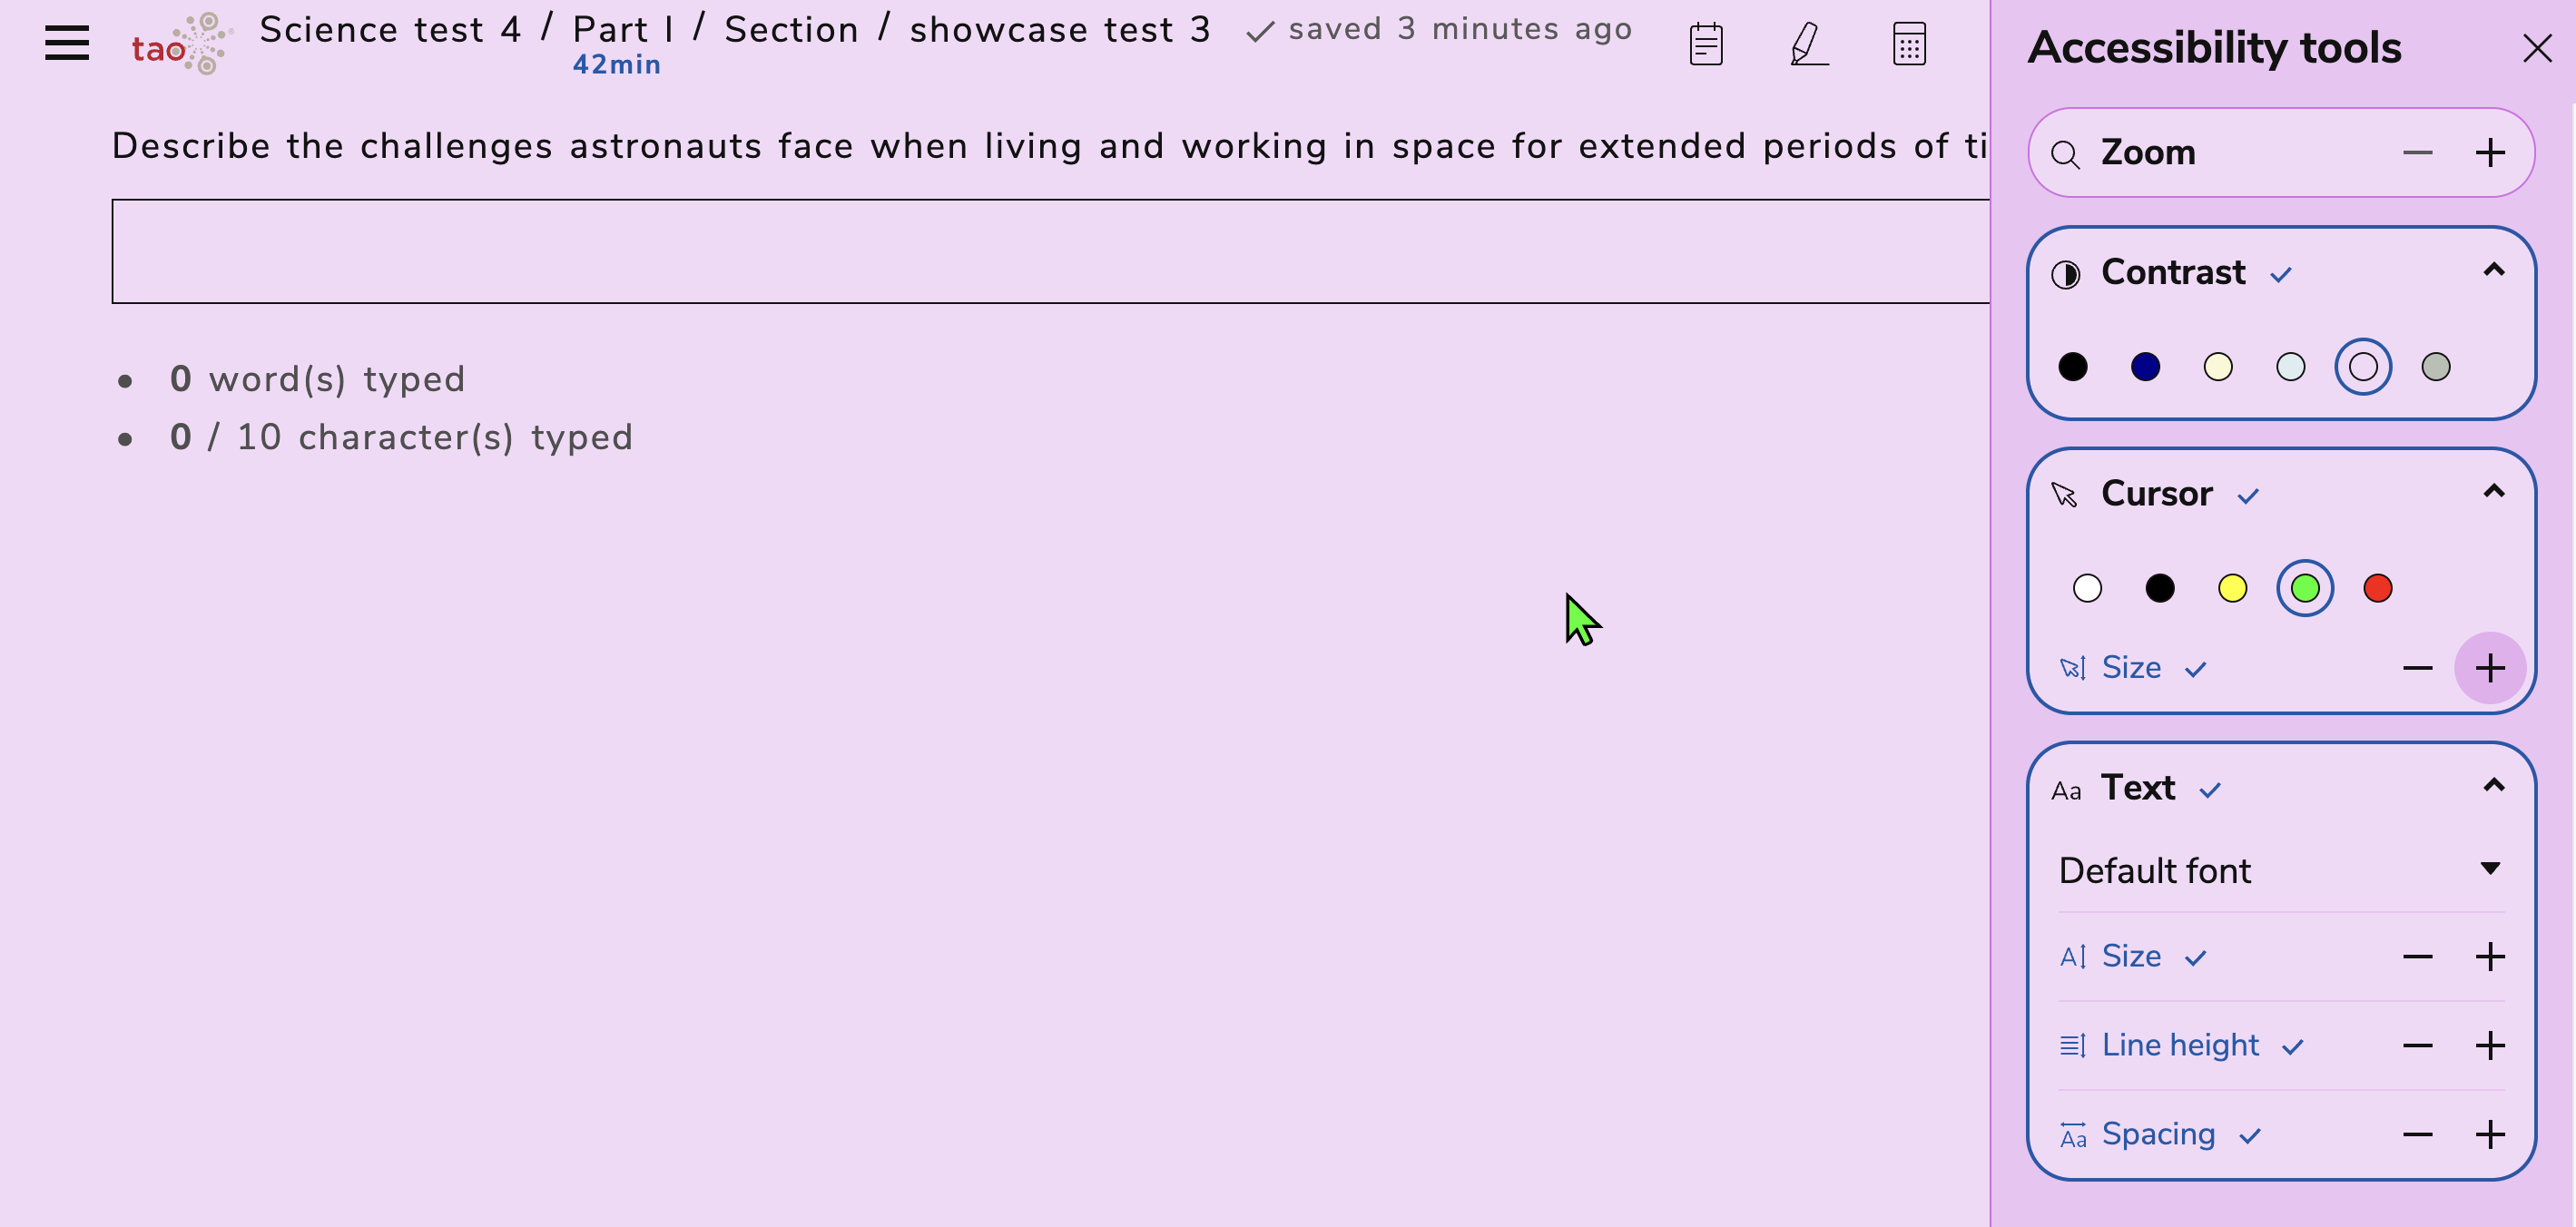
Select the test taker icon on the right side of the toolbar to open the Accessibility tools panel. From this panel, you can adjust several display and navigation settings.

accessibilityicontt.png

Zoom

  1. Locate the Zoom settings.

  2. Select the plus button to zoom in or the minus button to zoom out.

Contrast theme

  1. Locate the Contrast Theme settings.

  2. Select a color option to change the color and contrast of the test text and background.

  3. Choose from the available themes to find the option that provides the best readability.

Custom pointer

  1. Locate the Custom Pointer settings.

  2. Select a color to change the color of your pointer.

  3. Select the plus or minus button to adjust the size of your pointer.

Text font and spacing

  1. Locate the Text Font and Spacing settings.

  2. Select a font from the drop-down menu to change the font used in the assessment.

  3. Select the plus or minus buttons to adjust the text size, line height, and word spacing.

accessibility-toolstt.png