Text Entry interaction
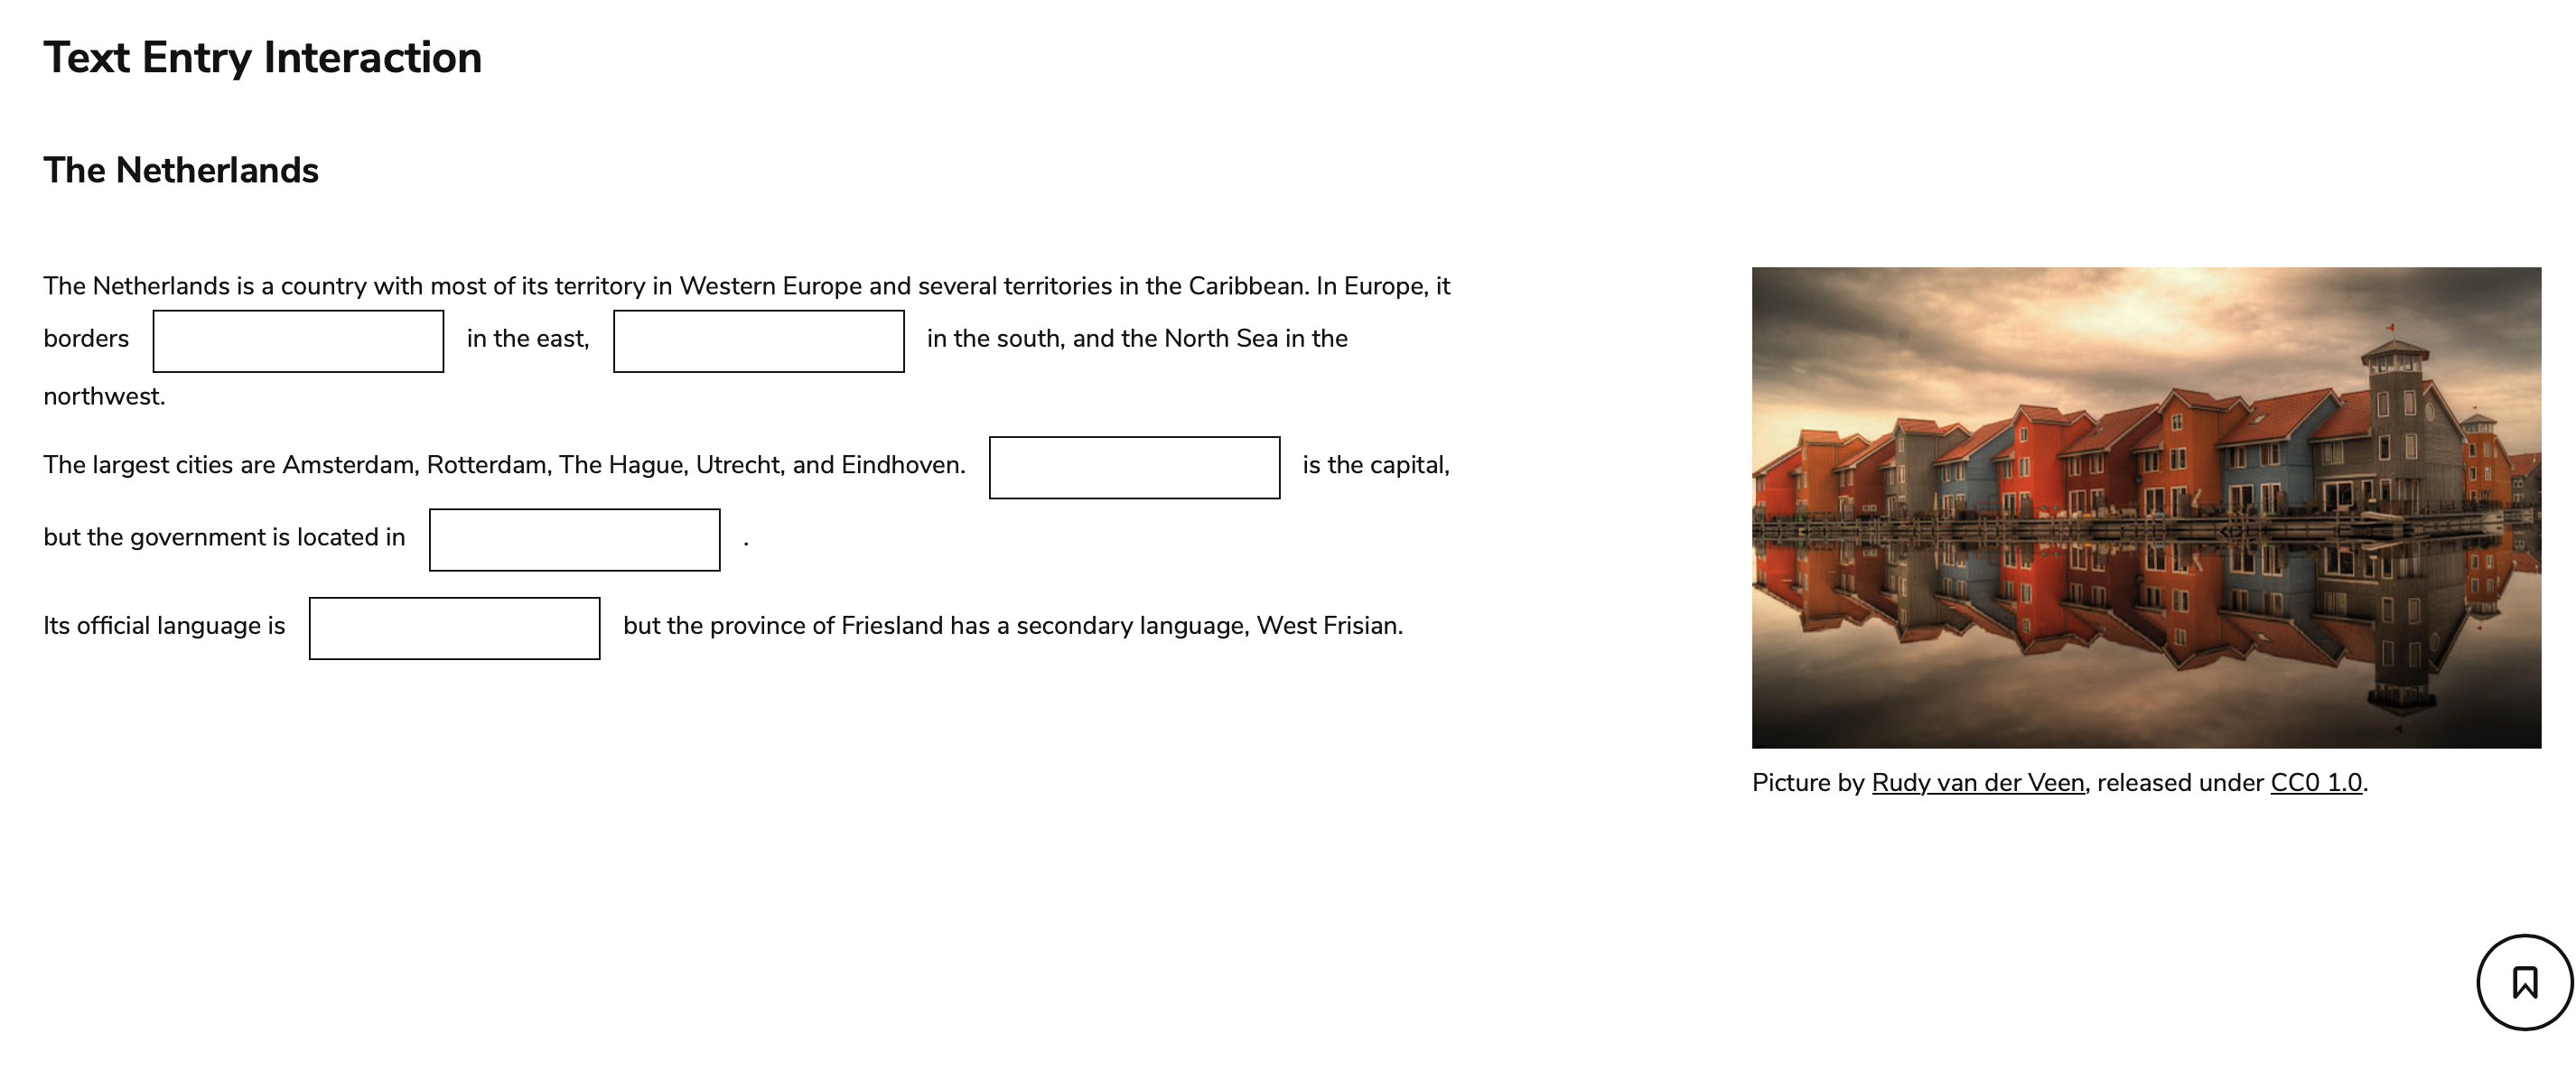
Text Entry Interactions allow Test-takers to complete a “Fill in the Blank” question with an exact text answer. This interaction needs to be inserted into a Text Block element.

Text Entry interaction in TAO Advance
Once you have generated a new Item, and clicked on Authoring in the Action Bar, follow the steps below to create a new Text Entry Interaction:
1. From the Inline Interactions Library below Common Interactions on the left, drag the Text Block onto the blank Item and drop it onto the Canvas.
This creates a field (containing a sample text) in which a text may be entered from a favorite source (a Word document or website, for instance), or typed in.
To enter your text, click inside the text field.
See the chapter Word Processing Options for details on text editing options such as using italics or bold text in your item, and inserting features such as shared stimuli or media, tables or formulae.

Text Entry interaction
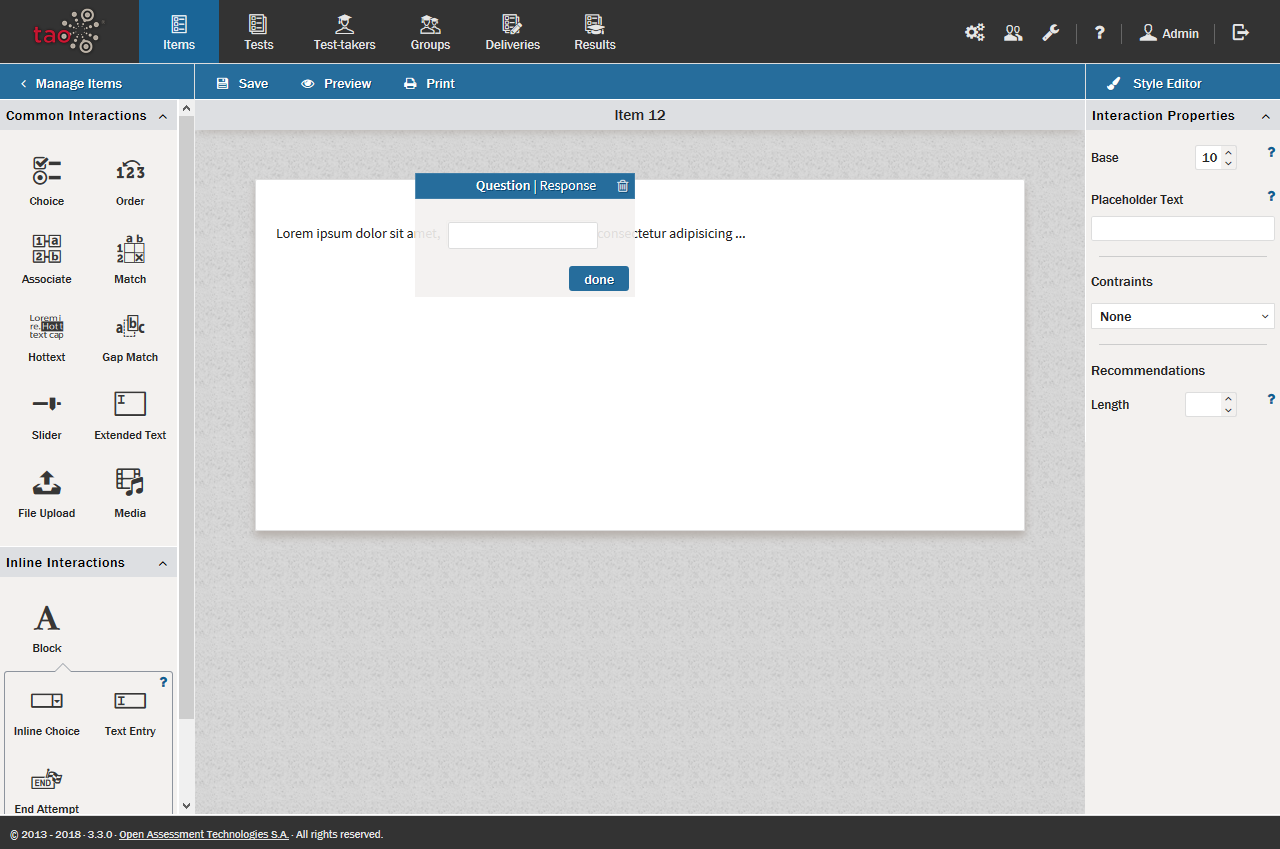
2. Once you have entered the text, drag the Text Entry icon from the Inline Interactions library to the space next to where the test-taker will be expected to fill in the blank.
This creates a pop-up window containing the blank, which is to be filled by the test-taker. No changes can be made here: the window just confirms that you have created the blank. However, a correct answer will need to be selected and this is done in the Response mode.
Remember to remove the actual words from the text that the Text Entry blanks are designed to replace.
3. To configure the interaction settings, click on each Inline text entry element, and in the header bar of the resulting pop-up window, click Question. Complete optional configuration of the interaction if required.
You can choose to configure your interaction in the following ways:
define a numeric base (see note below)
define length constraints and a certain pattern the answer must follow
These options are available in the Interaction Properties Panel on the right. See the section Configuring Interactions for details.
The Base feature is used to set the number base for the interpretation of numerical values entered by the test-taker. By default this is 10, i.e. its interpretation is based on the decimal system. If it uses a different system, change this here.
4. Click Response in the pop-up window to define the correct answer(s).
This opens the response entry window, in which you can enter the correct answers. Remember that you will need to produce an answer that the test-taker will be expected to match exactly, character-for-character, including spaces.
Repeat steps 2 and 4 until all the desired Text Entry blanks have been inserted into the text.
5. Complete the item’s Response Properties configuration (if required) in the Response Properties Panel.
You can choose to configure the interaction response in the following ways:
Determine how the item is to be scored. See the topic Modifying the scoring method for details.
Whether the item is to be automatically or manually (human) scored
Give partial credit for partially correct answers
Define the response type
Insert modal feedback
These options are available in the Response Properties Panel on the right.
6. Click the blue Done button. Your text entry interaction is now complete.
After this step, you can preview and test-run your interaction by following the instructions given in Steps 5 and 6 in Creating a Test Item.
