
Admins and Group Managers (group creators) can create new groups from the Groups tile in the TAO Portal, via the side bar menu (Groups).
1. Select CREATE GROUP in the top-right of the Group management interface.
The Create Group form displays:
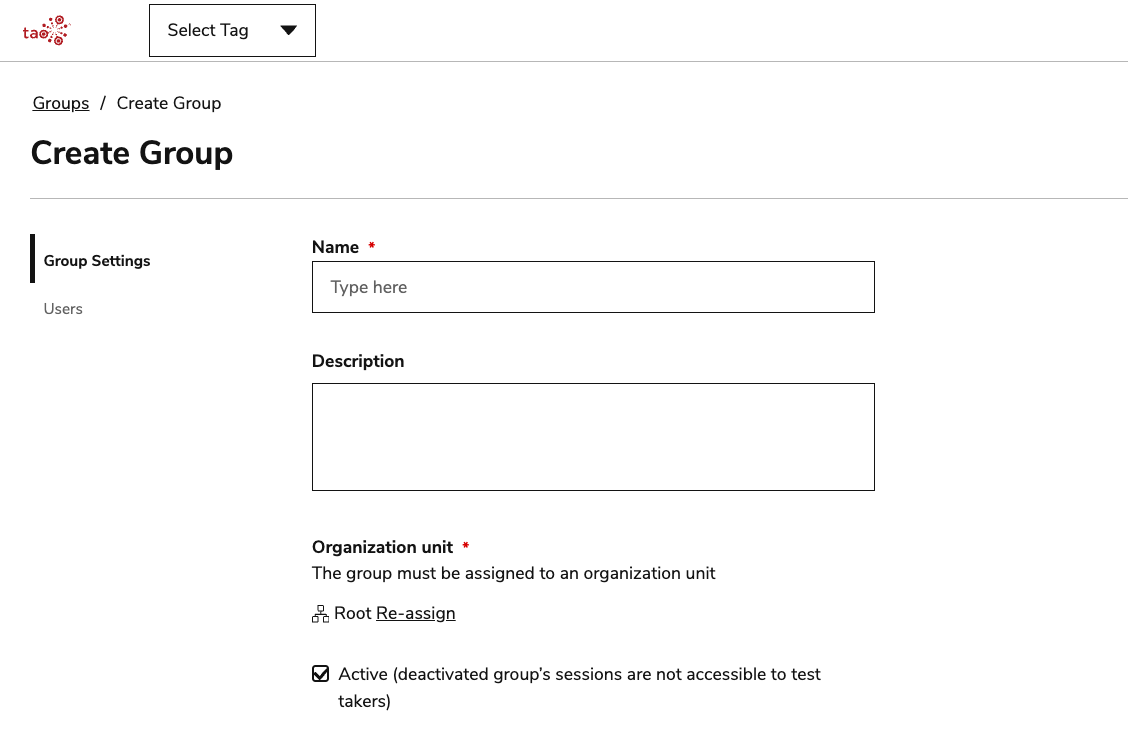
2. Populate the fields in the Group Settings tab.
The Group Settings tab contains main information about the group you are creating. The mandatory information is marked by an asterisk *:
-
Name*: The group name.
-
Description: The group description.
-
Organizational Unit*: The organizational unit a group is assigned to. The default OU is Root. For more information on organizational units, see Managing organizational units.
While a user can only be assigned to a single OU at any given time, a user can be part of multiple groups (each belonging to a different OU).
-
Active flag: To create an enabled (active), disabled (inactive) group. By default Active is checked. Sessions linked to inactive groups are not accessible by the test-takers anymore.
3. Select the Users tab to assign users to the group.

This is not a mandatory step. Users can be enrolled into groups when updating an existing group or via User Management.
4. Click on Add Users to access the list of available users.
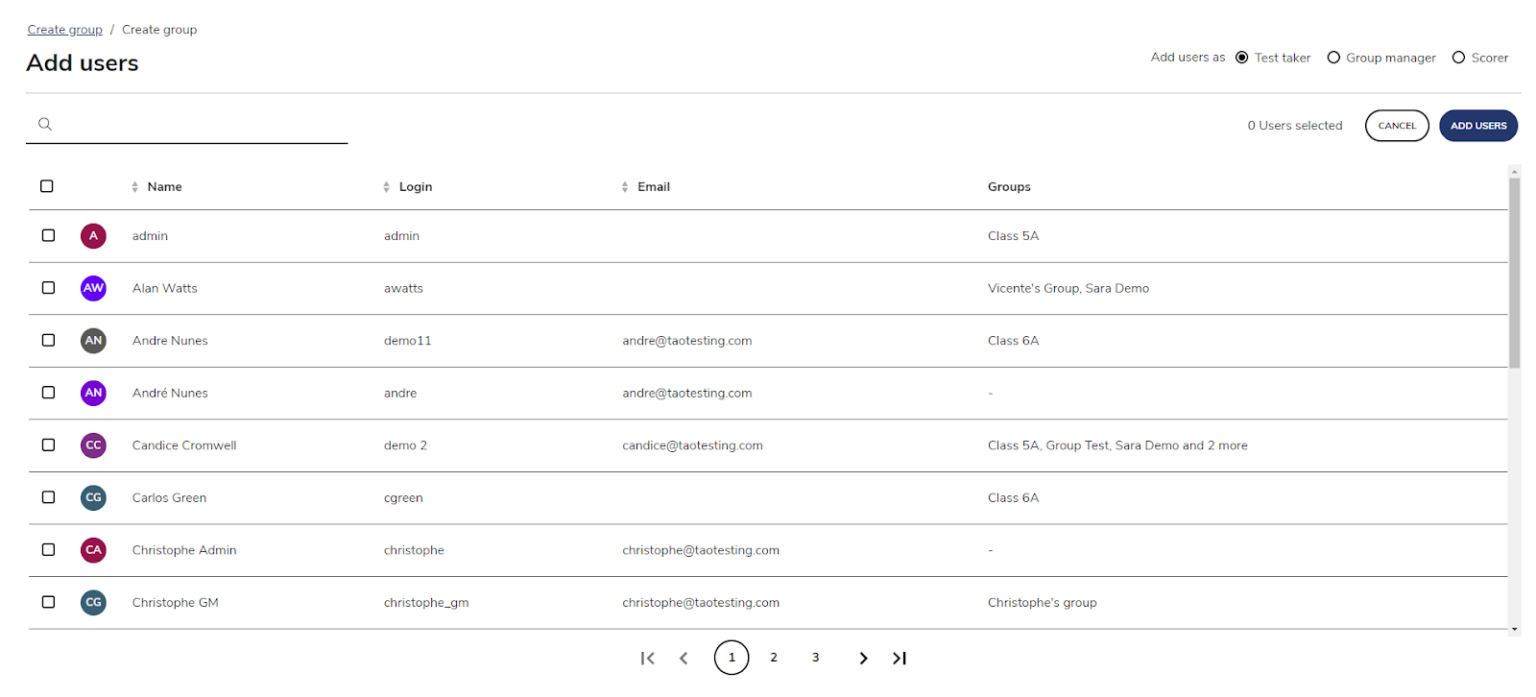
When adding users to a group, only the users belonging to the same organizational unit (OU) as the group - or to a parent OU - can be seen.
Similarly, the current user who is adding users to the group can only see (and add) users belonging to their OU or below.
If it is important that that your organization’s information per unit is kept separate, the organizational hierarchy should be created before creating a user or group. However, this is not mandatory, as users/groups can be re-assigned at a later stage (if new OUs are created). For more information on organizational units, see Organization management.
To find specific users, use the top-left search box. Select one or more users using the check boxes available on each row. For a description of user information see User Management.
To assign a group-related role for a user(s) within the group, select a role at the top right of the table. The options for group-related roles are the following:
-
Test-taker
-
Group Manager
-
Scorer
-
Score reviewer (see Reviewing scores (read-behind scoring))
-
Proctor
-
Booklet Publisher
-
Scan Uploader
-
Group Viewer
For more information on role permissions, Global and Group roles.
IMPORTANT: A user can be enrolled in multiple groups with a different role. For example a user could be enrolled as a Scorer in one group and as Group Manager in another one. However, this cannot be done in a single operation. To assign a user to a secondary role, open the Add Group interface and re-assign the user to the group with each role you want to assign to the user.
If a user is assigned a test-taker role + any other role, they will be able to switch between the test taker view and the administrative view by selecting their avatar in the top-right of the Portal interface. For more information, see Managing your TAO Portal account.
Once users are added, they appear in the Users tab together with the corresponding role:
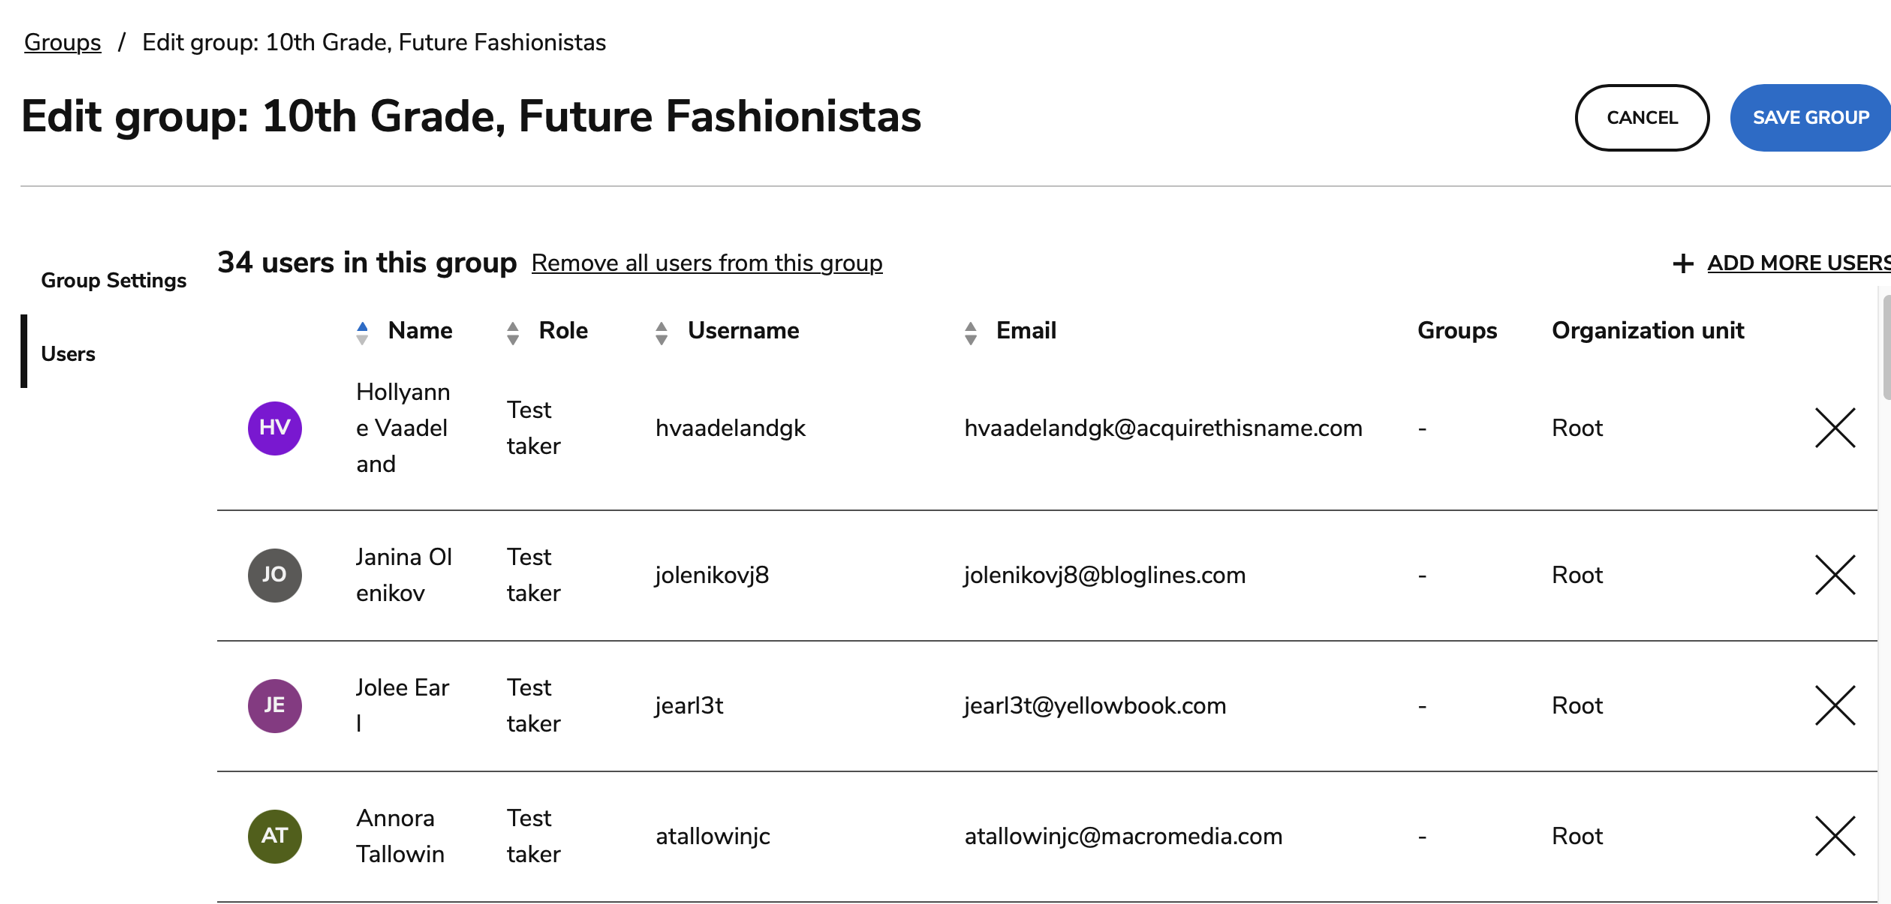
You can remove all assigned users by using the Remove from all button, or click the X on the right side of a line to remove a specific enrollment.
4. When you are finished, select CREATE GROUP and confirm the creation of the group.
Once a Group Creator creates a group, they are automatically assigned to that group as Group Manager.