Metadata is useful for classification - it can help identify items used in a specific course, for a specific instructor, within a specific test, etc. Properties define the metadata schema entered for an item class - values for these properties can then be added to any item.
By defining metadata properties at the class level (folder), you can automatically apply them to all items within that class. Although this section only covers Metadata that apply to Items, the procedures for applying Metadata to other entities are very similar.
TAO Core (deprecated): Add metadata properties to tests, test-takers, groups, assets, and deliveries
TAO Ignite: Add metadata properties to items, assets, tests, and deliveries.
Prerequisite
If you want to use close-ended metadata, you must first create lists (which can then be referenced from individual classes). For more information on types of metadata and creating lists, see Using metadata for classification and search.
1. Adding or editing metadata properties for a class (folder)
1a. Click on an Item class (folder).
The Properties form for the class you are reviewing allows you to change the label of the class.
Select Manage Schema. This will bring up Manage item class schema form that shows the Metadata properties set for all the Items in that class. These properties define the Metadata which apply to a given Item (within the class).
For items/item classes, the following Properties listed cannot be edited: Item Content, Original Filename, Item Model, State, and Lock. Other properties in the list of class Metadata can be both edited and, if necessary, deleted.
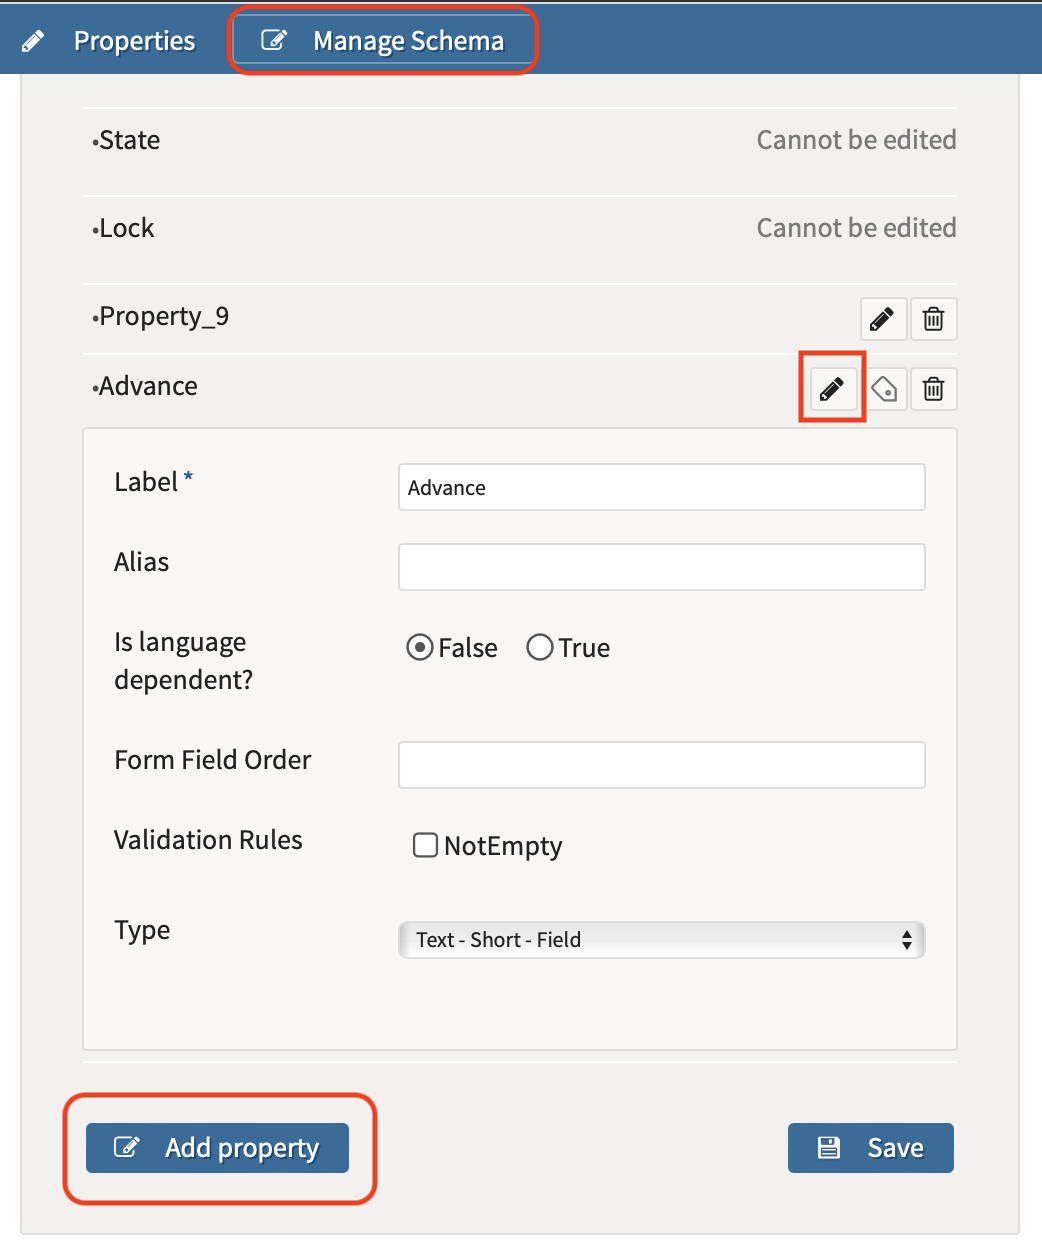
1b. To add a new Property in the Manage item class schema window, click on the blue Add Property button below the Property list.
This adds a new Property at the end of the list. Before it can be used in TAO, you will need to add information to it (see the next step).
1c. To edit a Property in the Properties window for the class, click on the Edit icon.
The Edit icon is located on the right of the Property name, and looks like a pencil.
The following fields display:
-
Property Label: Enter the new name (to be changed from Property_X). This field is required.
-
Alias: This field is used as an alternative to the label, to be able to differentiate between various resources which have the same name (in Search, for example). The alias is also is also used for a statistical metadata import, as a way to identify the property name to be imported via CSV.
-
Language dependent: This indicates if the value of this field can be translated (the default is false).
-
Form Field Order: This defines the position of the new Property in the list of all the properties pertaining to that item. Use number values for this field.
-
Validation rules: Default is empty. If this is checked, that property value cannot be empty for a given resource. It enforces validation, checking that there is a value set for it.
-
Field type. This is important as it describes how the Property is defined and modified from each individual item (within the class). A drop-down menu provides six basic choices:
-
Text (three options: short-field, long-box, and long-HTML editor)
-
With these options, you will enter values as text (the length of which is dependent on which option you choose) with each item’s property.
-
This field type is an open-ended field, where the user can enter any value
-
-
List:
-
Single choice:
-
Single choice - radio button (only one choice can be selected; the list of values will be rendered as radio buttons)
-
Single choice - drop down (only one choice can be selected; the list of values will be rendered as a drop down list)
-
Single choice - search input (only one choice can be selected; the list of values will be rendered as a searchable input)
-
-
Multiple choice:
-
Multiple choice - check box (multiple choices can be selected; the list of values will be rendered as checkboxes)
-
Multiple choice - search input (multiple choices can be selected; the list of values will be rendered as a searchable input)
-
-
This field type is a closed-ended field, where the user can only select values from a predefined list of values; see below how to manage the lists in TAO
-
With these options, you will choose one or more values from a list in each item’s property.
-
-
Tree (multiple node choice)
-
Calendar
-
this field type allows choosing a date & time value
-
-
Password
-
this field type allows entering a text value, which will not be displayed visibly to the end-user
-
-
File
-
this field is deprecated and not used anymore in TAO, but still offered for backwards compatibility with older versions
-
-
Once you’ve selected the values which apply to this Property, click on the blue Save button: This will save and reload the window. Remember that you can delete the Properties you add by clicking the trash can icon.
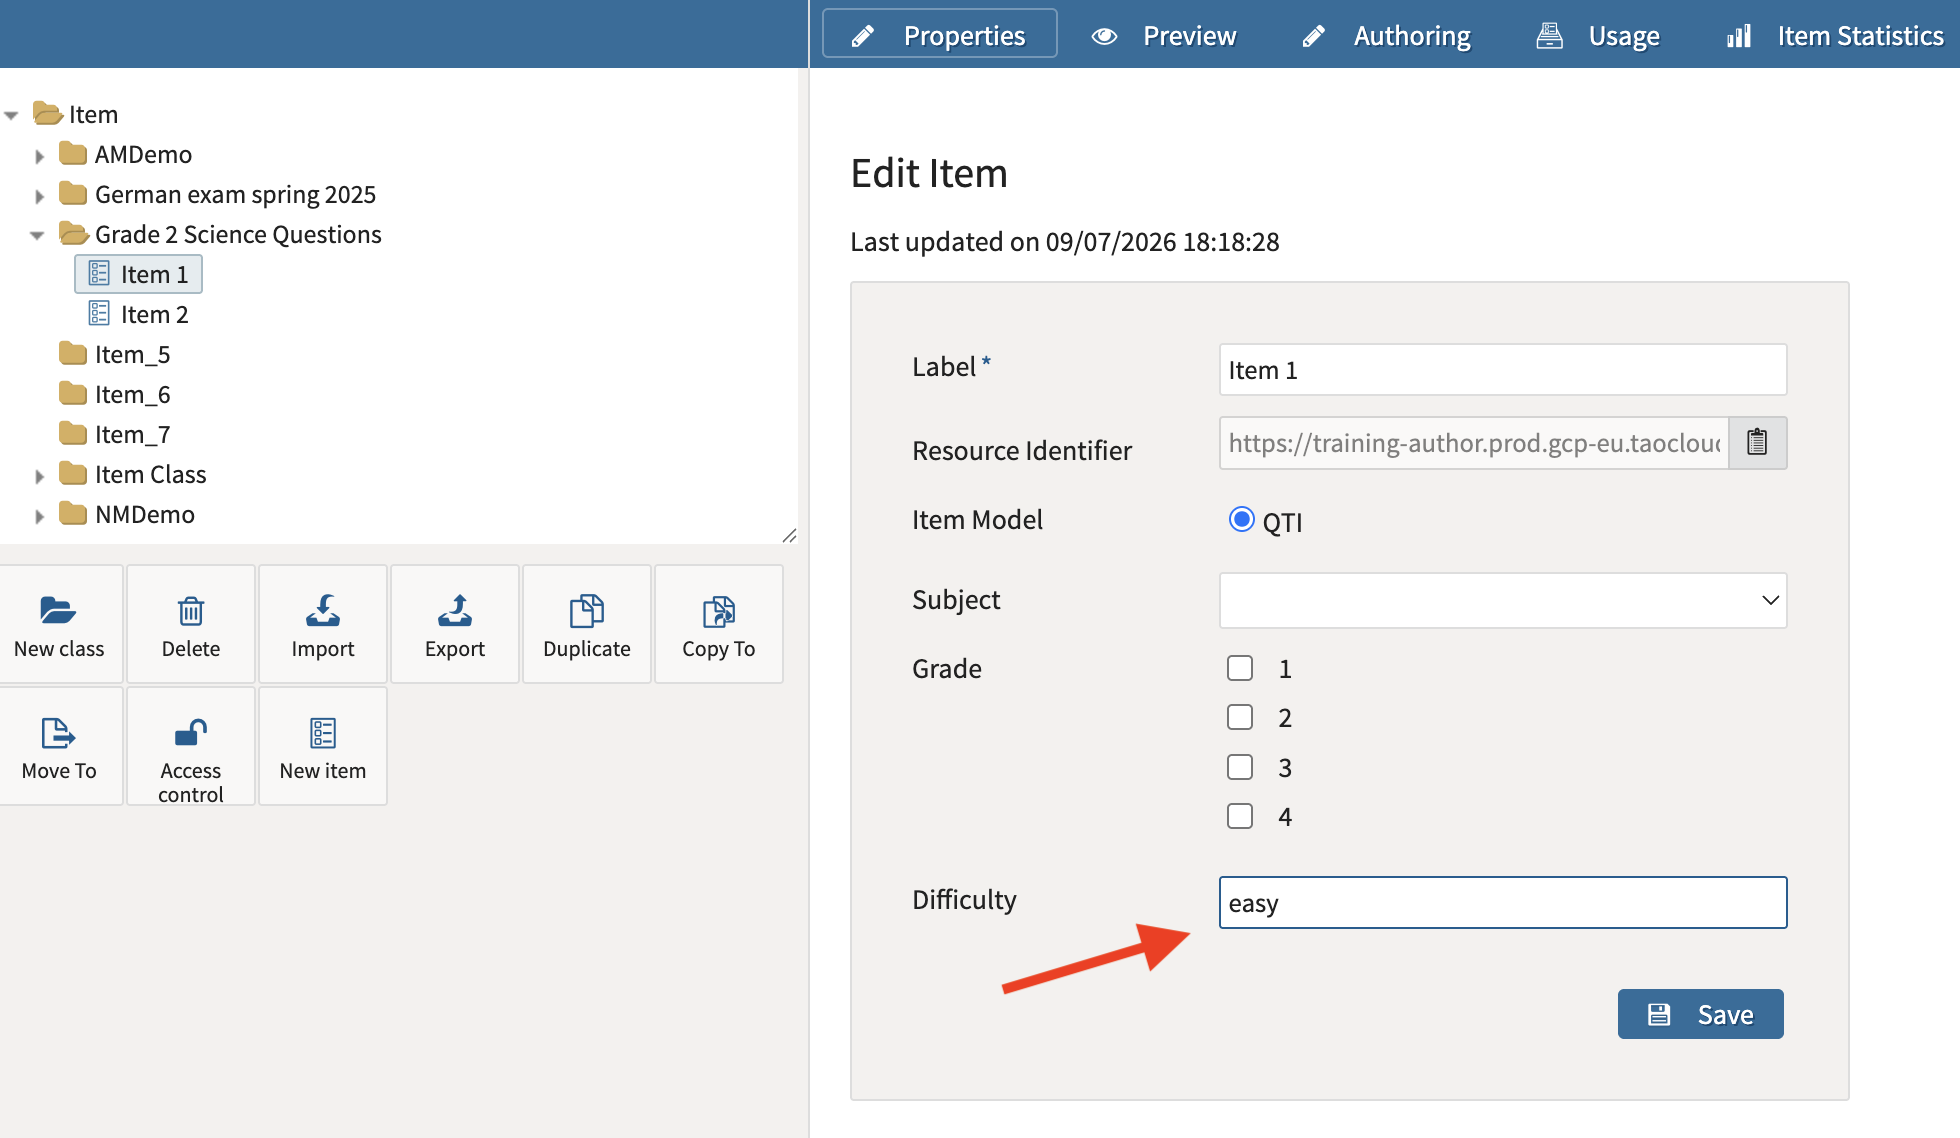
2. Assign metadata values from the class schema to individual items
Once you have configured a property for a class, you can assign values to individual items:
-
Select an item in the class.
-
In the Edit Item form, each property assigned for the class displays. Add a value for the specific item in each Property listed.