Importing a test
Prepared Tests can be taken from any computer and imported onto any other computer that also has access to TAO. This is done using an operation called Import.
1. Click on the Tests icon on the Assessment Builder Bar.
This will take you to the Test Library, which you will see on the left.
2. Click on the Test class (folder) in the library in which you wish to import the new test.
3. Click on Import in the button bank below the library.
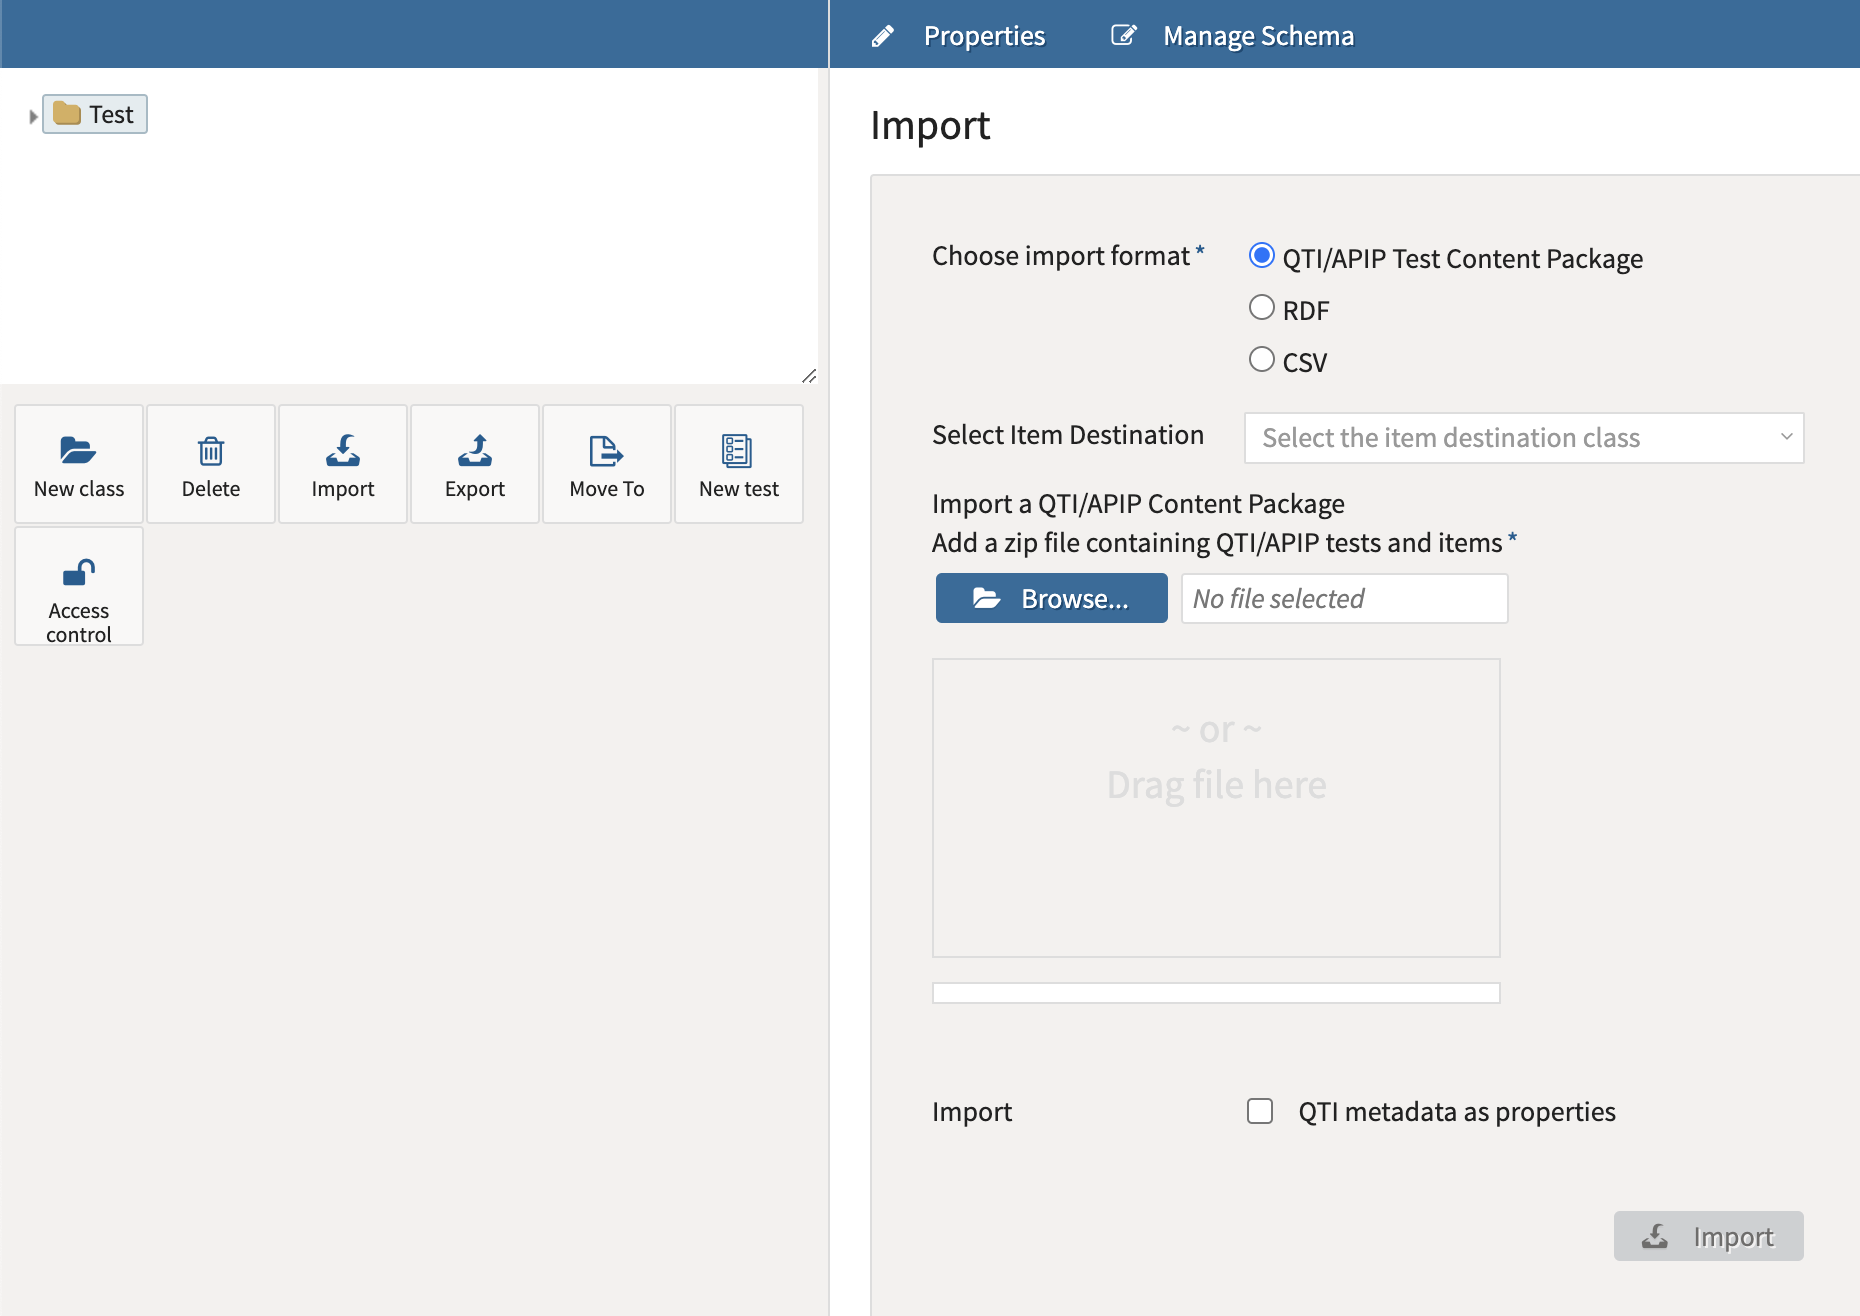
This opens a dialog box which asks you to select the format of the test to be imported. The supported input formats are: QTI (Question and Test Interoperability), RDF (Resource Description Framework), or CSV (Character-Separated Values).
Select Item Destination: This designates the existing class (in the Items library) that the items from the test will be imported to.
Important: If the test’s items contain metadata properties, the class for item destination must have properties with the same label(s) or alias(s) to match.

Importing a test
Click the blue Browse button to find the file intended for import (alternatively, the file may be dragged and dropped into the box below the button).
To retain metadata as properties for a test during the import, select QTI metadata as properties.
Important: To import the metadata properties associated with the test, it is required that properties with the same label(s) or alias(s) exist for the class/folder you are importing the test into.
For metadata properties with lists it is required that the lists are equal, meaning that all options in that list have the same values in the same order.
If these requirements are not met, the test will be imported without its associated metadata properties.
4. Once the Test is selected, click on the blue Import button.
This will import the Test into the Test library (for later use when you need to create a delivery). The items included in this Test will be imported into an Item class named after the Test’s label.
